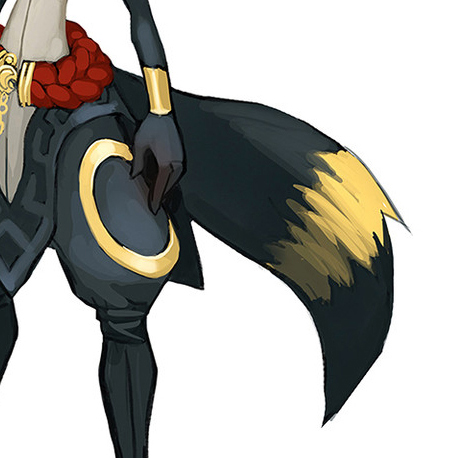
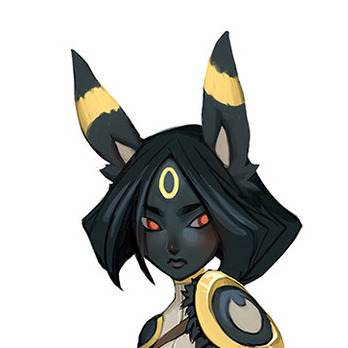
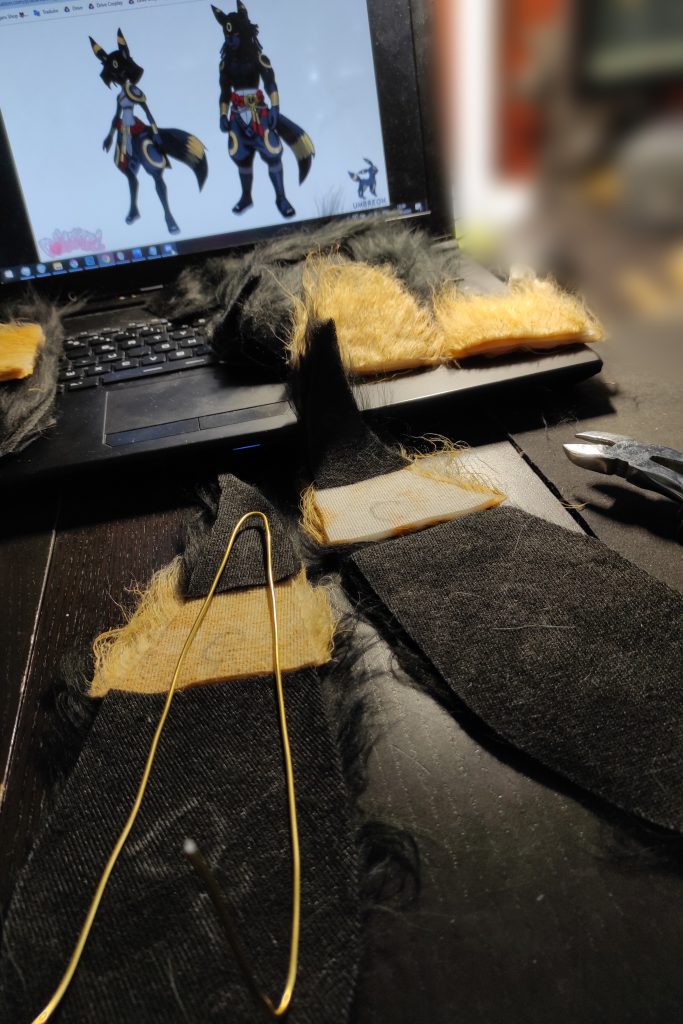
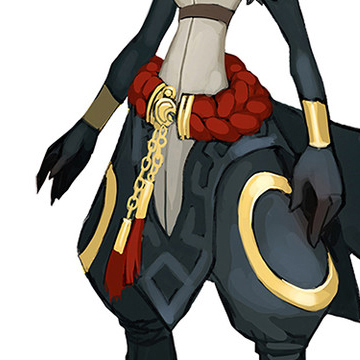
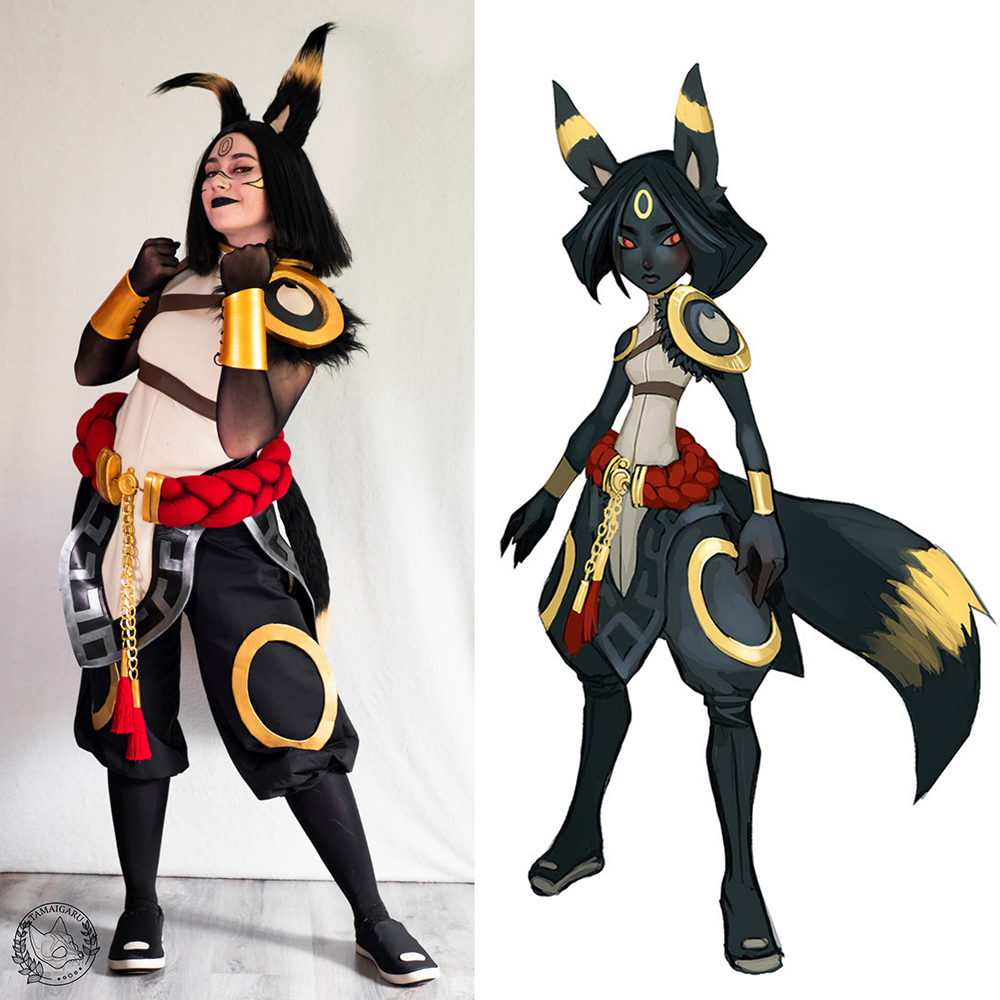
Hello to you ! Here we are today to talk about the making of my Umbreon [Pokémon] cosplay! For this costume, I chose to follow the design created by Dollightful, an artist transforming classic dolls into brand new unique characters. When I discovered her work, I found her Umbreon design absolutely fantastic and interesting to make! And the little bonus: two versions for the price of one! The male version is still being created, but duo photographies are planned. (A complete group including all designs is even in the plans!) ♥
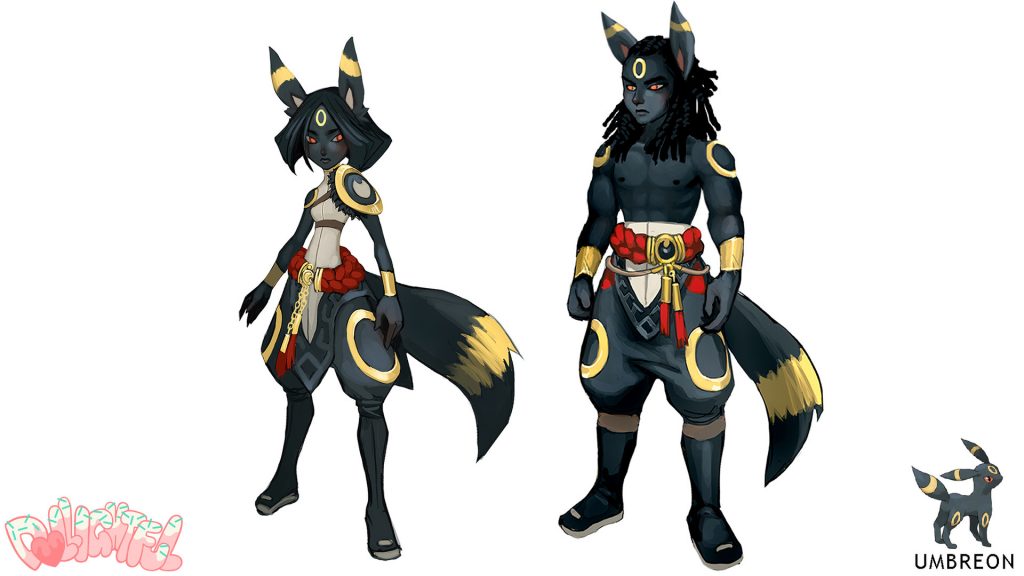
My reference was therefore the following throughout the creation of my costume:
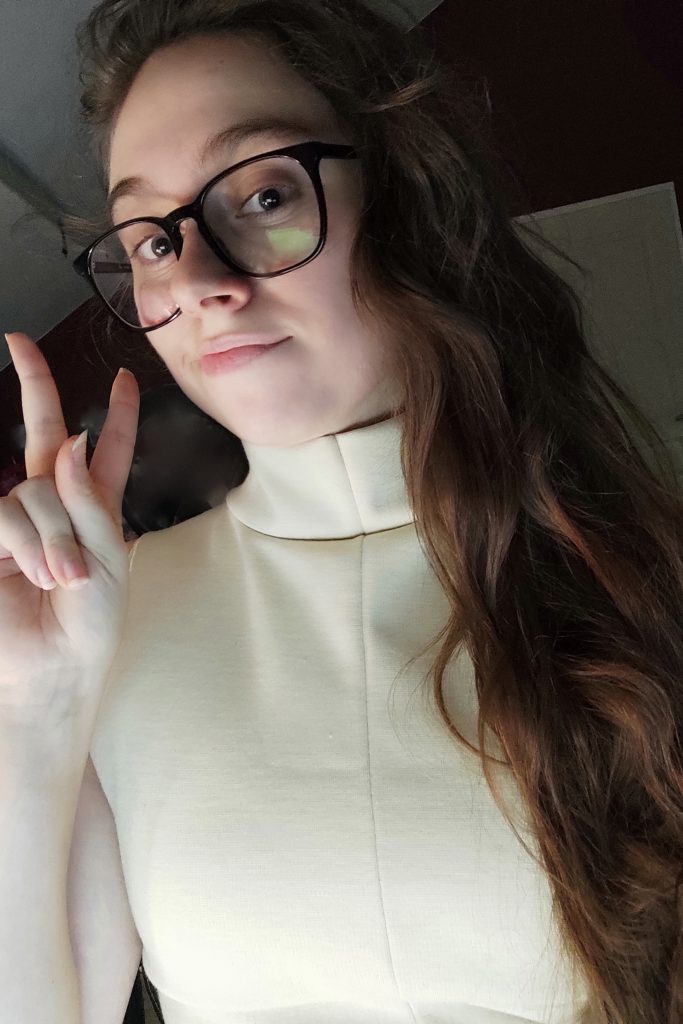
1 • The dress
The shape of the clothes in this design is quite atypical, but that’s what makes it interesting to work on! I found the perfect color for the dress in my fabric box. Awesome! Now it’s time to patronize. Not knowing how to patronize in a conventional way, I choose to use the shape of a tank top in my wardrobe that perfectly matches the shape of the top of the dress.
I am also thinking of tightening at the waist so that the dress is quite tight! (the tank top being a bit wide for me, I preferred to adapt it. ♥)
For the bottom of the dress, I trace the shape by hand after taking a few measurements! (my apologies to the dressmakers who read me for this affront 😂)
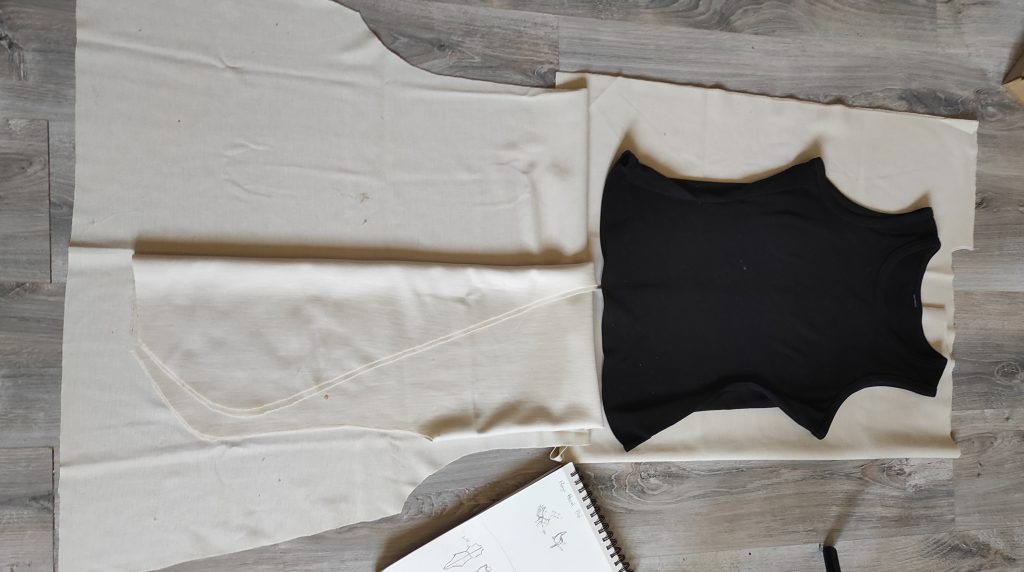
SEWING TIP: If you don’t know how to patronize, you can use the shape of a clothing you own (which is more or less what you want to get) to help yourself! To do this, turn the clothing over to make the seams visible, then place it flat on your fabric / paper (pin it if necessary!). Then trace the outlines and repeat for each part of your clothing. Do not forget to take into account the seams so as not to end up with a clothing that is too small once sewn 😉
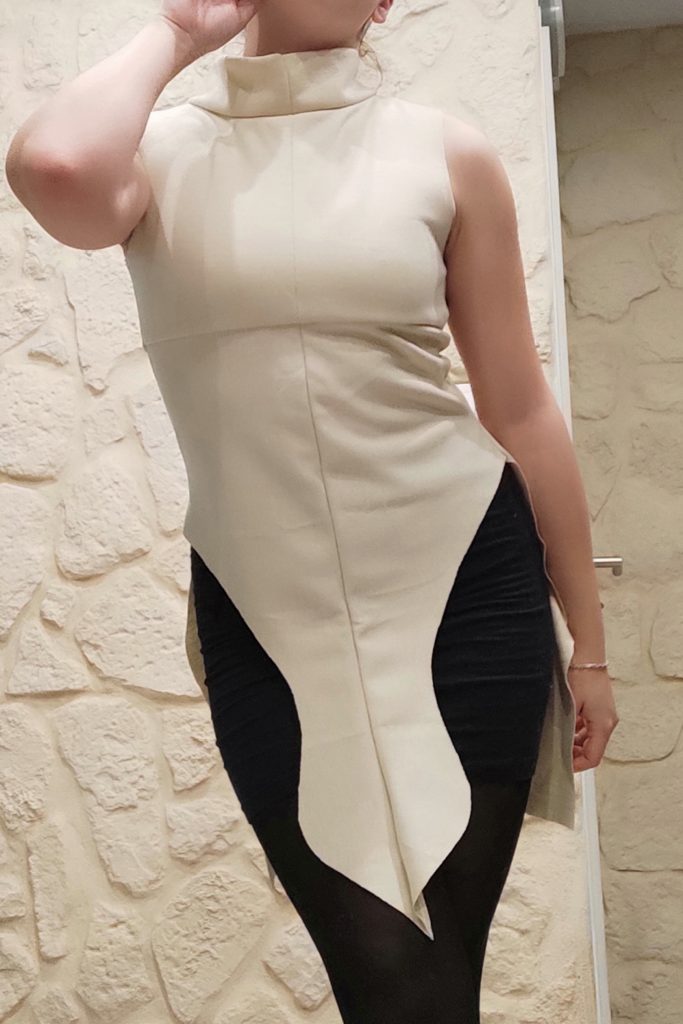
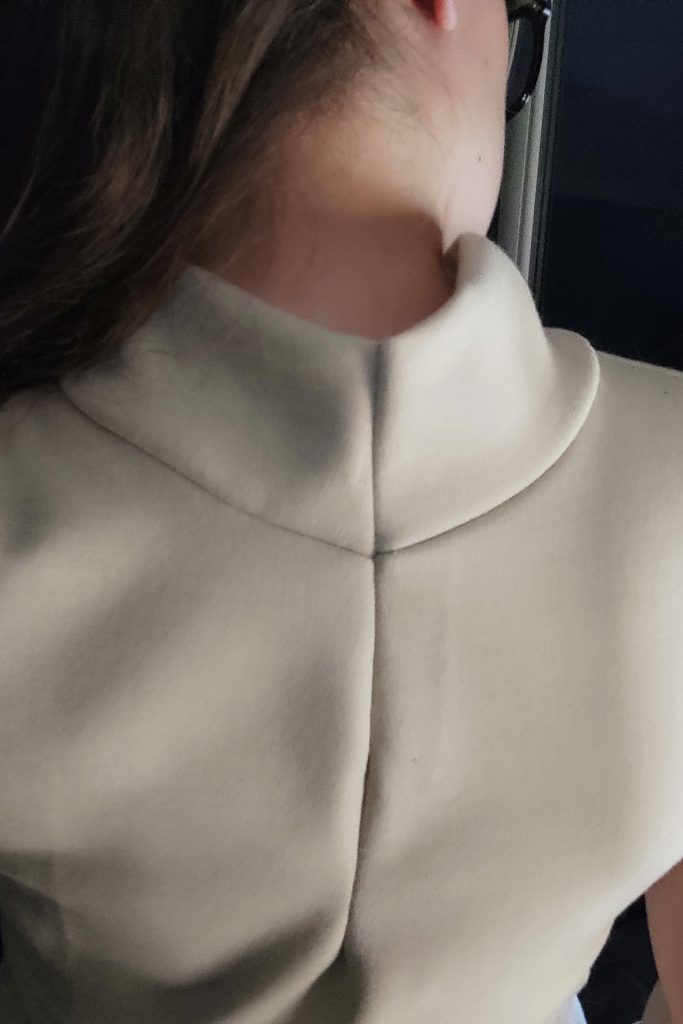
I also choose to make a lining for the entire upper part of the dress. Question of solidity, cleanliness and above all the transparency of the fabric! 😆
To be more accurate to the reference, I also added 1cm during the patterning to allow me to recreate the seam all along the center of the dress. A small detail that was important! ♥
Next step: the golden edges!
For the collar and the shoulder pads, I choose to use the Luxor golden soft imitation leather from Ma petite Mercerie, a fabric that I have been one of my favorite of since I discovered it. It has a beautiful texture, is very flexible and has an amazing color! ♥
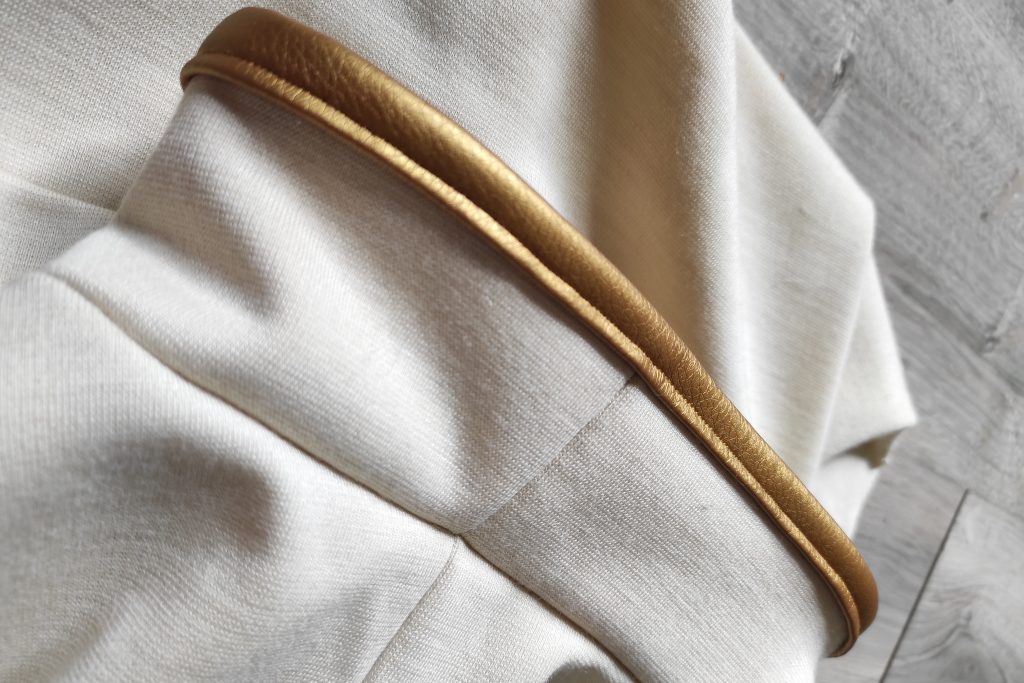
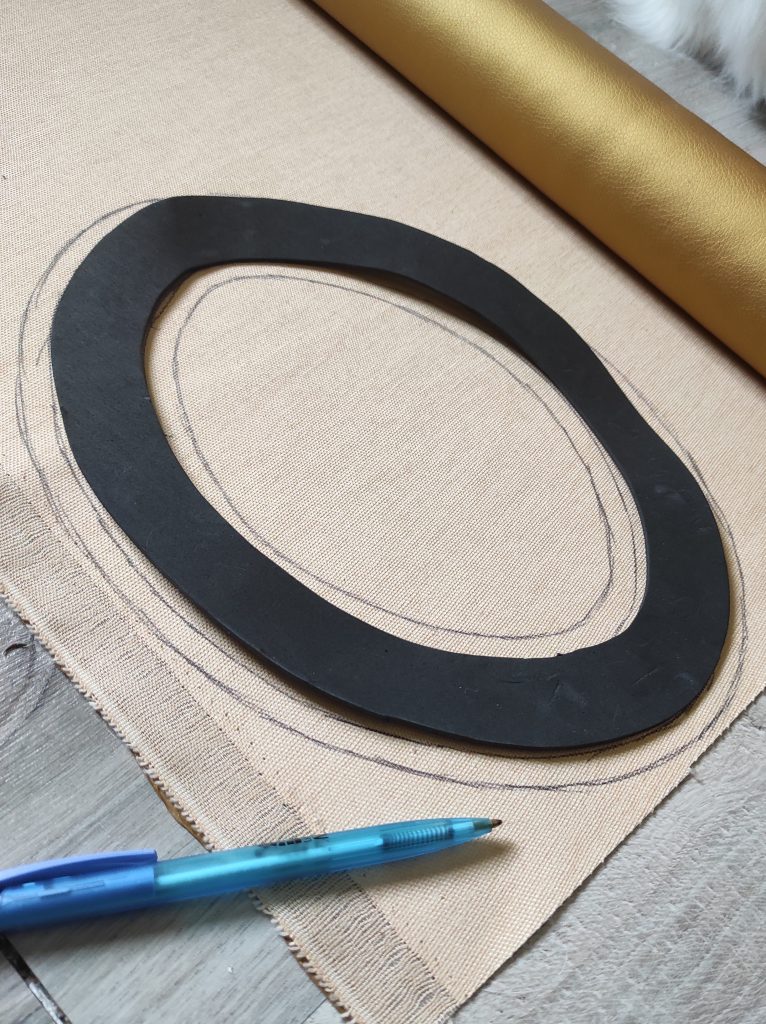
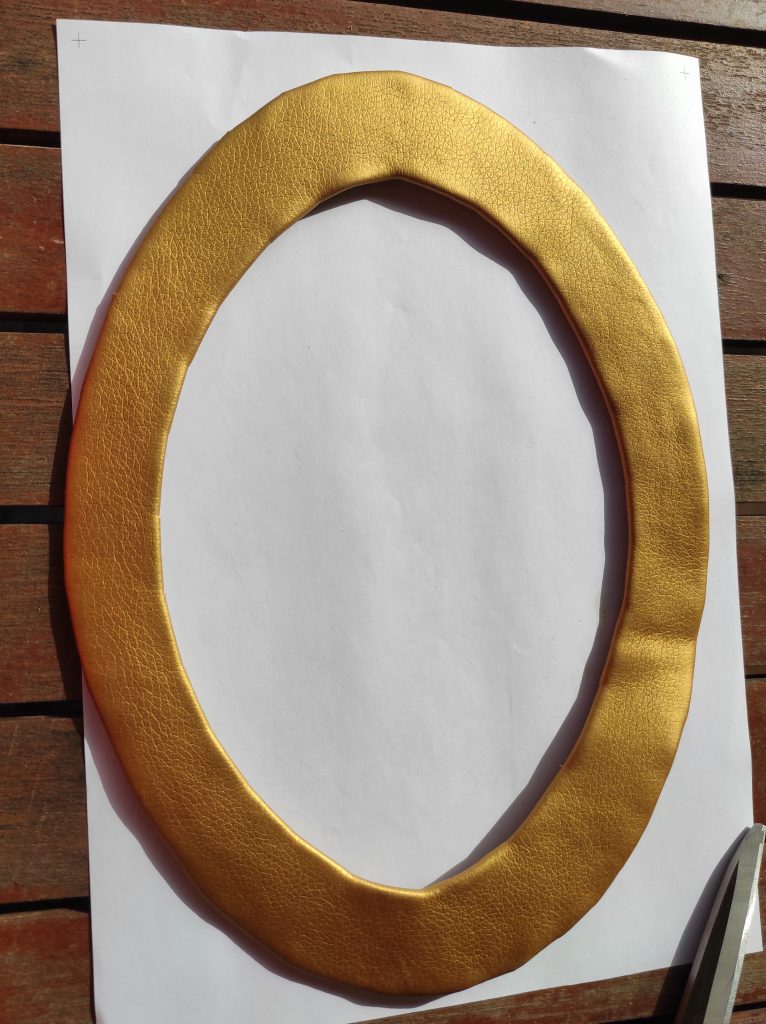
For the circles at the shoulders, I choose to wrap EVA foam (a material widely used by cosplayers for its flexibility and ease of work!) in 2mm thickness to give shape and rigidity to my fabric.
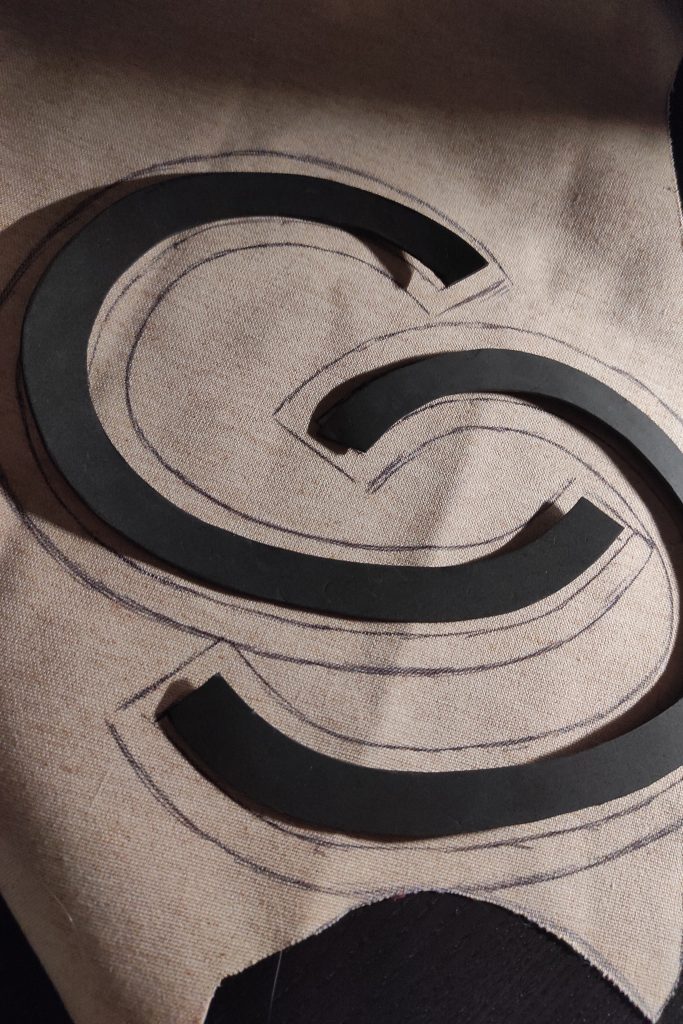
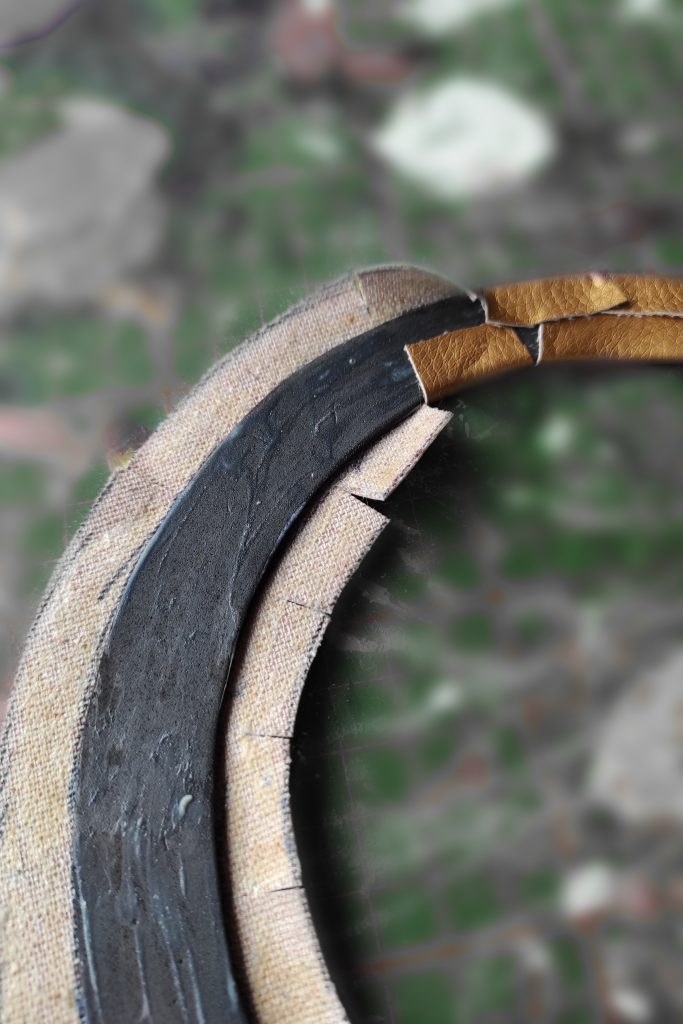
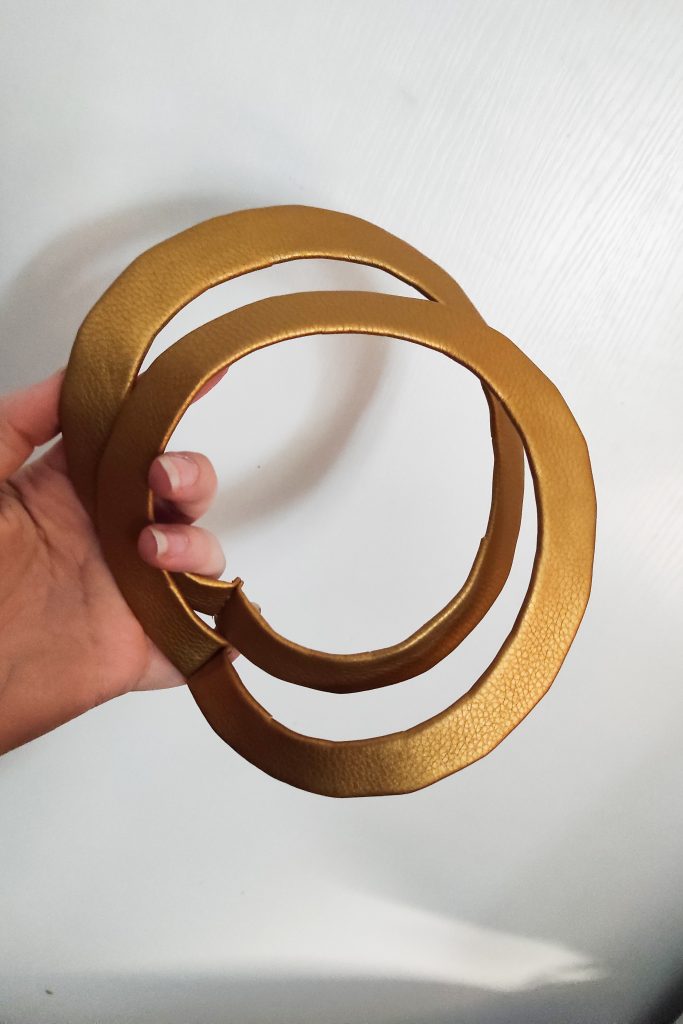
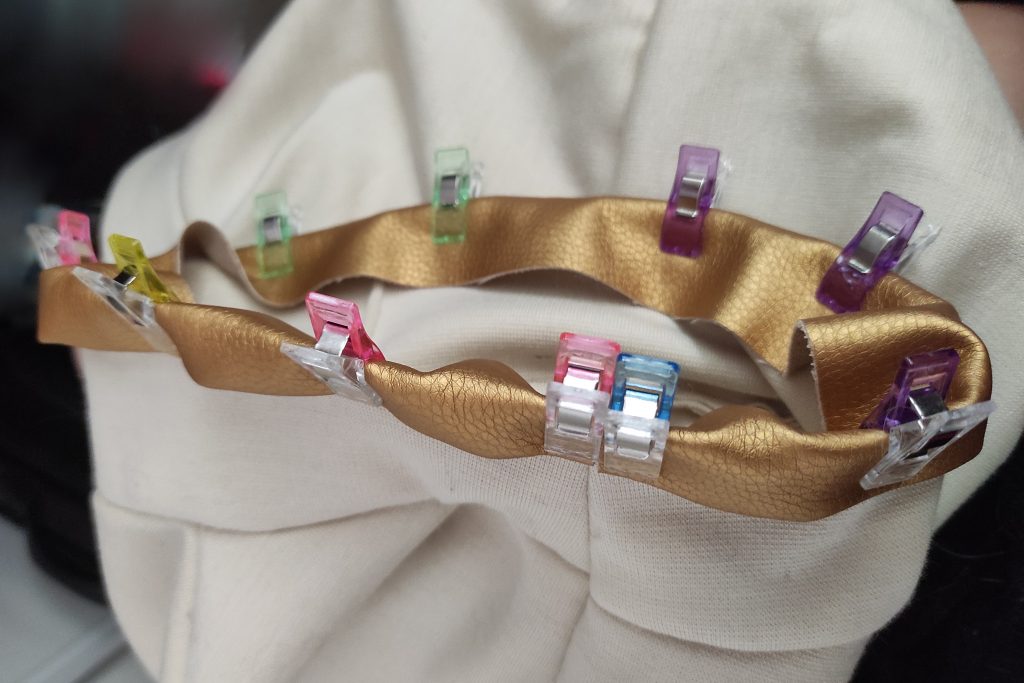
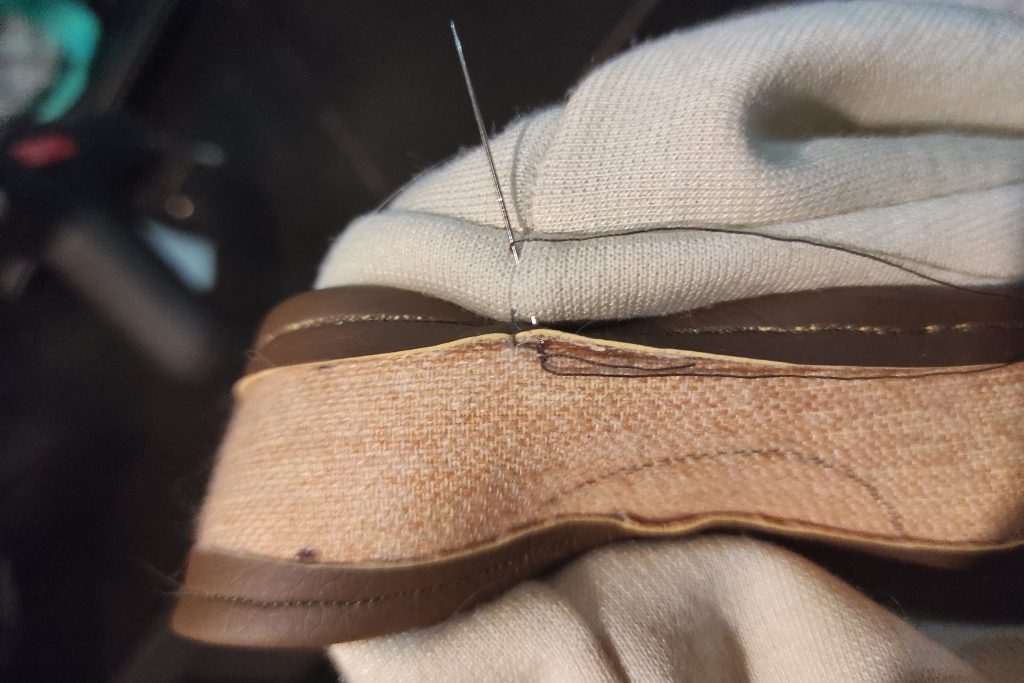
CRAFT TIP: To easily create special shapes with fabric, you can cut the shape you need out of EVA foam and then wrap it in fabric! When cutting the fabric strips, remember to add the thickness of your foam + about half the width of your strip to cover the other side. Also remember to cut the margins at the curvatures to facilitate gluing (see photo n°2). To glue your fabric on the foam, I advise you to use neoprene glue (or contact glue). This will allow you to take your time and have a clean and smooth result.
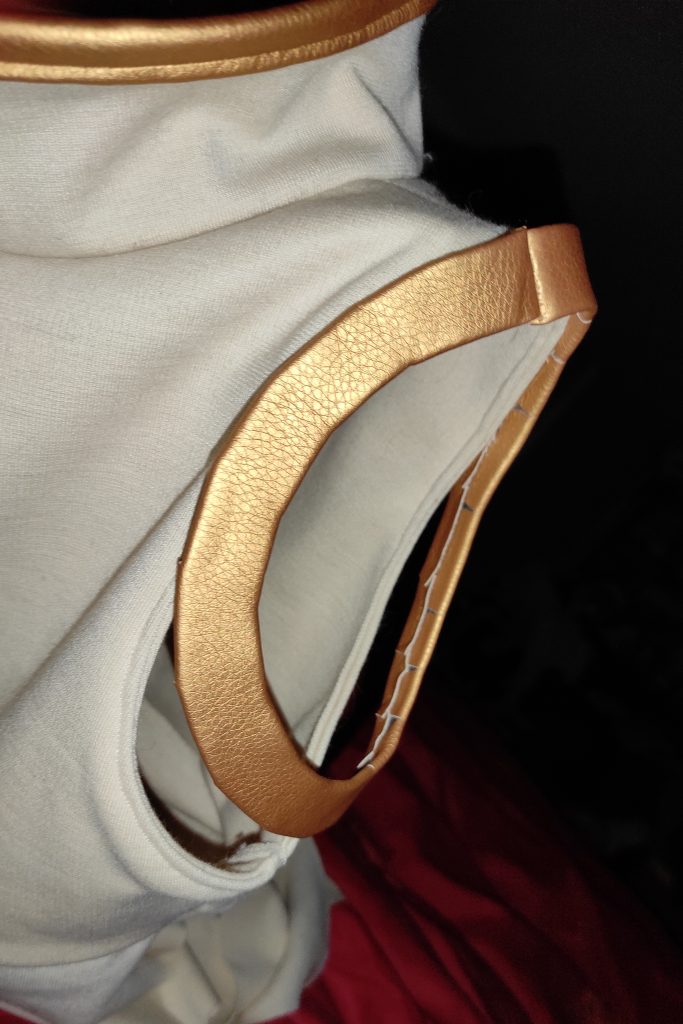
For the belt and the fastener of the armor present on the shoulder (which we will see later), I use the brown Nilo imitation leather from Ma petite Mercerie! I had never tried it but it turned out to be perfect for what I wanted to do. ♥
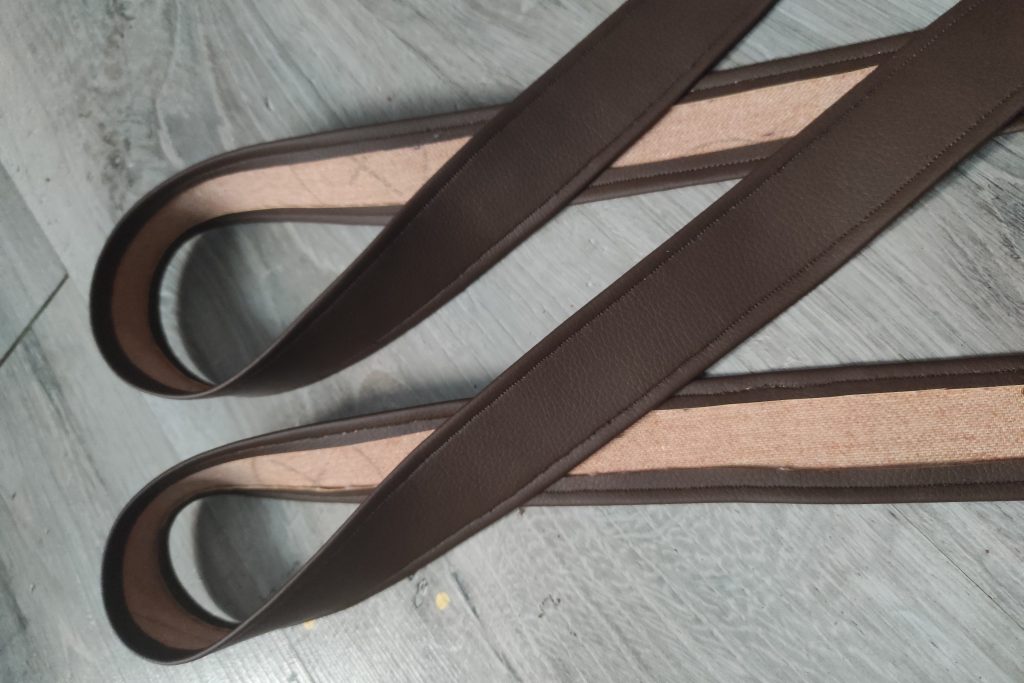
So I cut two strips of the desired length by adding a few centimeters to the width so that I can fold them back and sew along each
Now let’s work on the decoration of the bottom!
I thought long and hard about how to make it out of fabric but.. I couldn’t find a way to do it properly and this step was blocking my motivation for the project a lot.
So I simply turned to EVA foam! (2mm thick, to keep flexibility!)
After redrawing the shape of my fabric on paper, I add the decorative part. A few foam cuts later, the basic shape is ready for the next step!
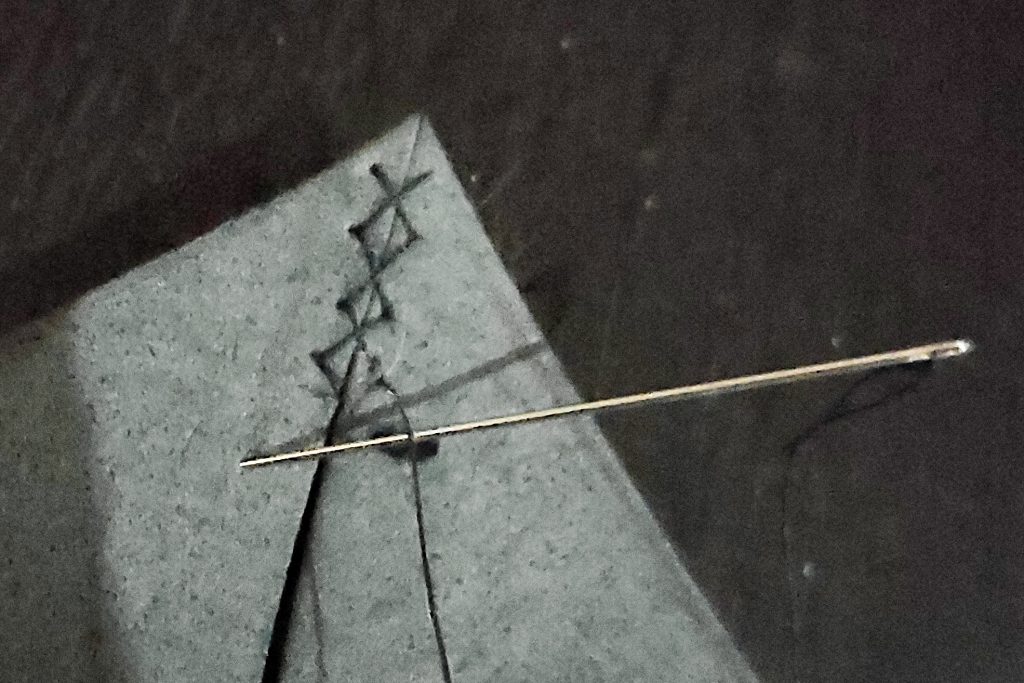
The foam being very thin, I’m afraid that a single line of glue will not be enough to do the job for a long time. I also want it to be clean on the reverse side as it will show off slightly so I cannot add a reinforcement strip. So I choose to.. sew my foam. 😆 A technique that is perfect for what I need!
I also reinforce the whole with a few dots of strong glue on certain seams. (you never know what can happen during a shoot! I prefer to be as secure as possible 😋)
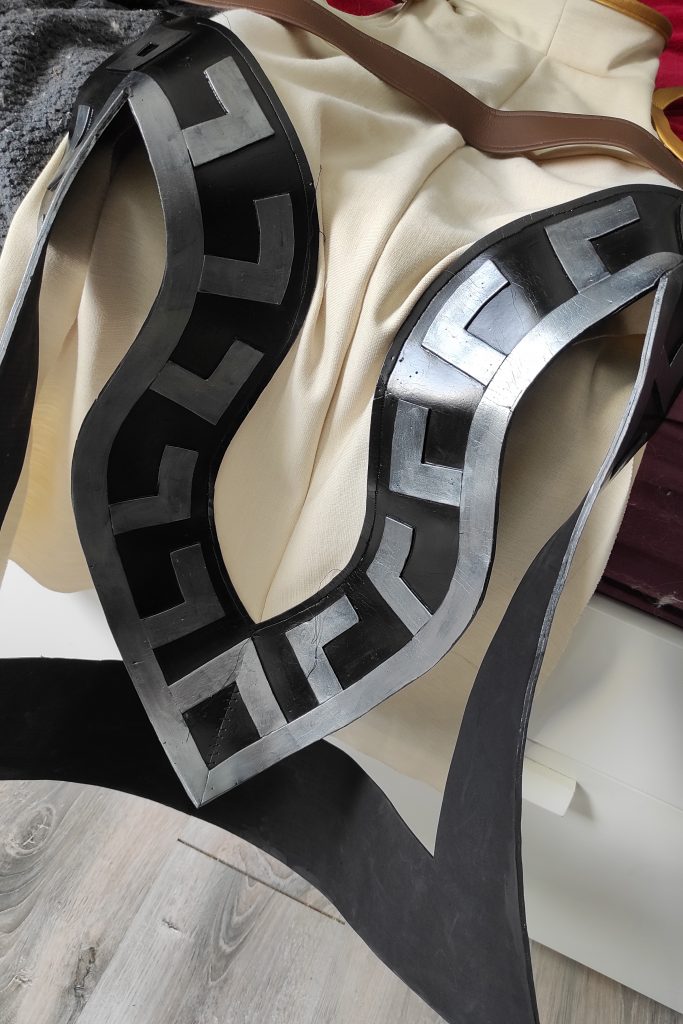
For the details, I initially wanted to glue/sew pieces of silver imitation leather, but in the end I chose to use foam for the relief!
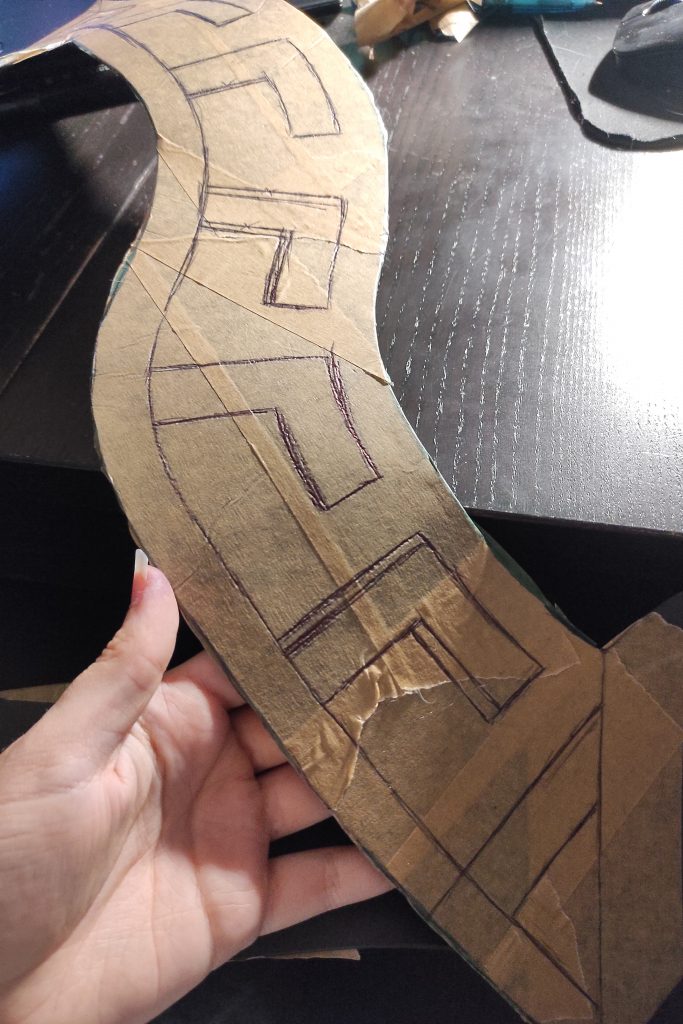
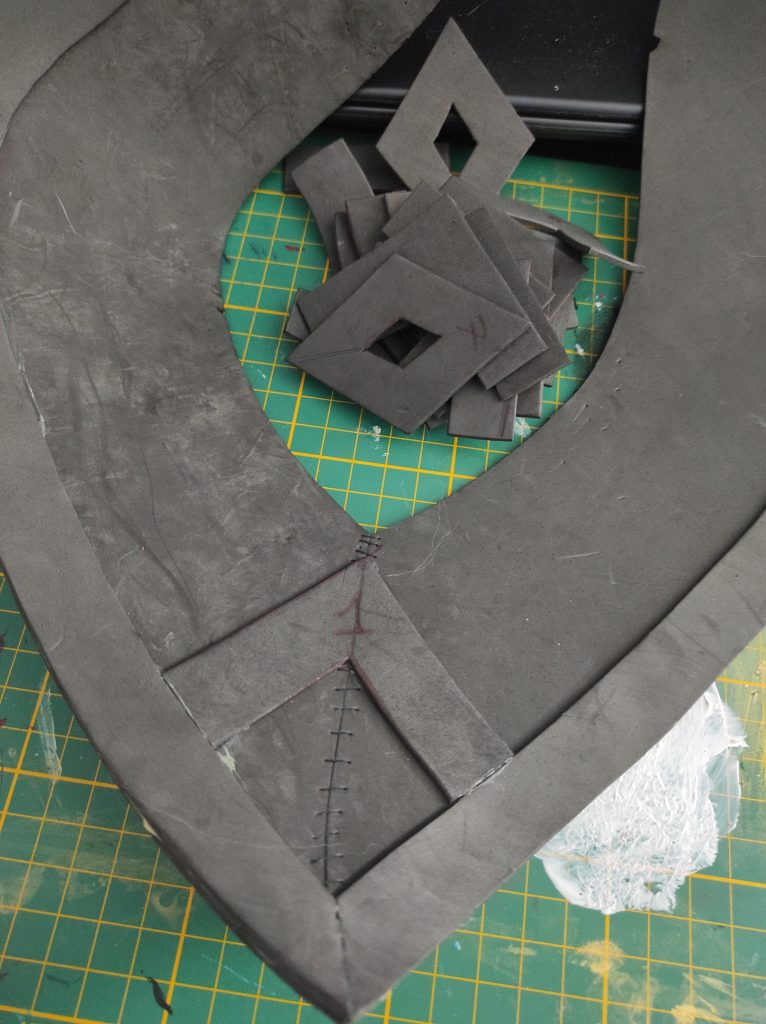
In order to make sure I have the right size pieces, I prefer to patronize every detail directly on my foam pieces. I use masking tape for this (a low-adhesion tape designed to easily hide certain parts during a painting job. It is very easily removed and therefore does not stick or very little to the paint).
After covering my pieces with this tape, I draw every detail and cut them out then glue them back onto the foam to check if it suits me!
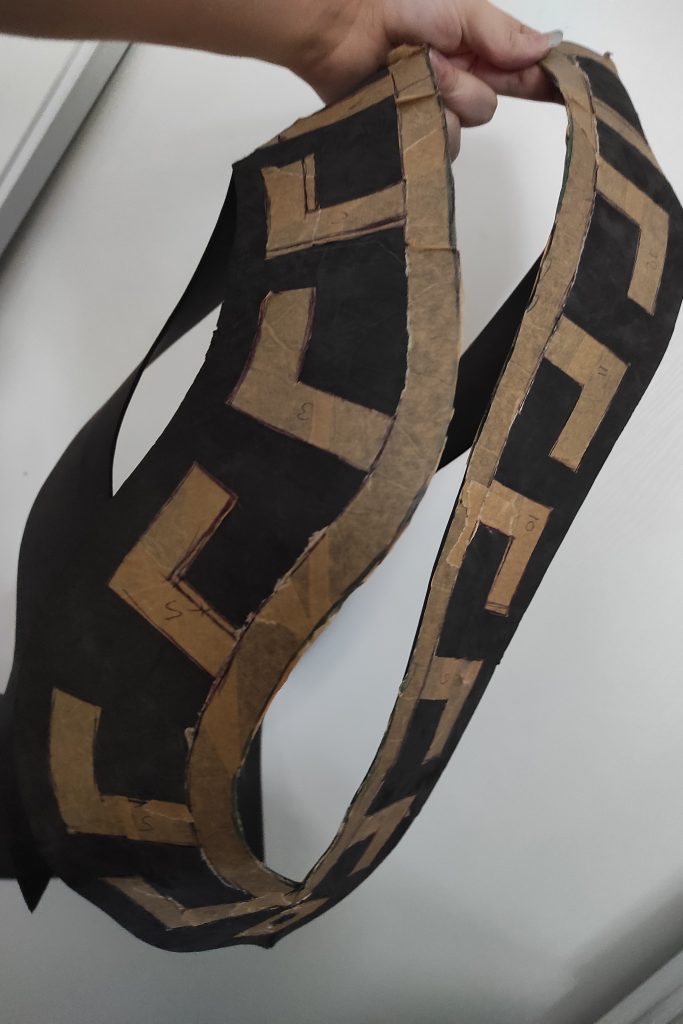
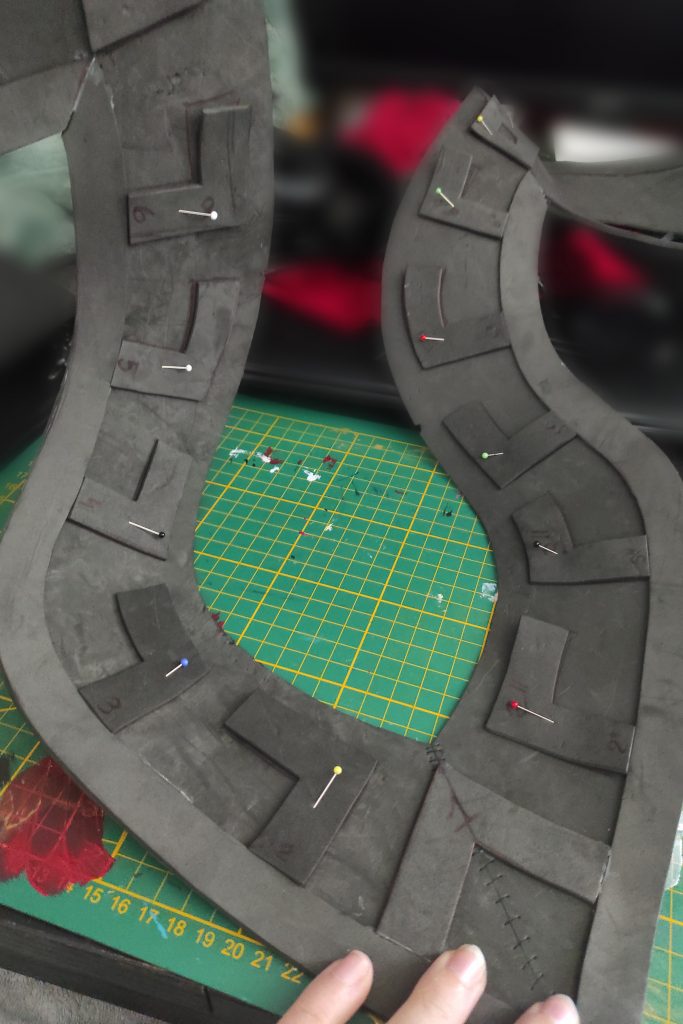
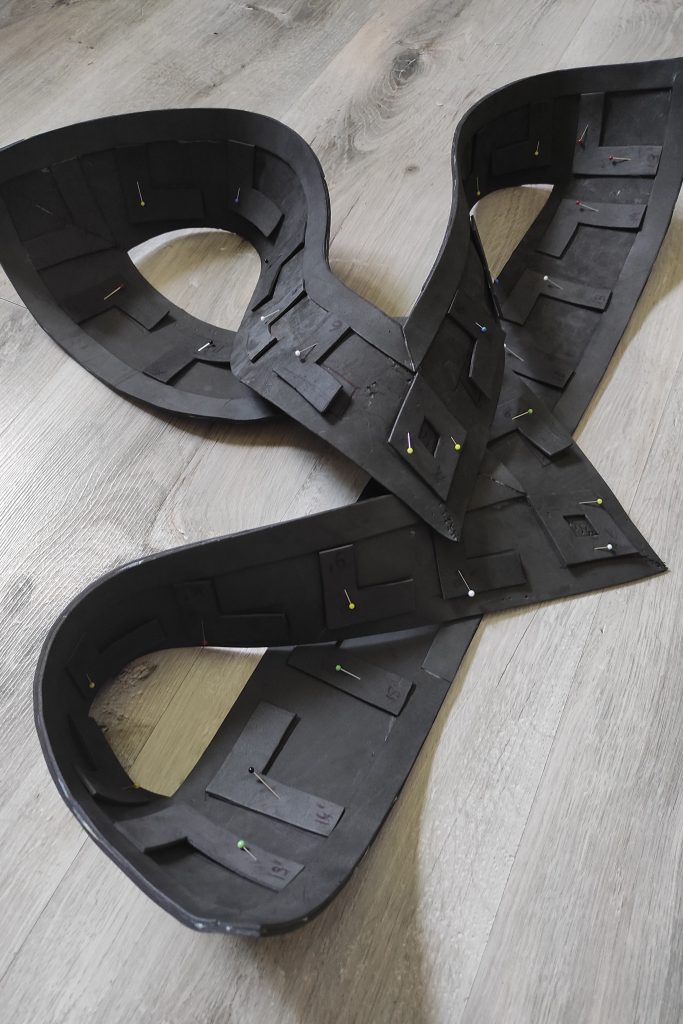
There comes a long moment of cutting out every detail in the foam. Once cut and numbered, I pin each part to its location then glue them one by one with neoprene glue! (PLEASE, when using contact/neoprene glue, remember protect yourself and your pets by wearing a respirator and putting your pets in another room!! Contact glue vapors are really bad for our lungs.)
I must admit that I really like the result. ♥
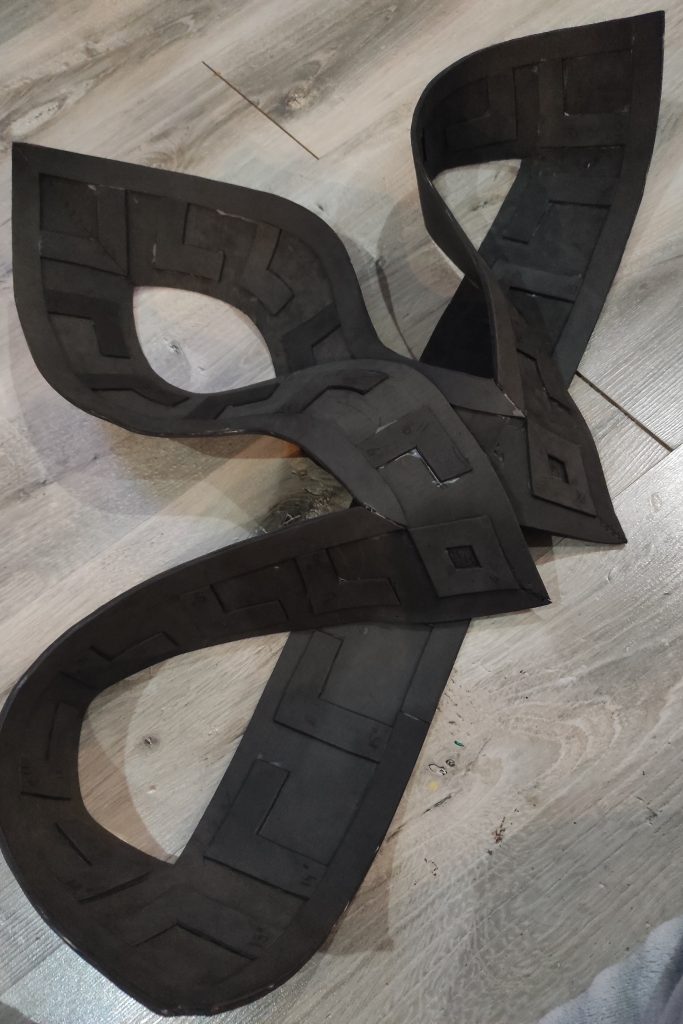
After a light coat of wood glue (which acts as a slightly flexible primer at a low price), I cover both sides of my foam with black paint using a conventional spray paint (I always take mine at Action, they are very affordable and do the job very well!).
I then add the silver paint on the previously glued details, two coats were enough. Finally, I put everything under a spray of acrylic varnish (still found at Action) and that’s it!
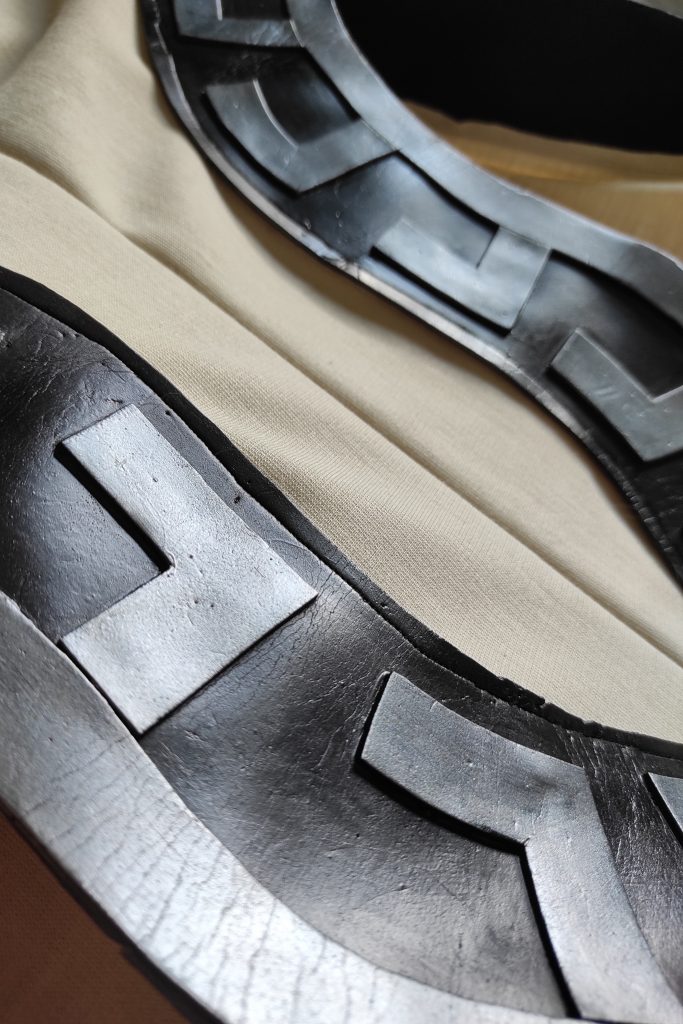
I then choose to sew everything on the dress. Neoprene glue would have done the job as well, but I preferred this option because it adds a bit of detail! (but I must admit that sewing foam properly was quite complicated, I had never done it before 😅)
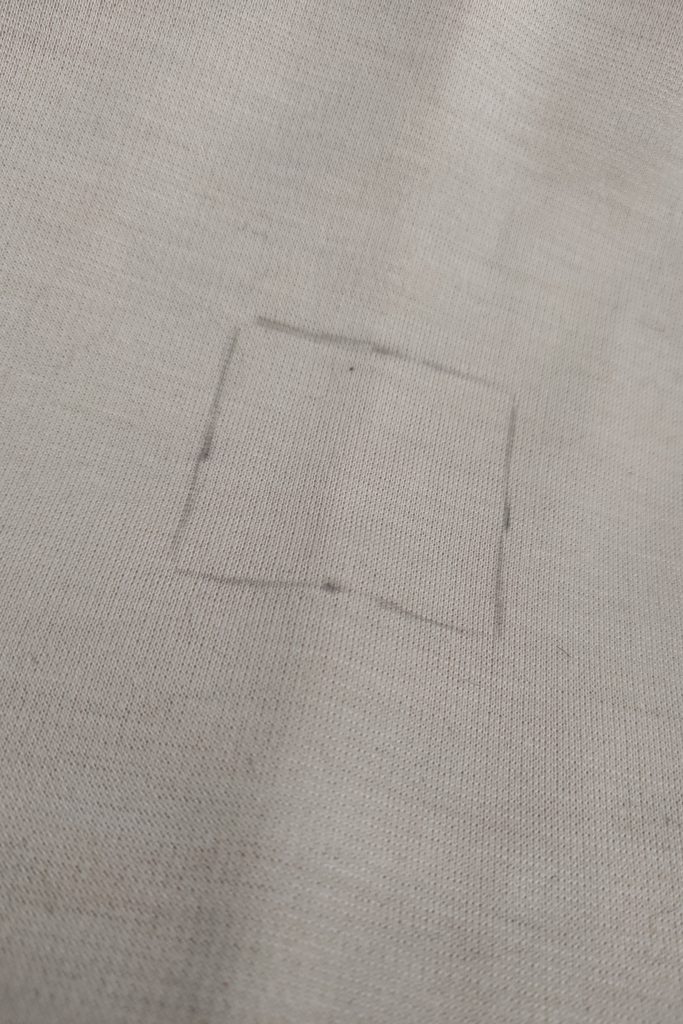
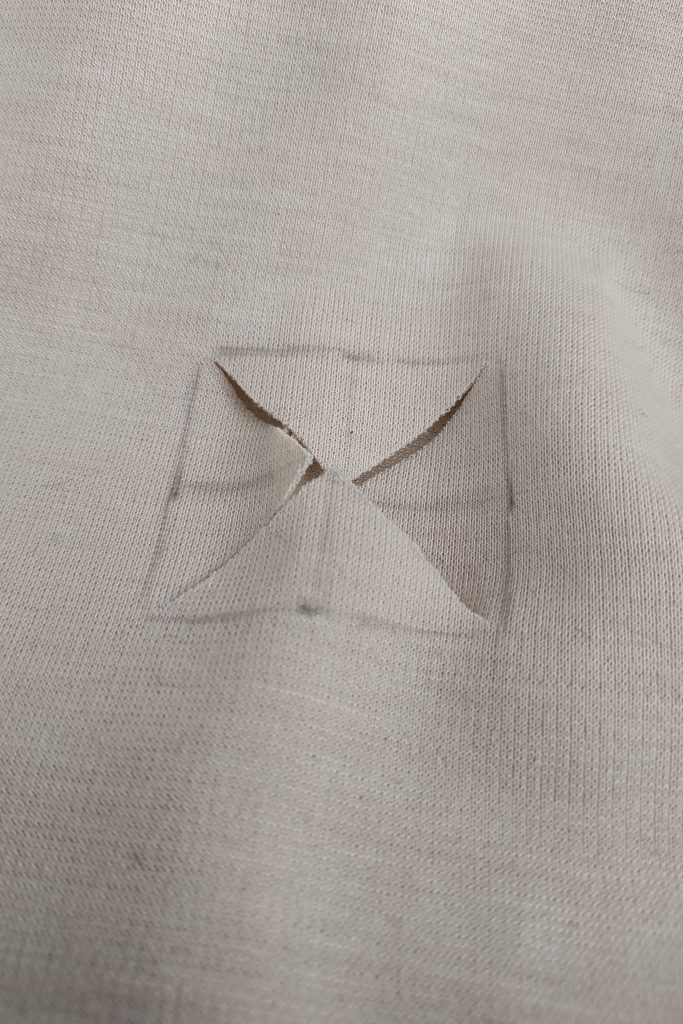
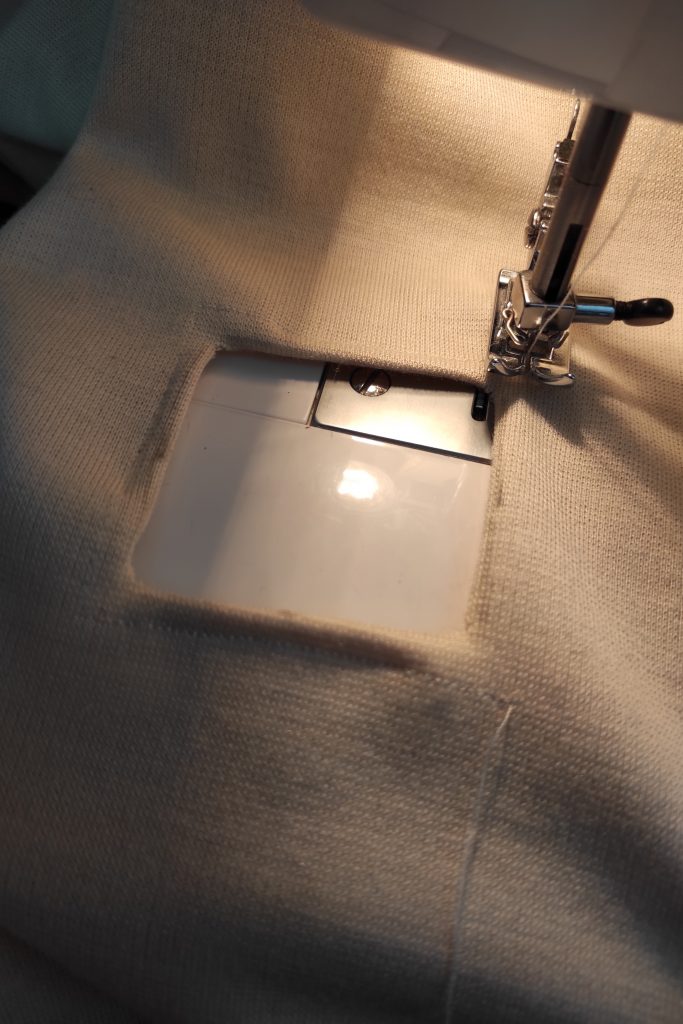
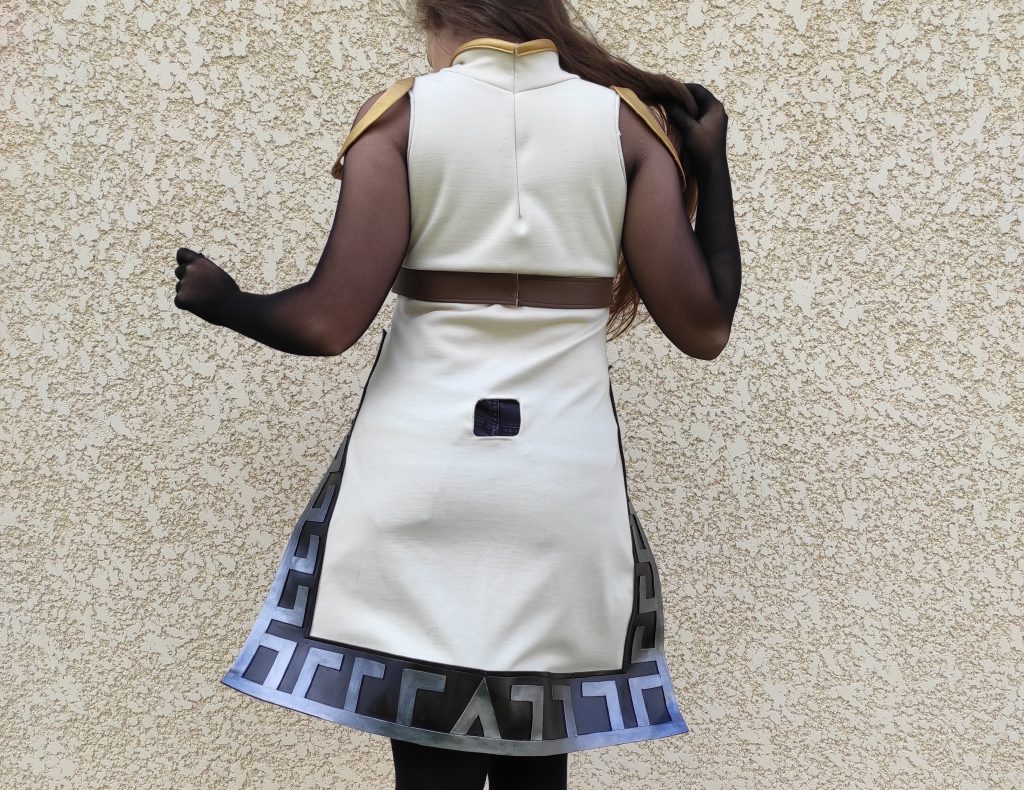
To attach the tail (which we will see later), I have to make a hole in the back of the dress. This will allow it to be attached discreetly without the belt being visible from the outside! So I’m drawing a square that have the width of my belt, then sew the edges inward. This helps to make the opening clean and quite solid! ♥
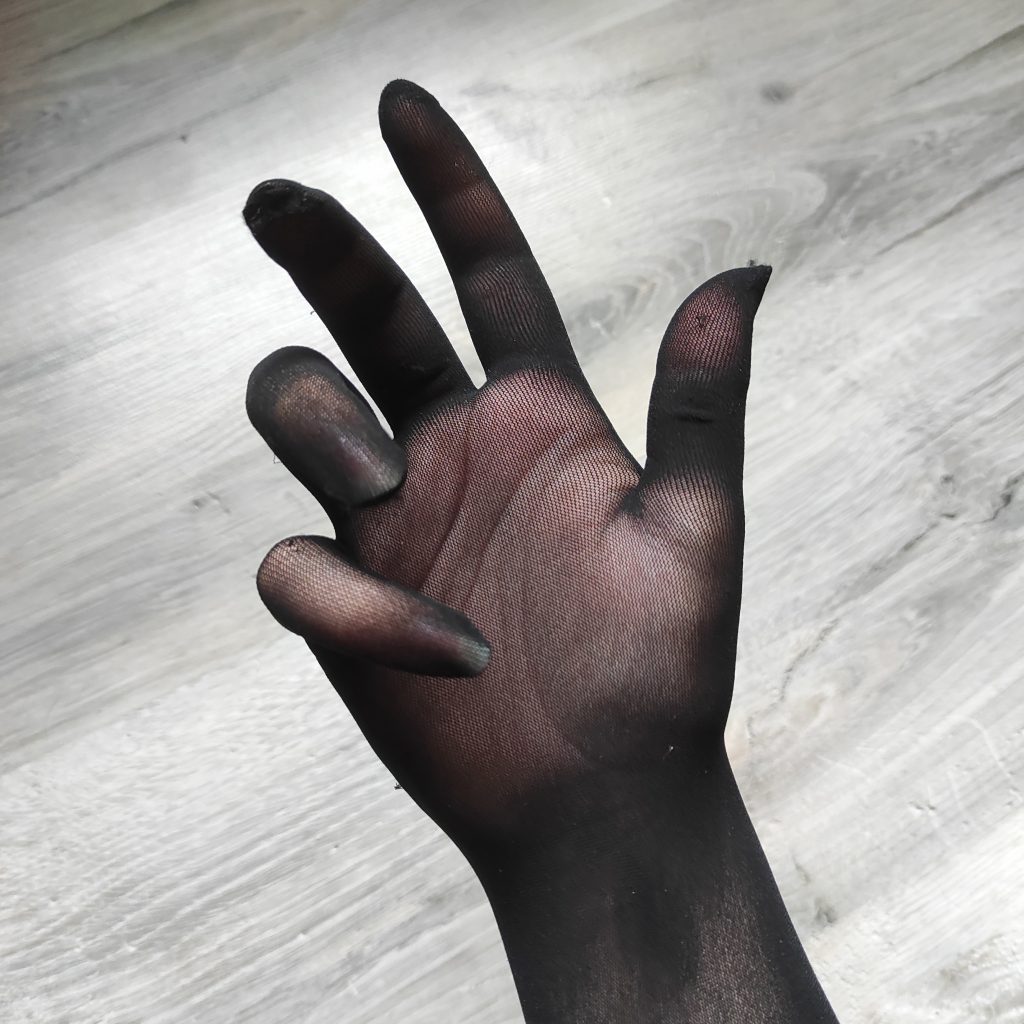
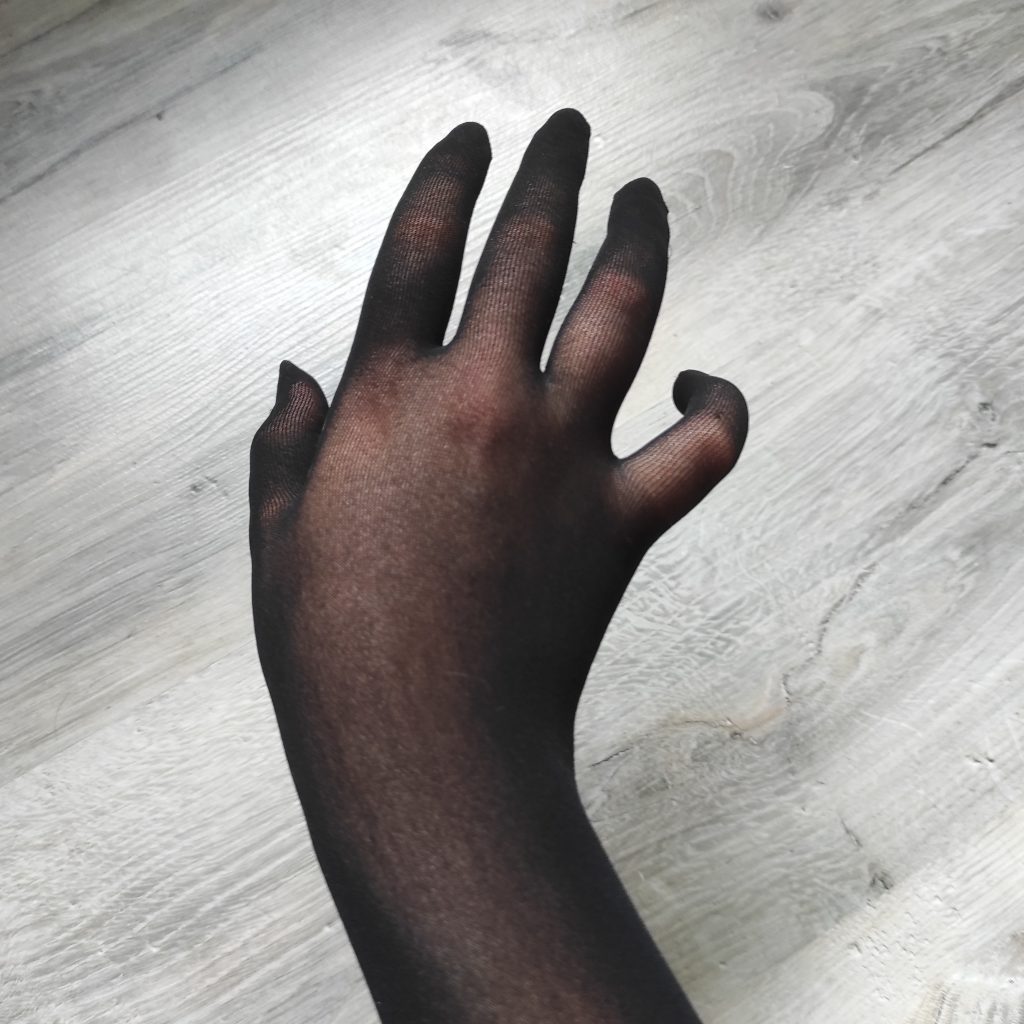
Finally, as the character in this design has black skin, I bought these gloves made from the same material as the classic tights! A super comfortable little find on Aliexpress. (You can find them right here if they still exist!) ♥
So I sew these two gloves to the sleeves of the dress. Not easy when the material must be stretched to the maximum but the expected result is there and lets stand out a superb gradient! 💪
SEWING TIP: If you want to pin, sew, paint etc. a very elastic material that must be kept stretched, you can:
• Do most of the work directly on you if possible. (be careful though with products in paints which are not very good for the skin!)
• Use an object of the diameter / size you need. Example: a box of Prince cookies for an ankle / a wrist .. remember to measure to find out what will suit best! Then thread the fabric around this object while you work your fabric.
→ Don’t hesitate to combine several objects! For example, here I used a box of cookies combined with a napkin to get the diameter I needed. If you want to paint your fabric, be careful to protect your items with cellophane to not damage them!
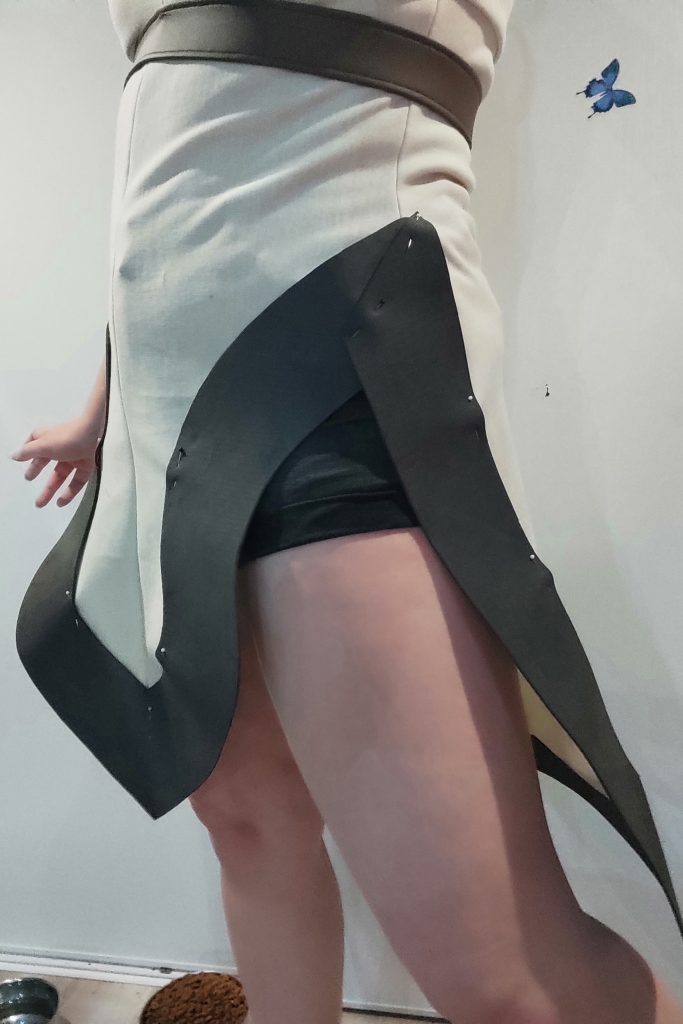
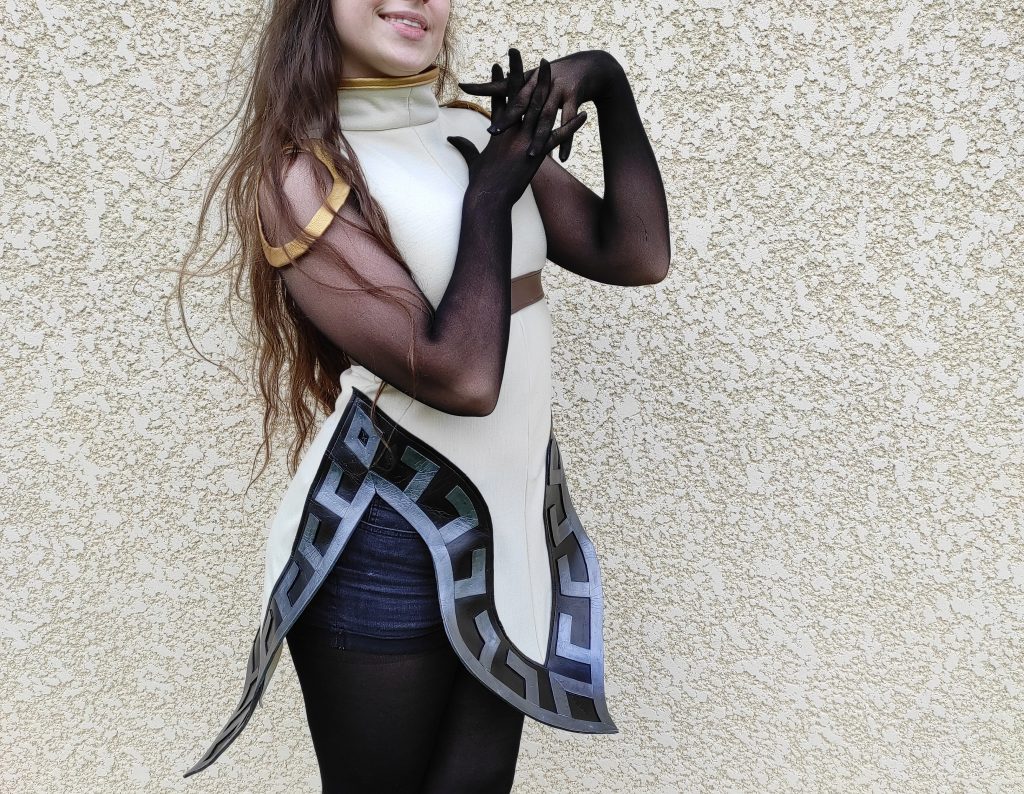
And here is the final result of this dress !! ♥
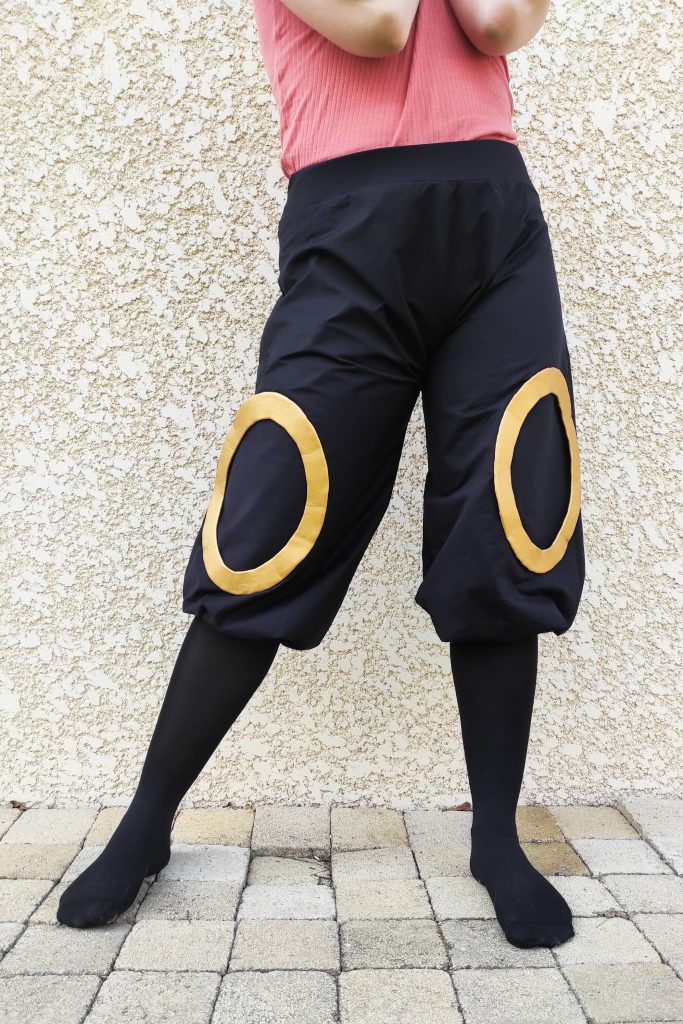
2 • The pants
The pants of this design also gave me a hard time, I had a lot of trouble finding a method that suited me to obtain a fairly puffy result like the one in the reference (especially since my fabric was very flexible and very elastic). After many hours of unsuccessful thinking, I asked my Instagram community for advice, and what a great idea it was! Many new ideas have emerged, and I kept four of them to develop them a little. (If you are one of those who helped me that day, thank you again! ♥)
After more and more thought (as well as a vote from the community to help me), I choose to use fusing fabric to stiffen my fabric (which, as a reminder, is very flexible – I could have used another tissue and think less, but I happen to be a bit stubborn, oops!). This method will also allow it to inflate as on my reference. So I choose a thick black fusing fabric on Amazon that you will find right here .
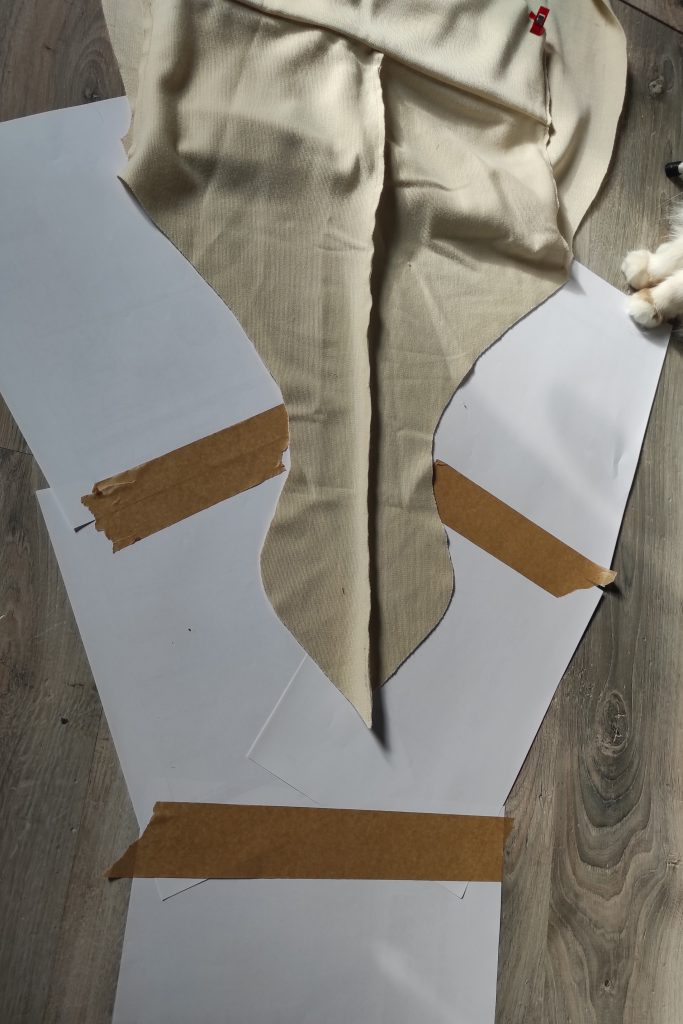
Regarding patterning, I wanted to mix harem pants and baggy pants. With the help of wide pants and a few measurements taken for the length, I trace the shape that I want to obtain in only two parts: a front face and a back face. I didn’t want to worry about these pants anymore so I opted for this simple and effective solution! 😋
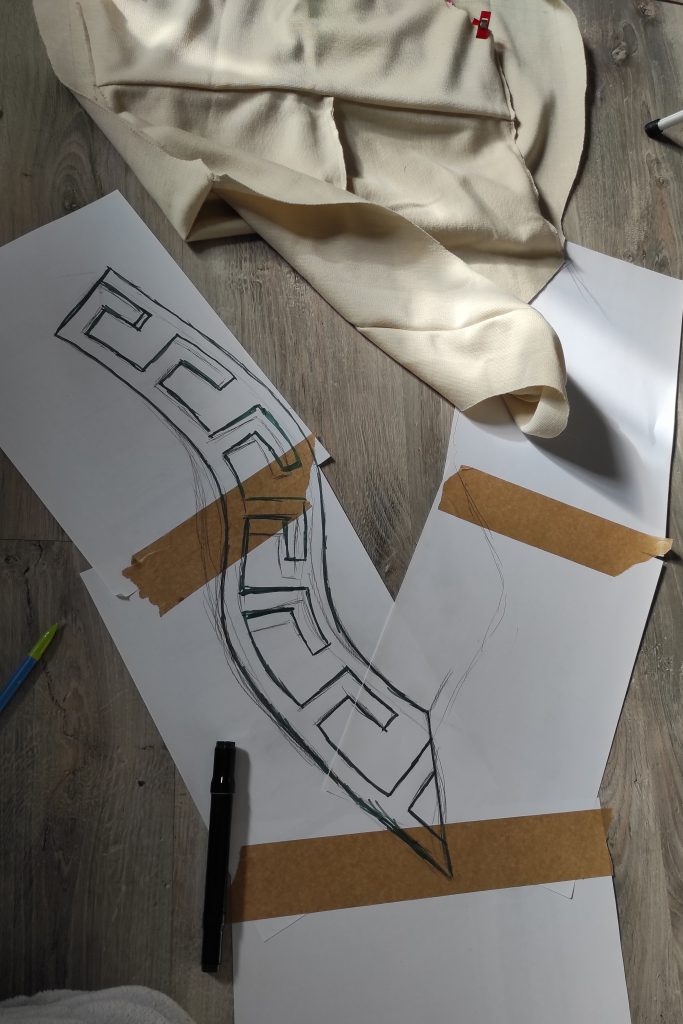
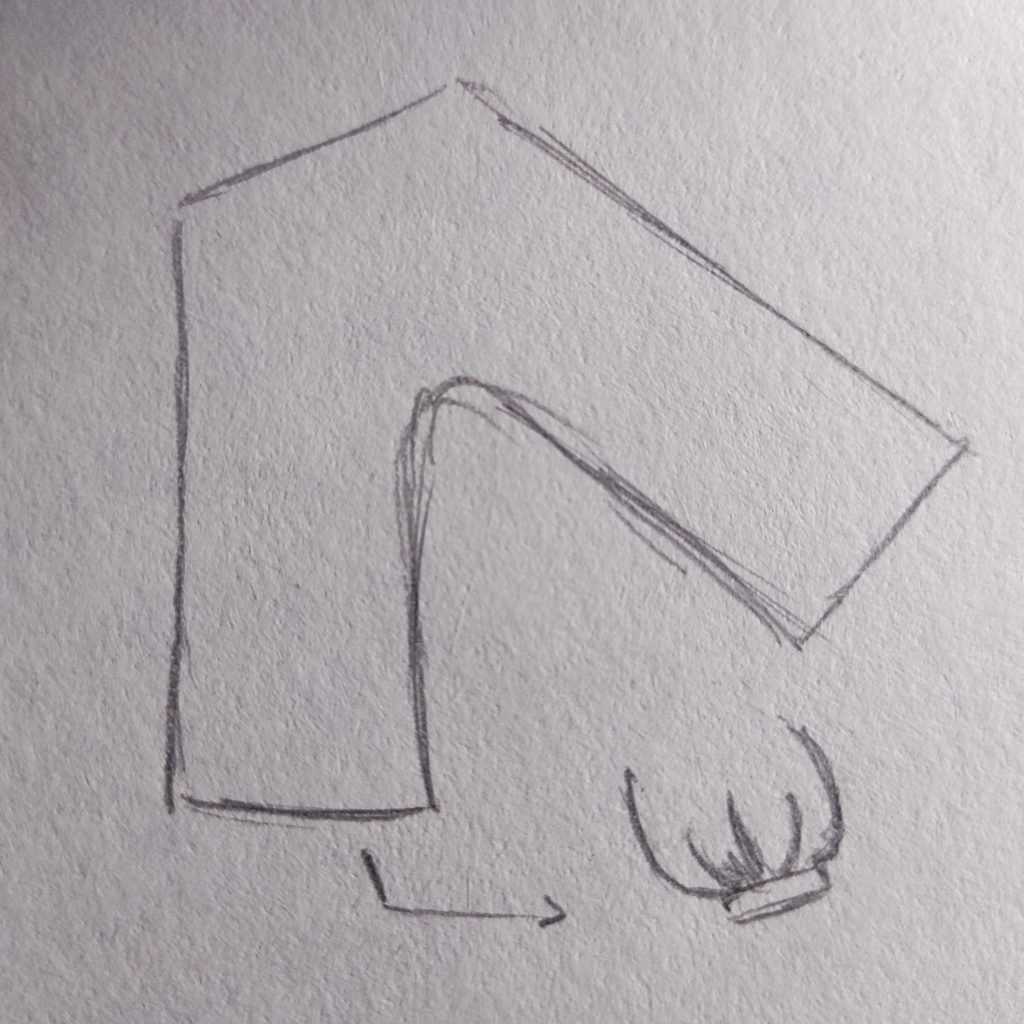
Here is a small sketch of what I wanted to achieve! Long “sleeves” that tighten at the knee with an elastic band while keeping a seamless face (only on the sides!).
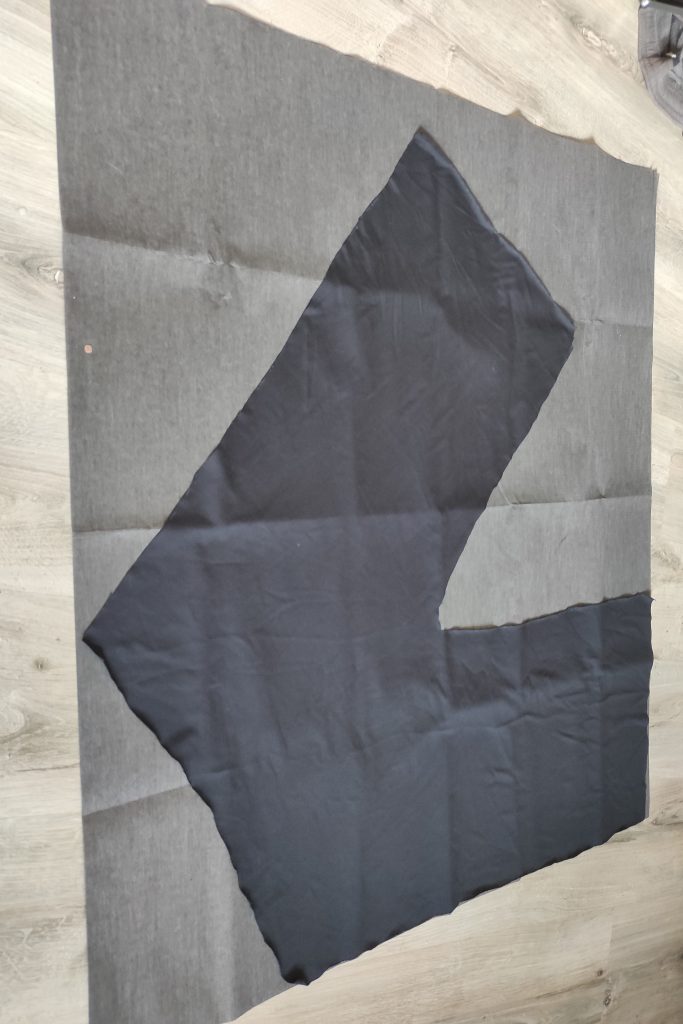
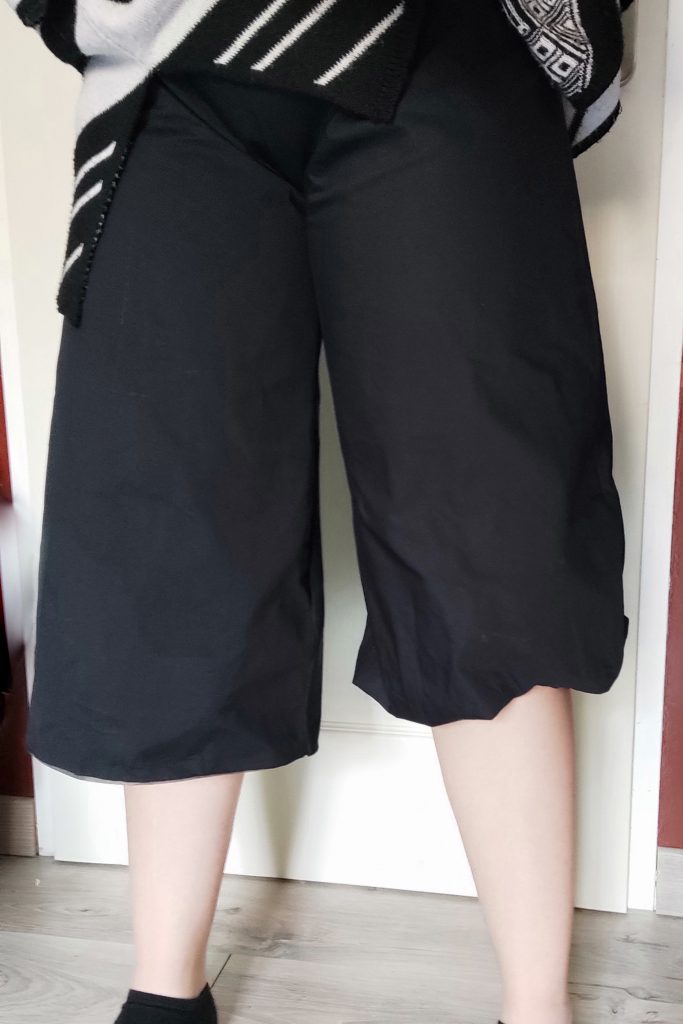
Once the pattern has been drawn and the fabric cut out, I start using my fusing fabric. Once it has been cut out, I slowly pass the whole thing with an iron to fix it to the fabric. I then sew my two pieces of pants together. Small test of the puffing effect.. Perfect!
So I add my elastic bands to close the pants, as well as a very simple belt with an elastic (I wanted so much to finish sewing these pants that I forgot to take pictures that day, oops!)
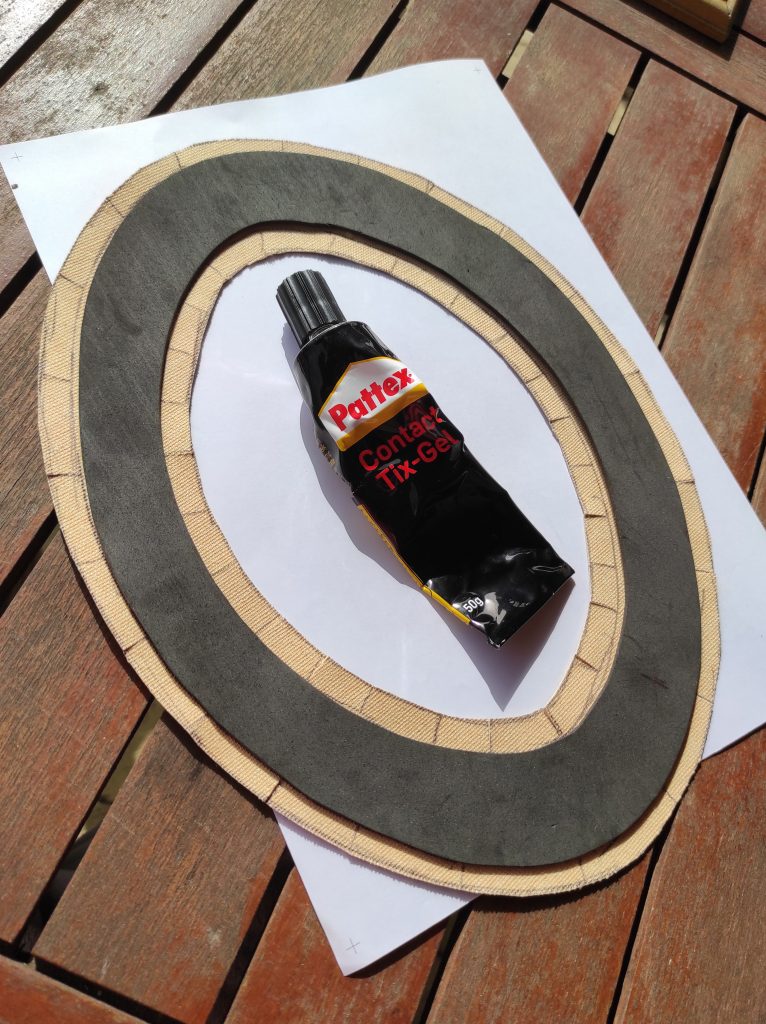
For the golden circles on the character’s thighs, I use the same method as for the shoulder pads! For this project, I used neoprene glue from Pattex: the Contact Tix-Gel. The tube version is very good for small projects because it is very handy and is easy to store! For large projects, I recommend the big pot version instead, which is less expensive in terms of quantity. /!\ PLEASE remember protect yourself and your pets by wearing a respirator and putting your pets in another room!! Contact glue vapors are really bad for our lungs.
CRAFT TIP: If you want to keep the glue in a pot longer, you can put some of it into a plastic tube (like this one!) for the duration of your project. This will avoid opening/closing your pot too often and will therefore prevent your glue from drying too quickly! Be careful not to put too much glue in this tube because it will dry much faster than in a conventional container.
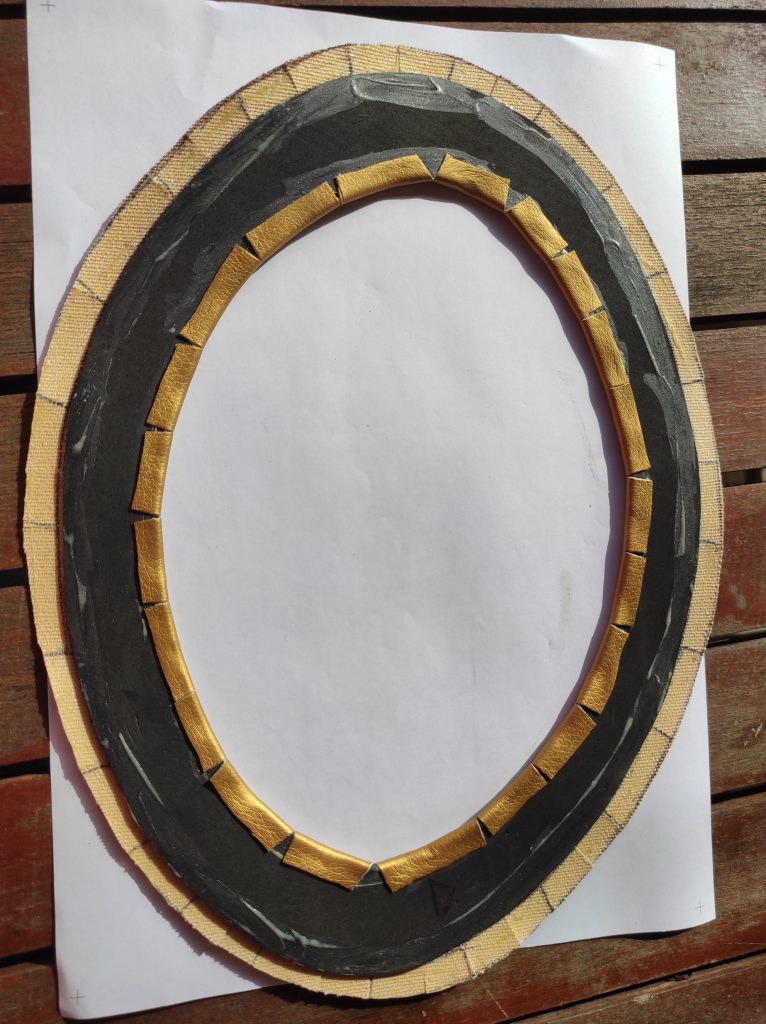
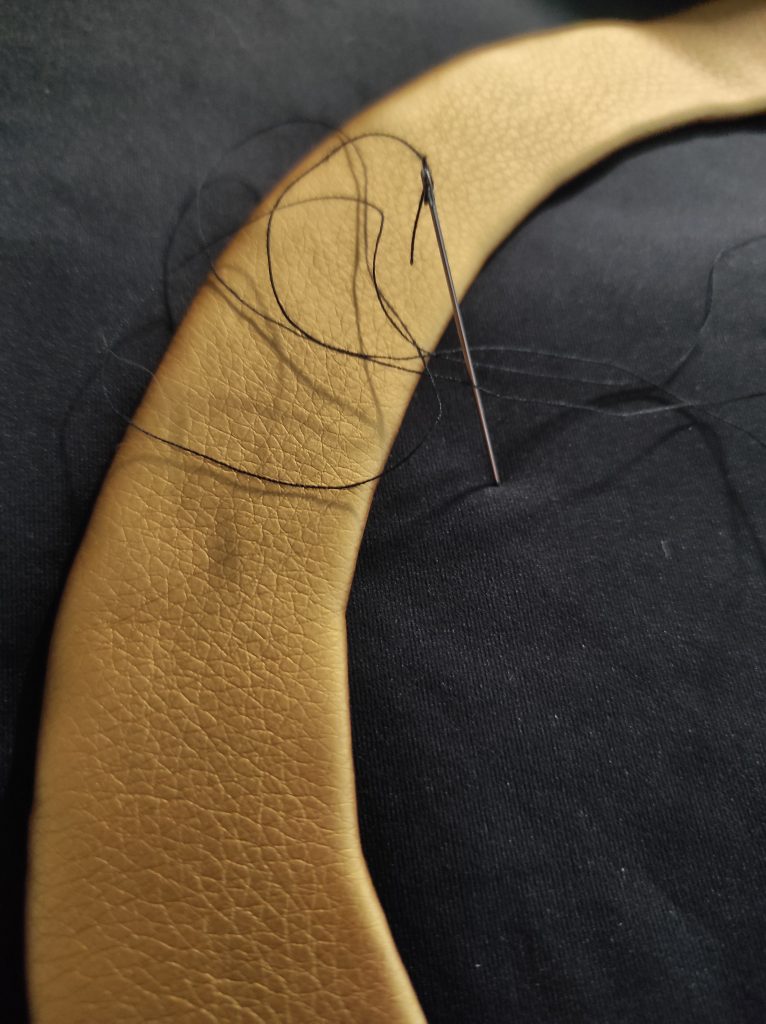
Once the two circles are ready, only a few hand stitches are enough to secure them to the pants.
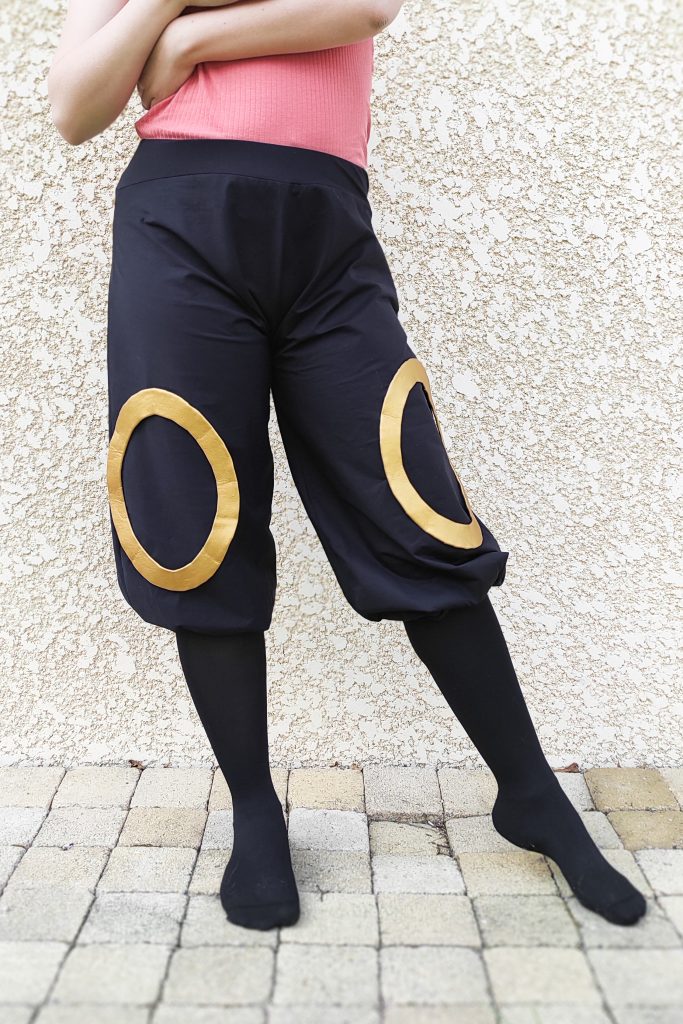
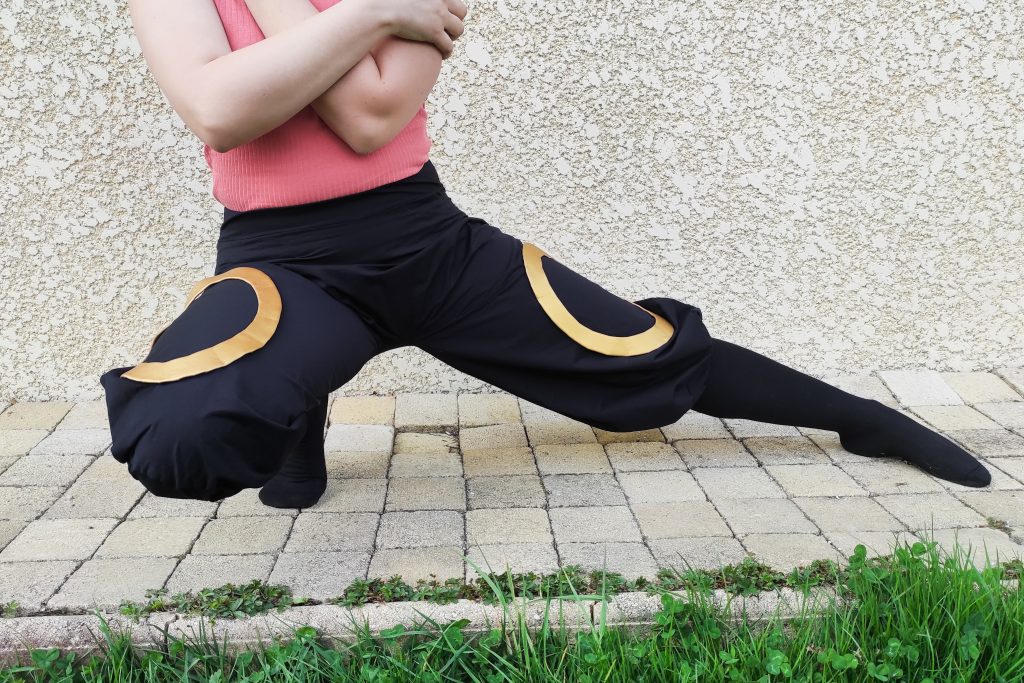
Final result of the pants worn with opaque tights! ♥
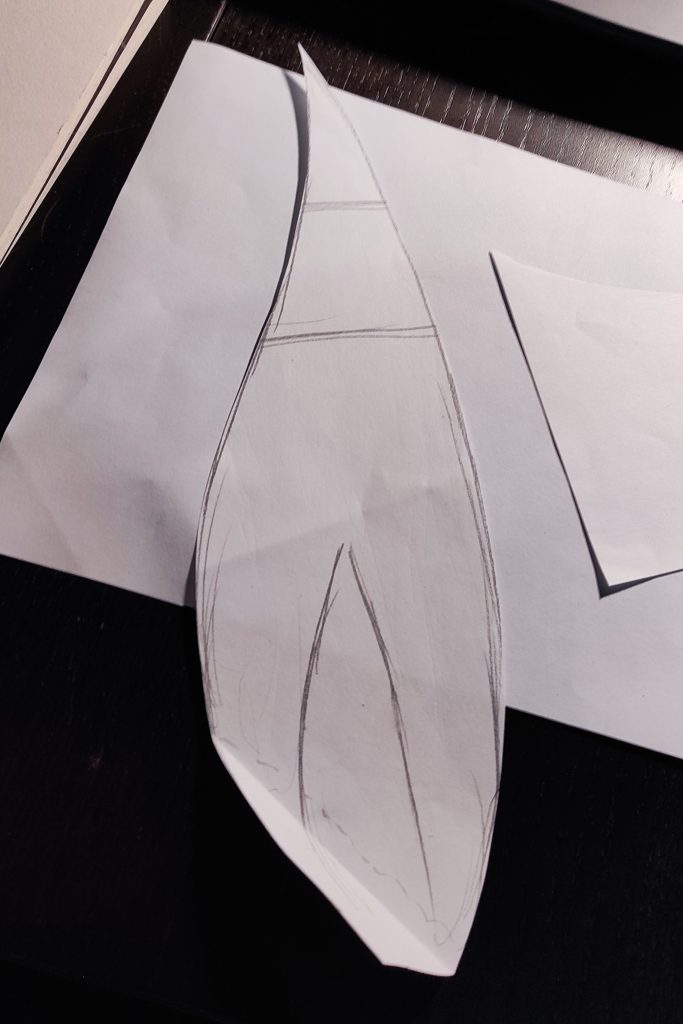
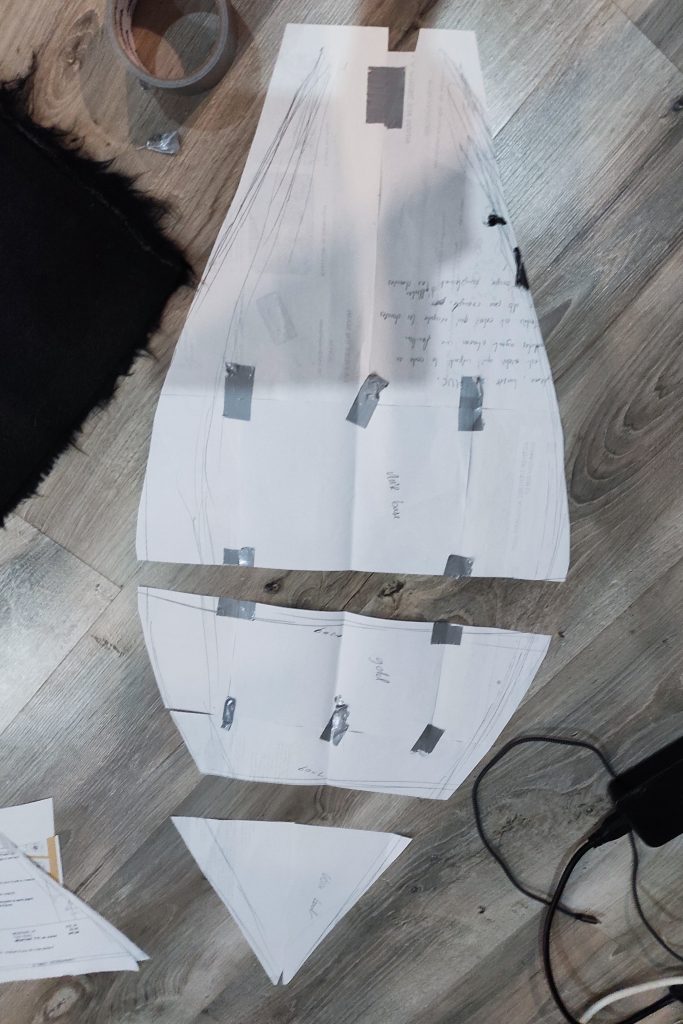
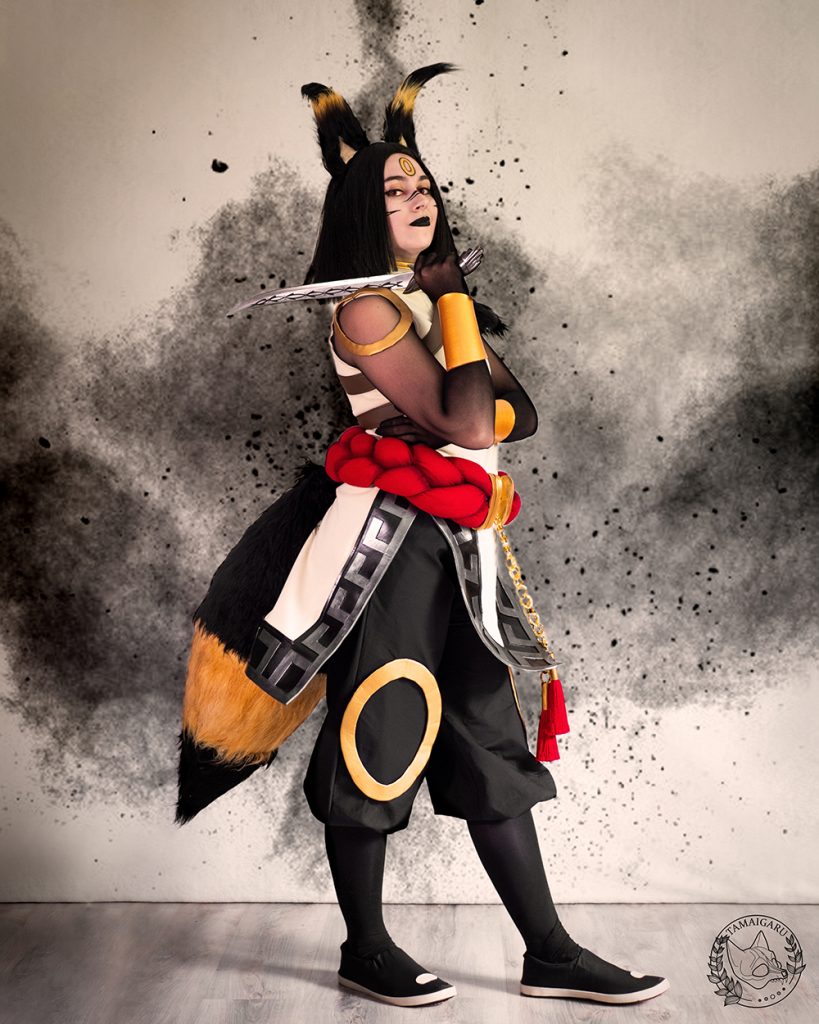
3 • The tail and ears
This part was certainly the most satisfying, even if the dyeing of the fur was a real hell to achieve! 😆
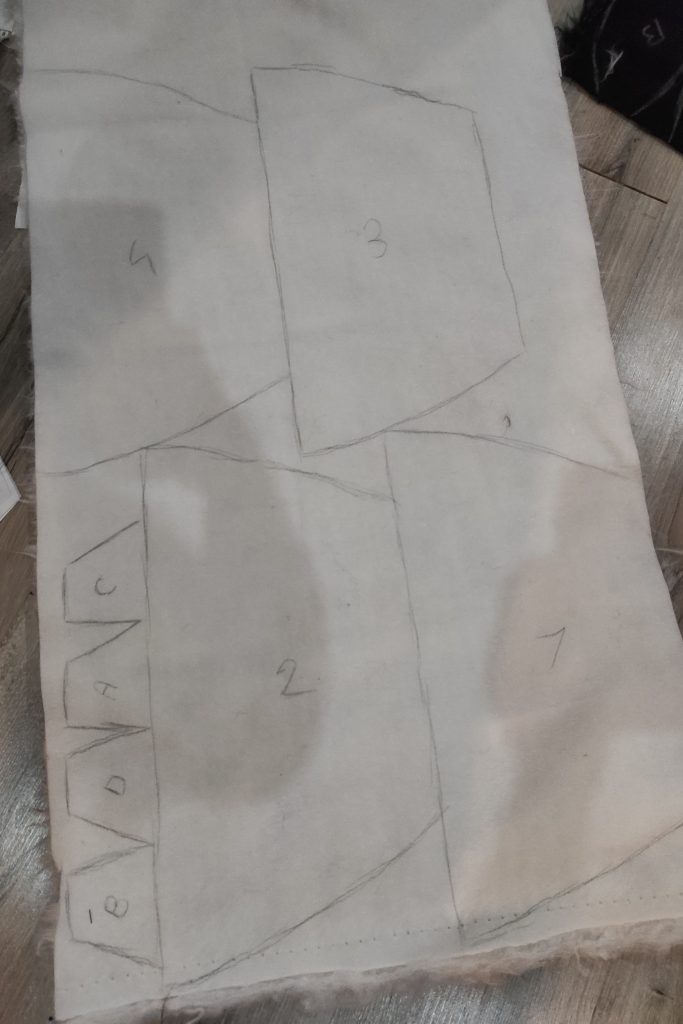
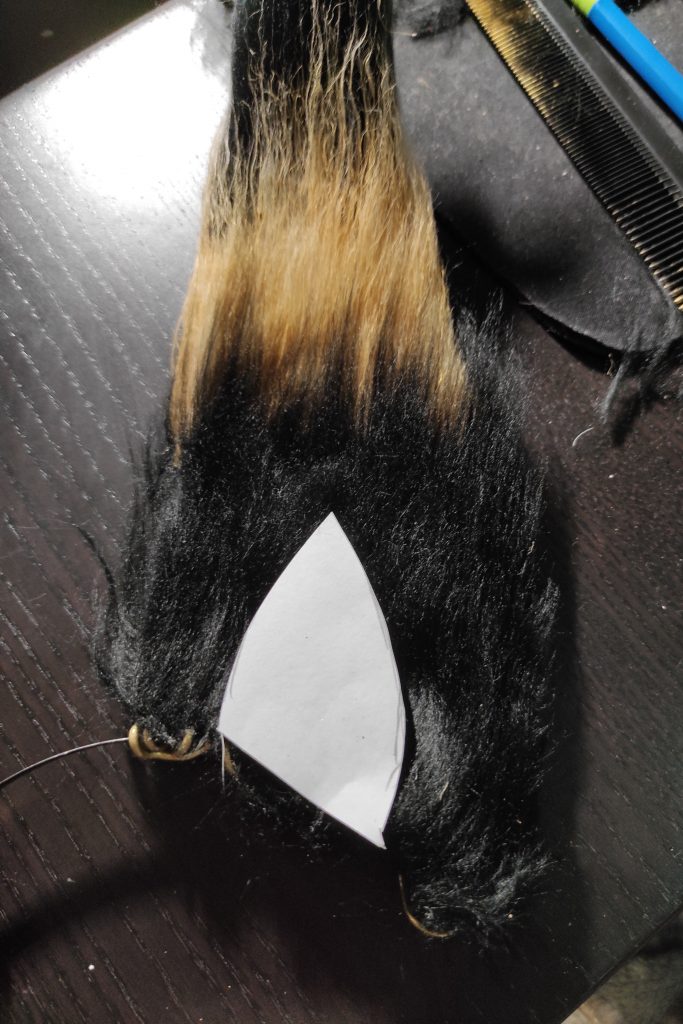
I first draw my patterns on a paper and then modify them until I get the size I need.
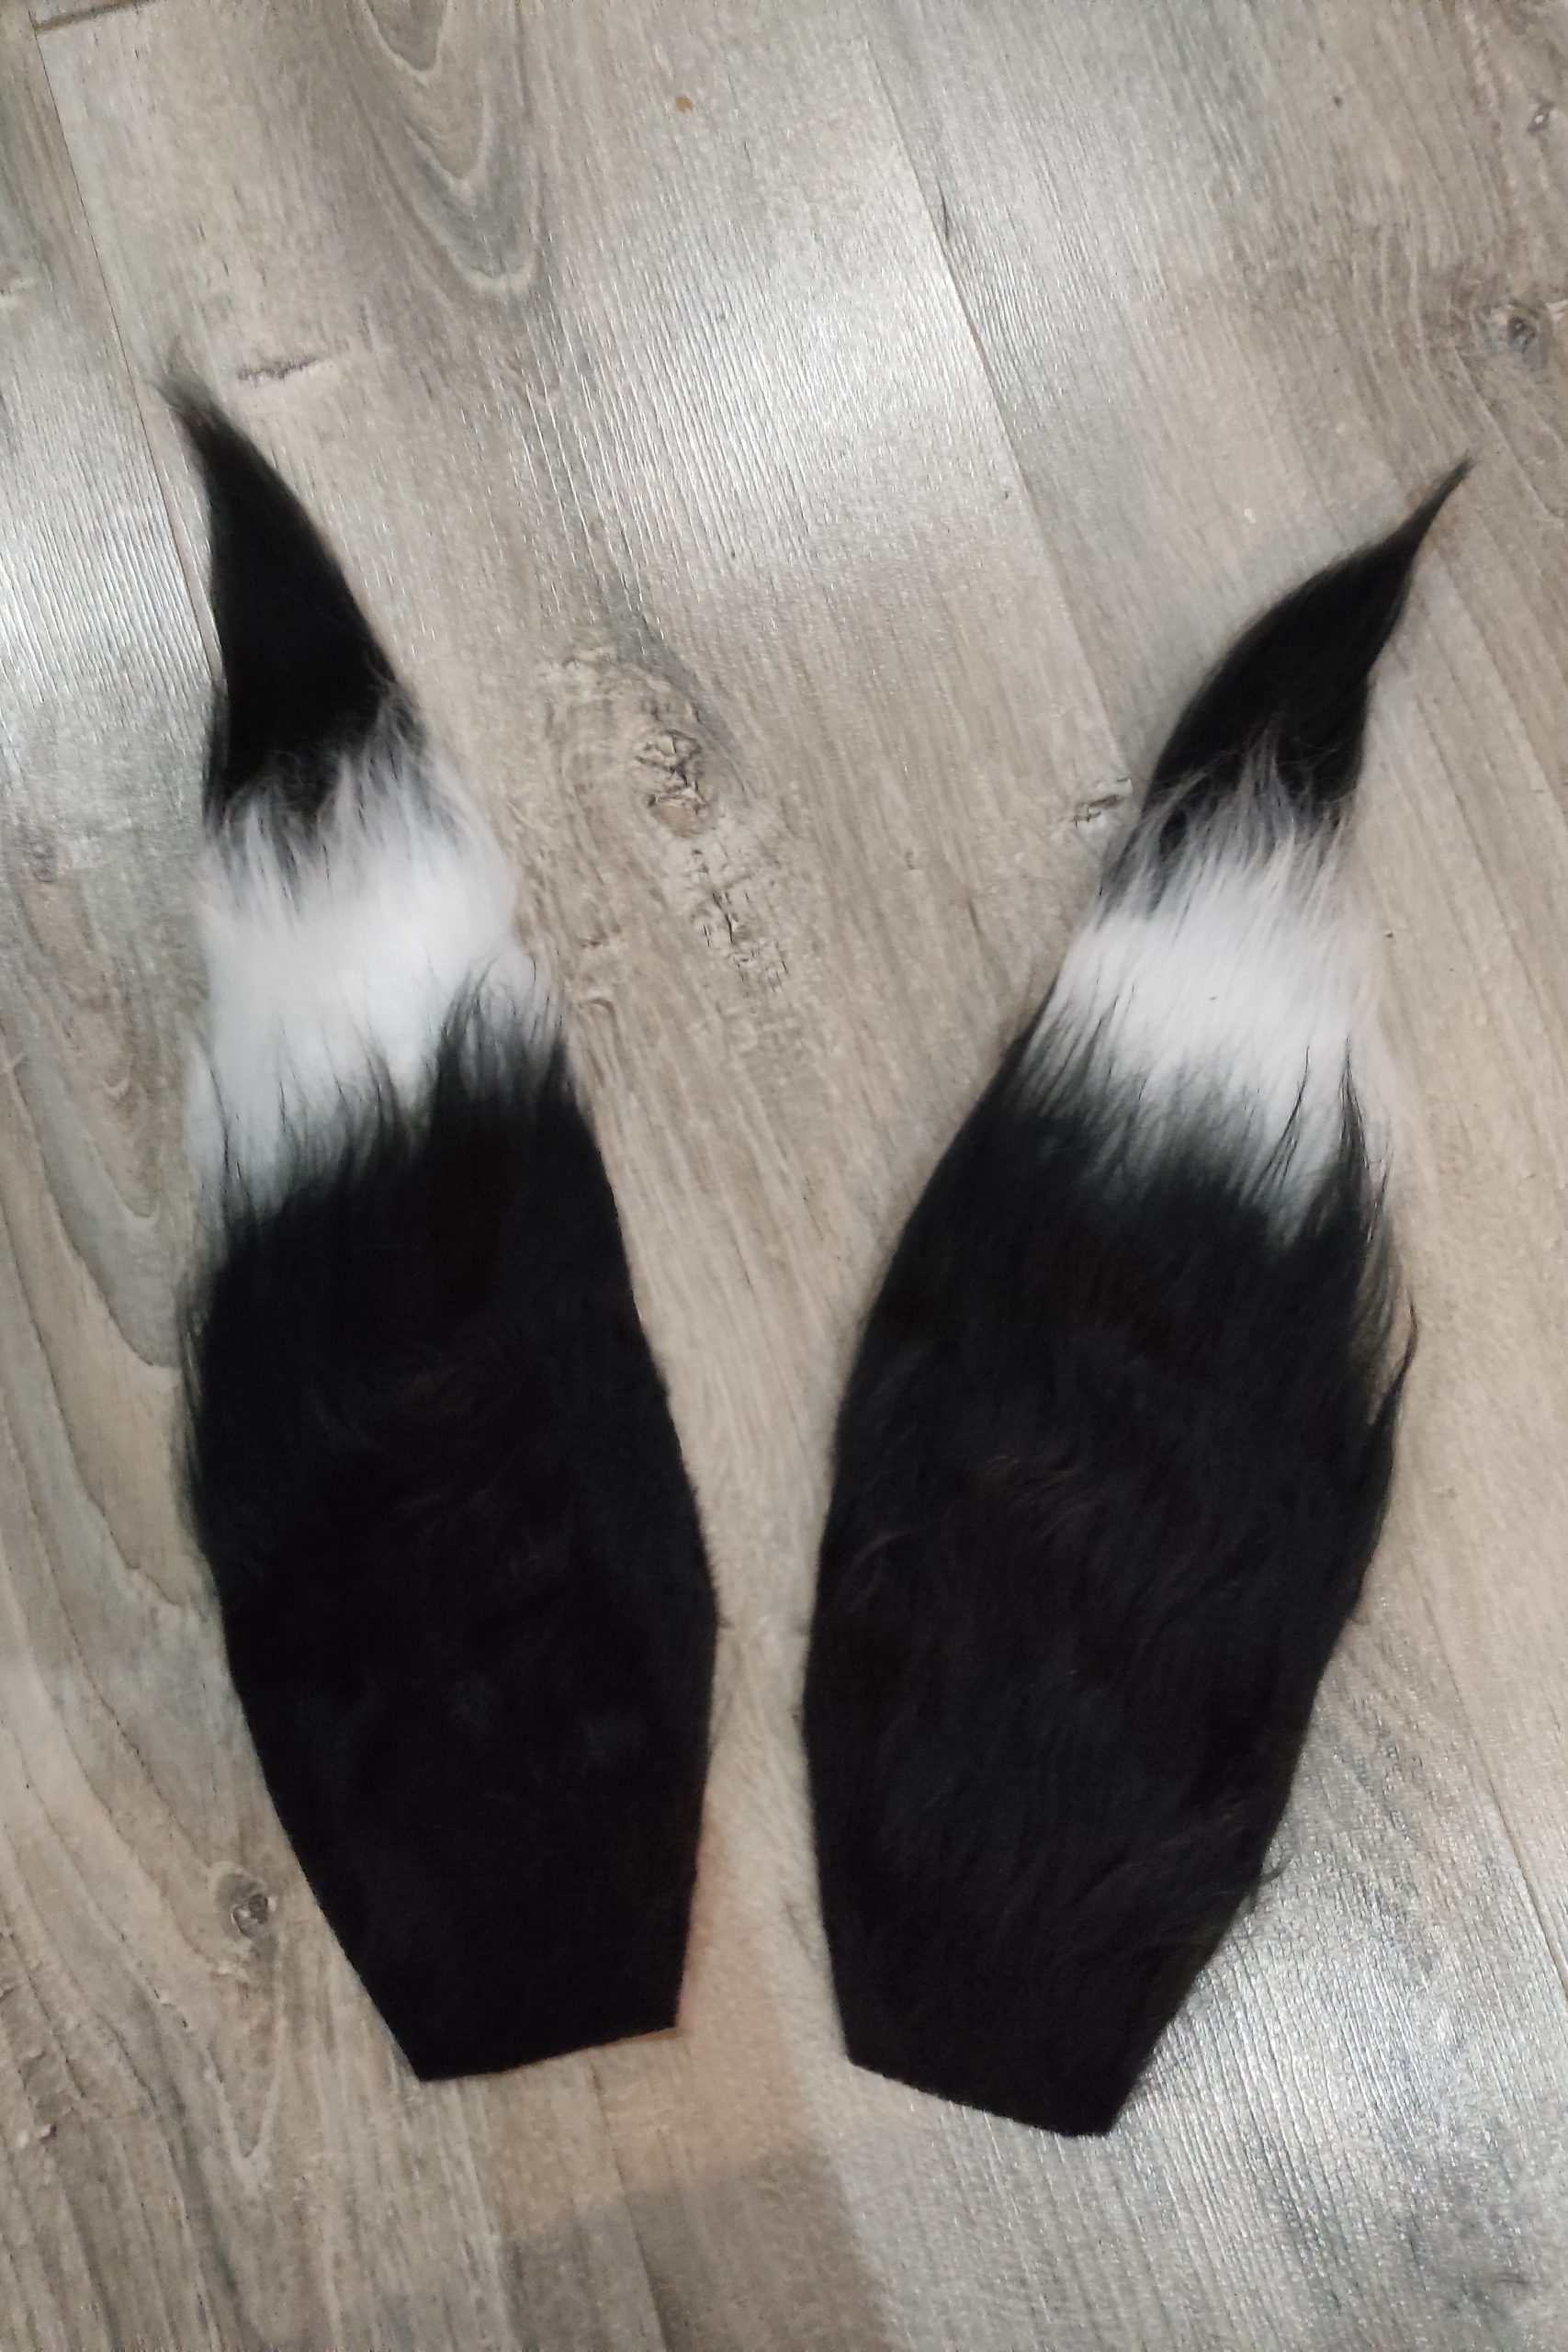
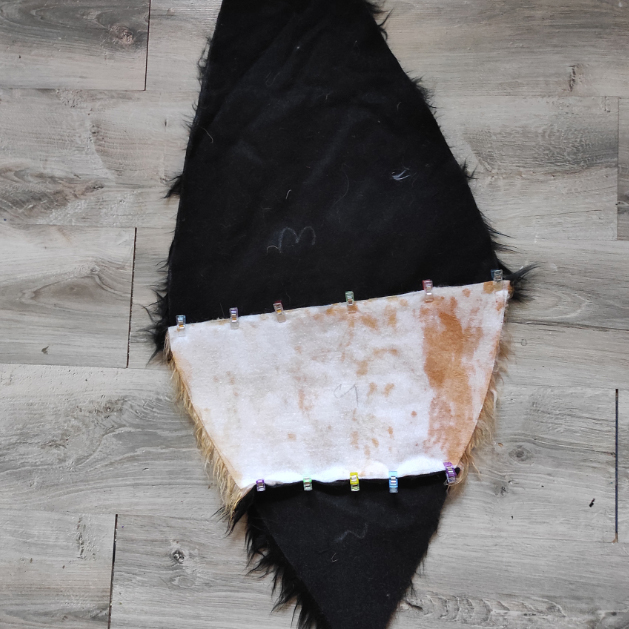
I draw and then cut the patterns into three parts to use two furs: one black and one gold. ♥
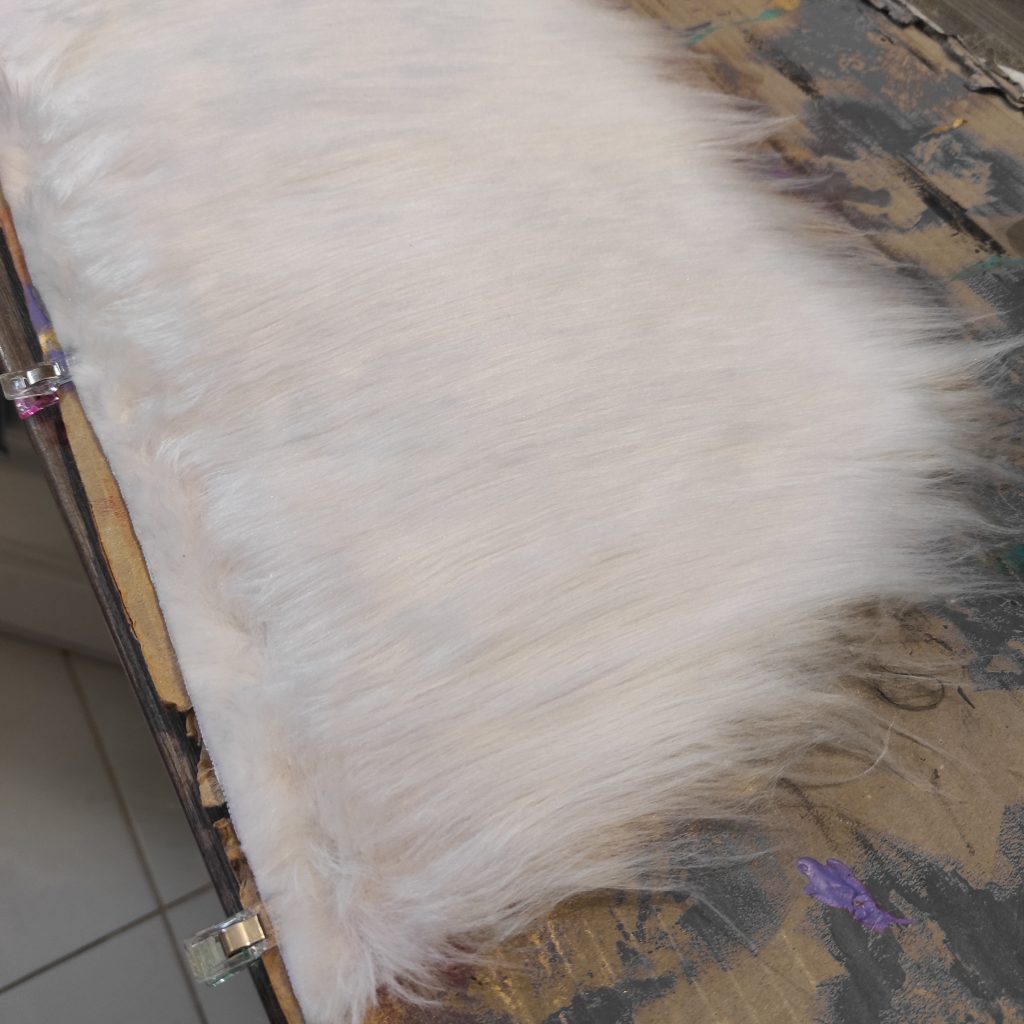
For this project, I used the long-haired fur from I Love Tissus that I loved working with!
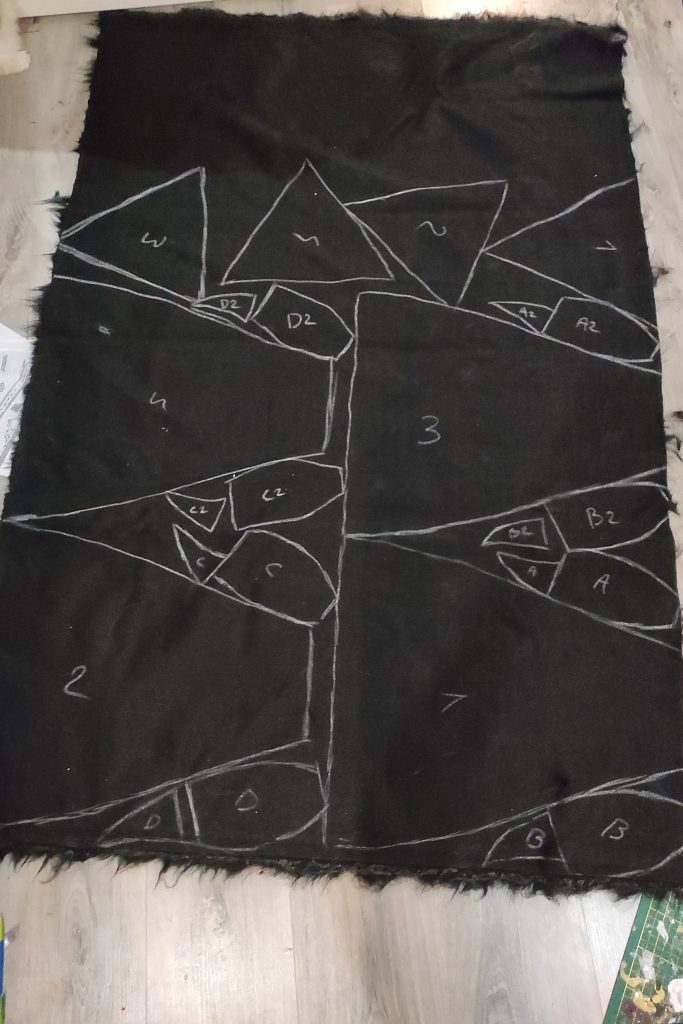
Once the patterns have been drawn and cut, I draw my cutting lines on the back of the fur using a chalk (for the black) or a felt pen (for the white) without forgetting to make the mirror of every part! I take this opportunity to make the parts for the male version (second costume which will be finished later! ♥) in order to optimize the cut.
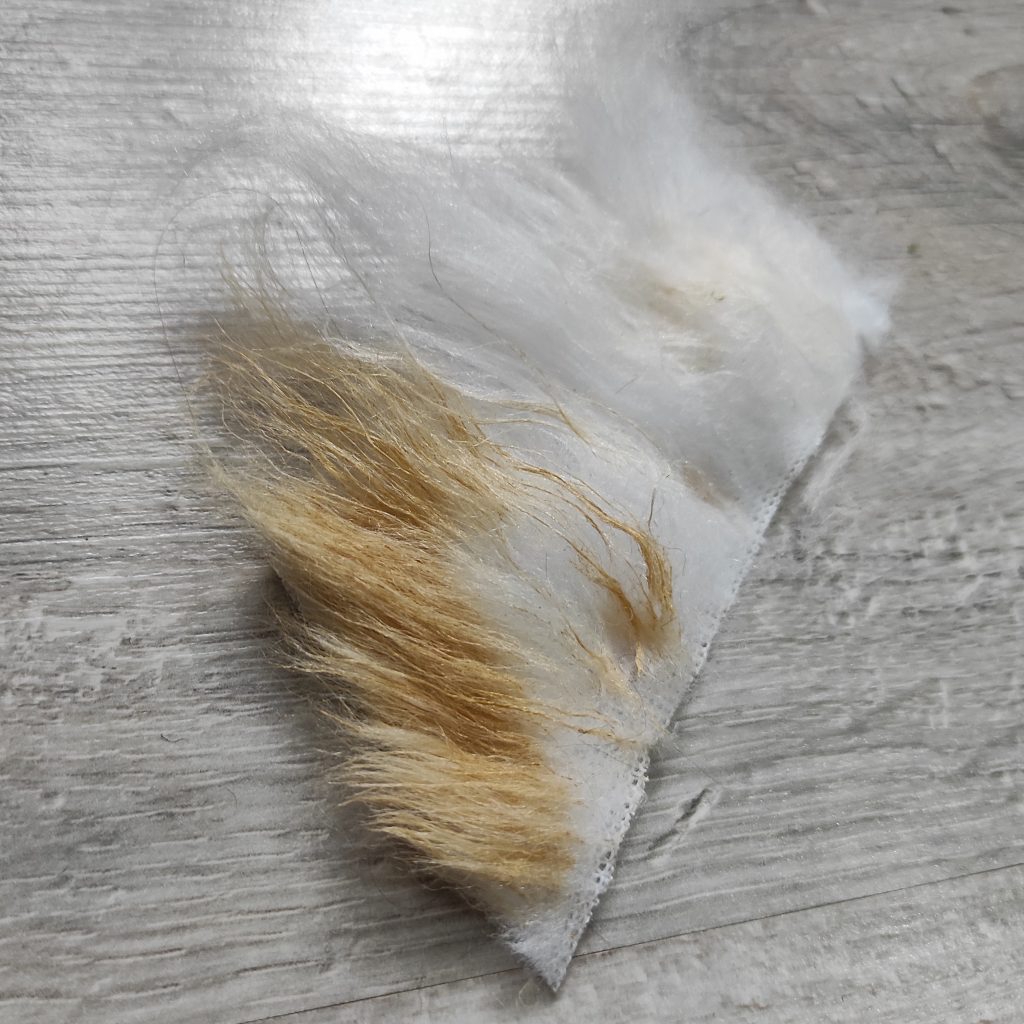
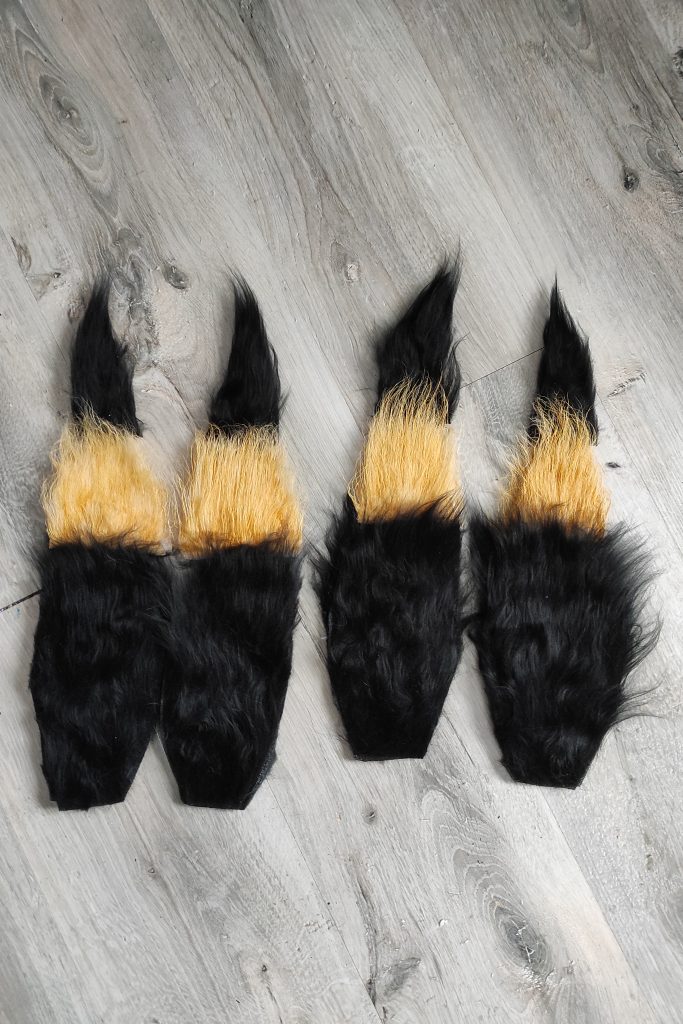
For the golden fur, I looked for a long time to buy one that was already colored but the ones I found online did not suit me. So I thought about dyeing a white fur with dyes for synthetic fabrics but once again, I was not convinced to get THE color I wanted, the one that would perfectly match the shade of my faux leather and my armor.
The only solution was therefore to dye my fur with the same acrylic as the one used on my armor (which we will see later ♥)!
After a few airbrush tests, it turns out that the paint I am using is not suitable for my airbrush. So I chose to test the dye with a brush and with a bit of determination, the result finally suits me!
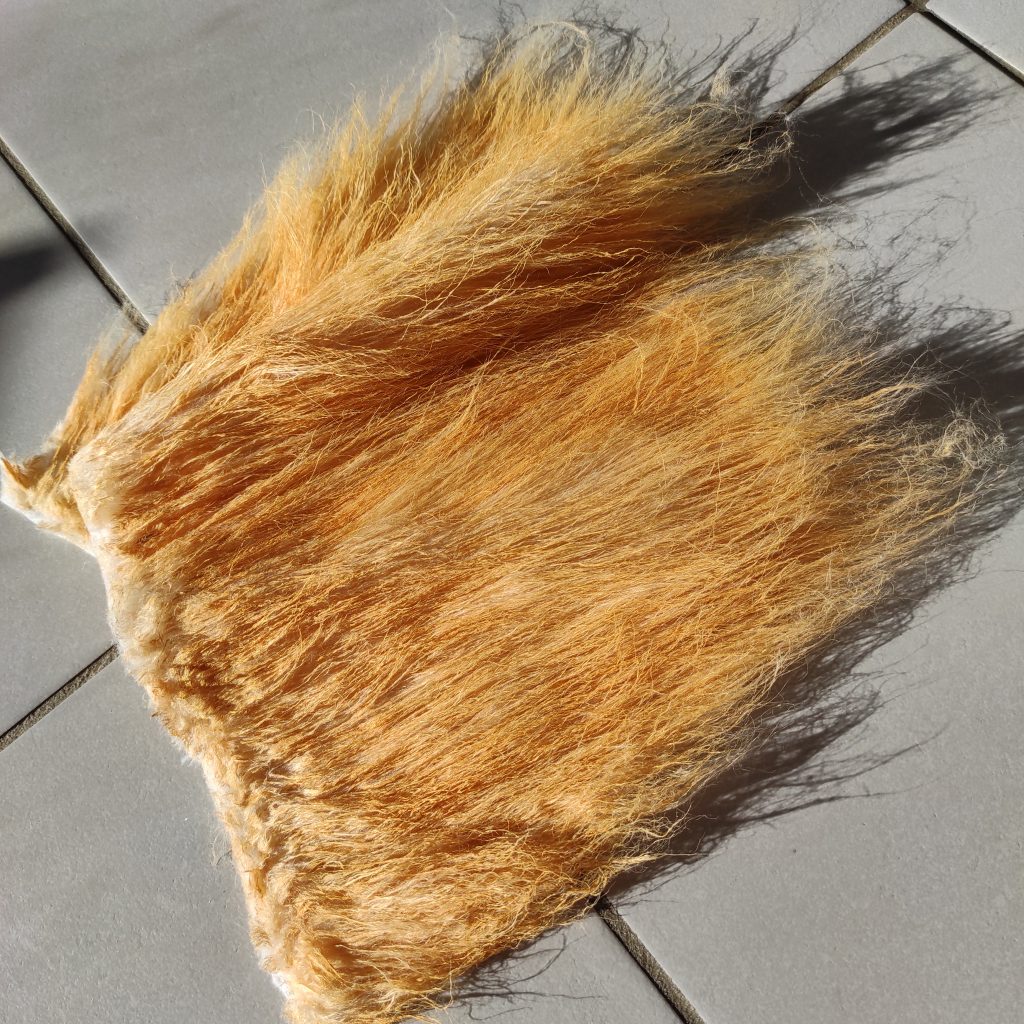
So here’s to the most endless part of this costume: hours and hours of brush dyeing! Fortunately all this suffering was well worth it, the final color is absolutely splendid! ♥
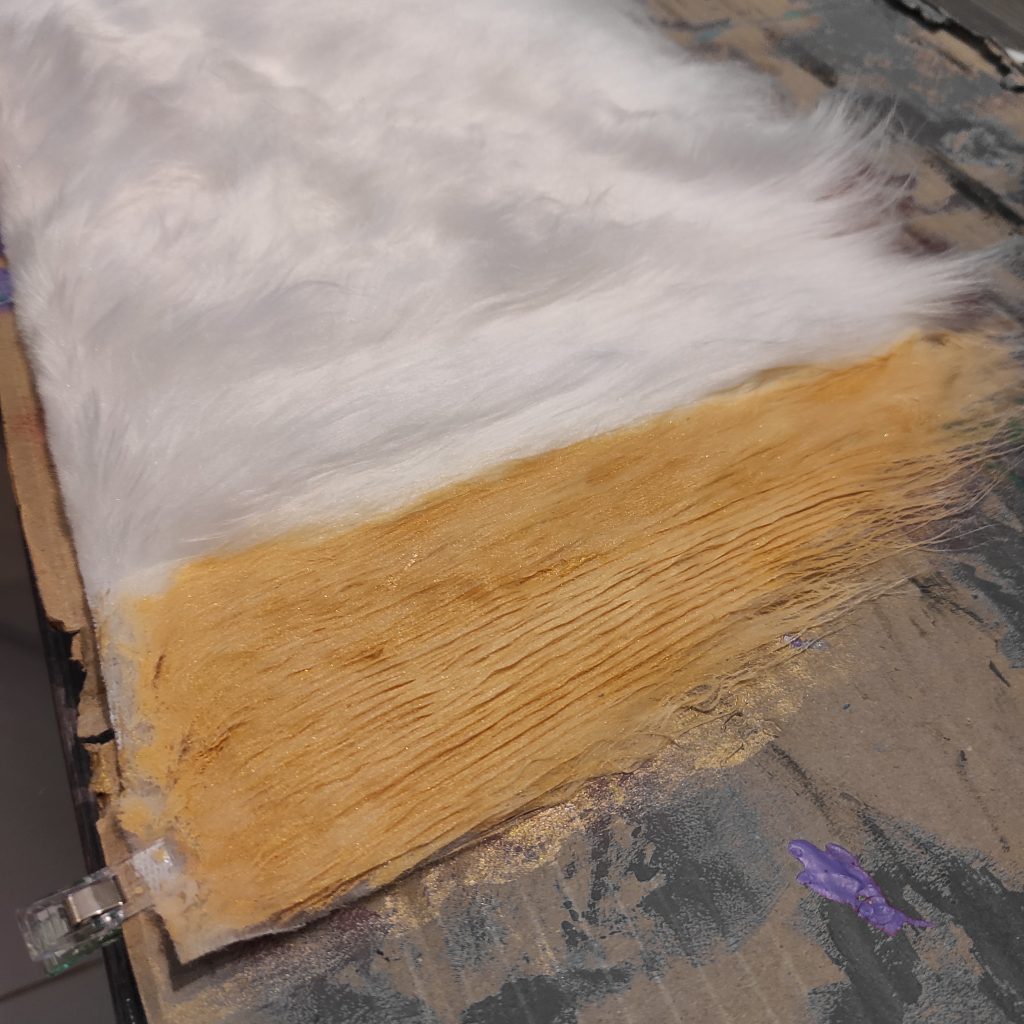
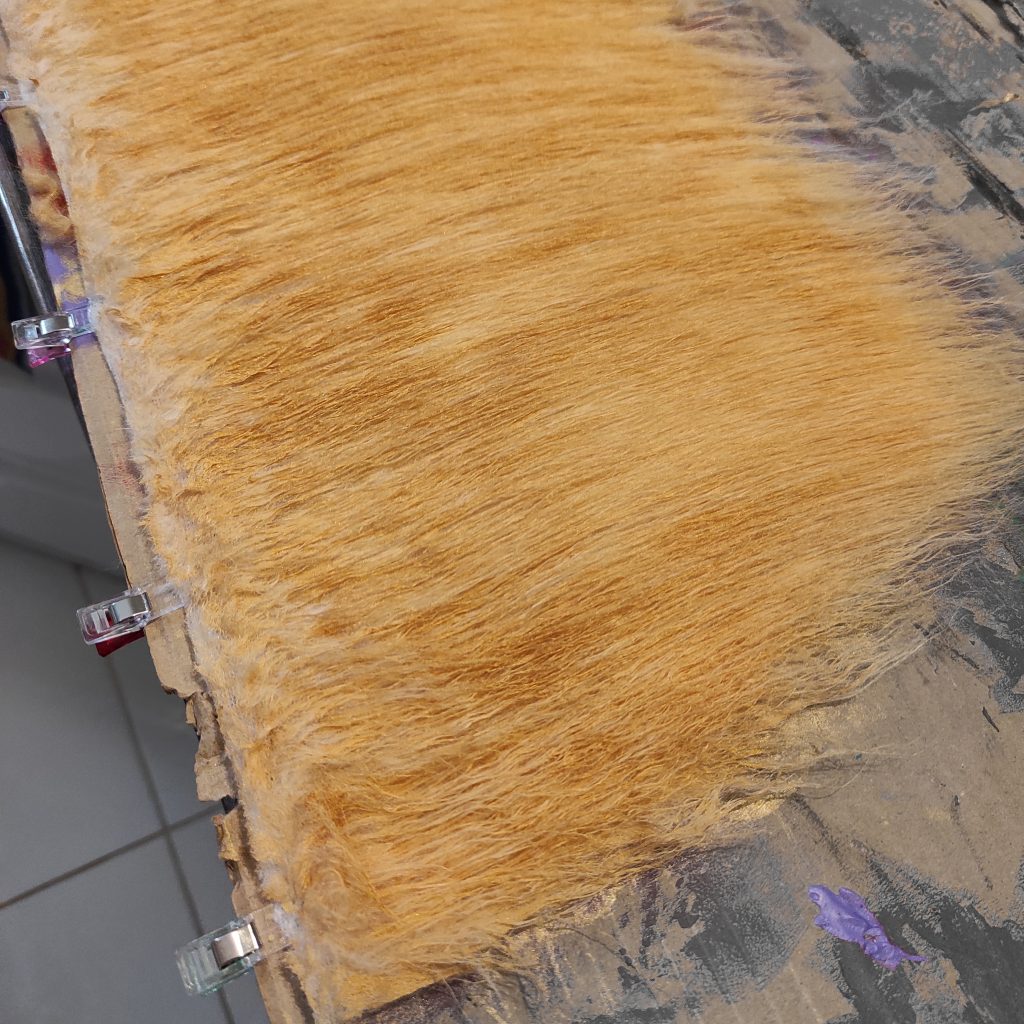
FUR TIP: If you want to dye fur with acrylic but you don’t have an airbrush or your paint is not suitable, you can do it by hand using a brush, comb and a hair dryer. Start by combing your fur and then mix your paint with water in a cup to make it more liquid. Then apply paint to a small area of your fur with your brush, comb through and repeat until all the fur in that area is dyed. You can comb your fur upside down too to make it easier to apply your paint! Once your little part is dyed, dry it with the hair dryer, combing it until your fur is dry. Combing while drying will help prevent hair from clumping when dry! This method is very long so I do not recommend it if you have large pieces of fur to dye. Be careful, your fur will unfortunately be much rougher than before dyeing!
Ears assembly
For these ears, I wanted to use a simple and seamless method. If you want to know more about this method, Kinpatsu Cosplay recently released a video about it! You can find it right here! ♥
Let’s talk about the assembly: to allow my ears to bend as I want, I use aluminum wire (usually used for decorations or jewelry) to create a frame that will be locked inside (I also let protrude several centimeters at the base of the ear to be able to wrap it in a headband when finished! ♥).
Once the general shape has been created, I place it in a sandwich between my pieces of fur and glue it all together using a good big dose of hot glue! (the glue gun: best friend of the cosplayers 😉)
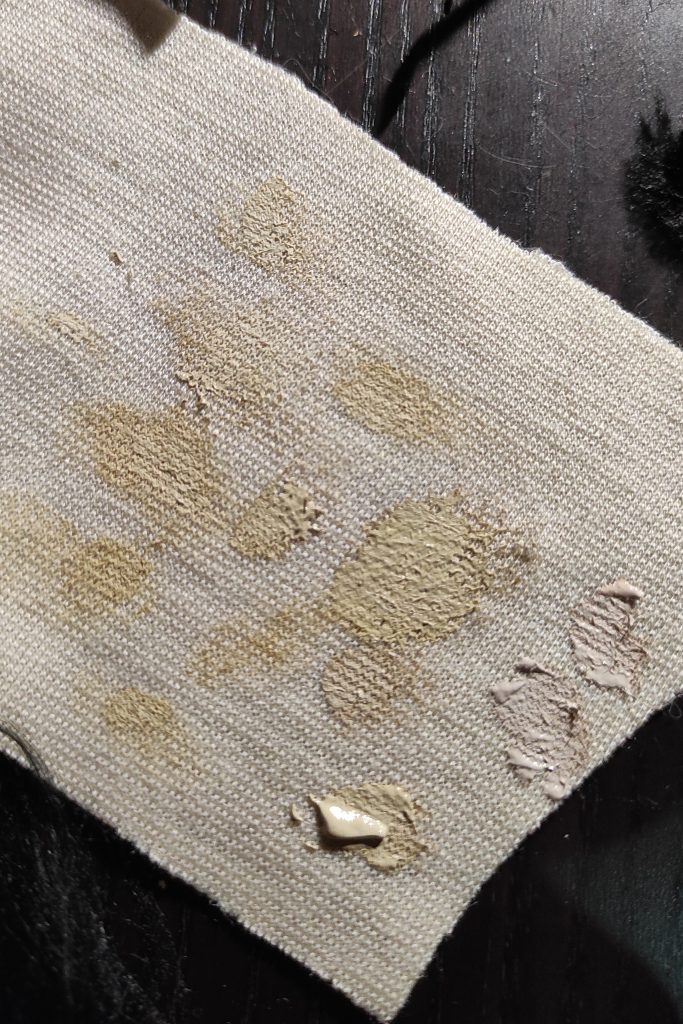
For the skin part in the center of the ears, I use an old suede type fabric that I paint in acrylic to give it the color I need.
To get this shade, I simply do different paint mixes that I test little by little on a scrap of the fabric of the dress! ♥
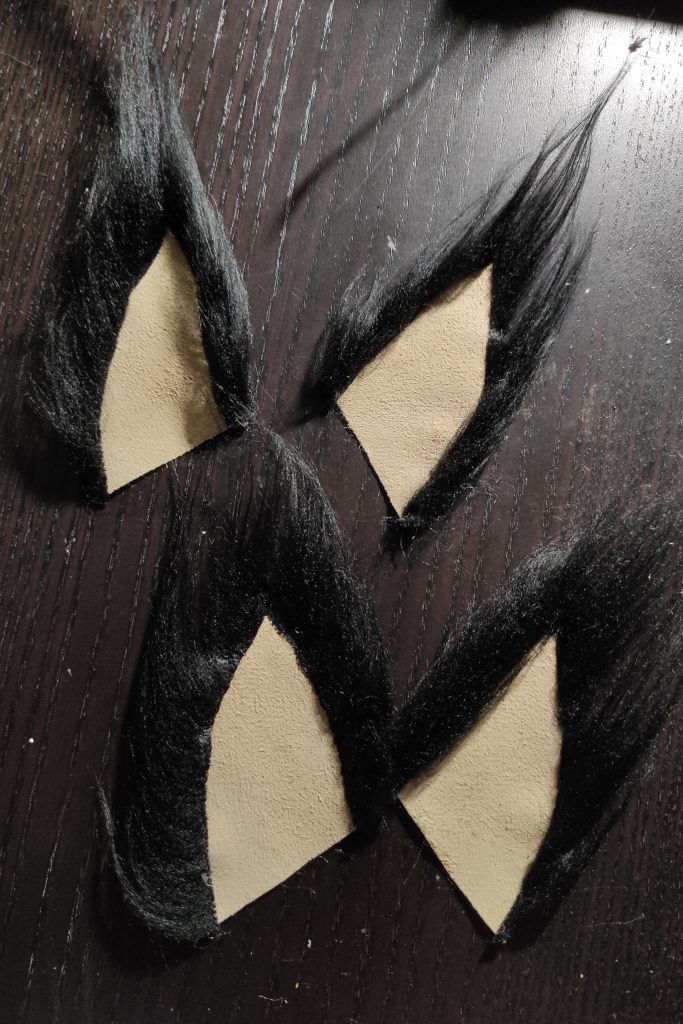
So that the change of material is not too sudden, I cut small strips of black fur that I fold (back to back) then glue all around my “skin”.
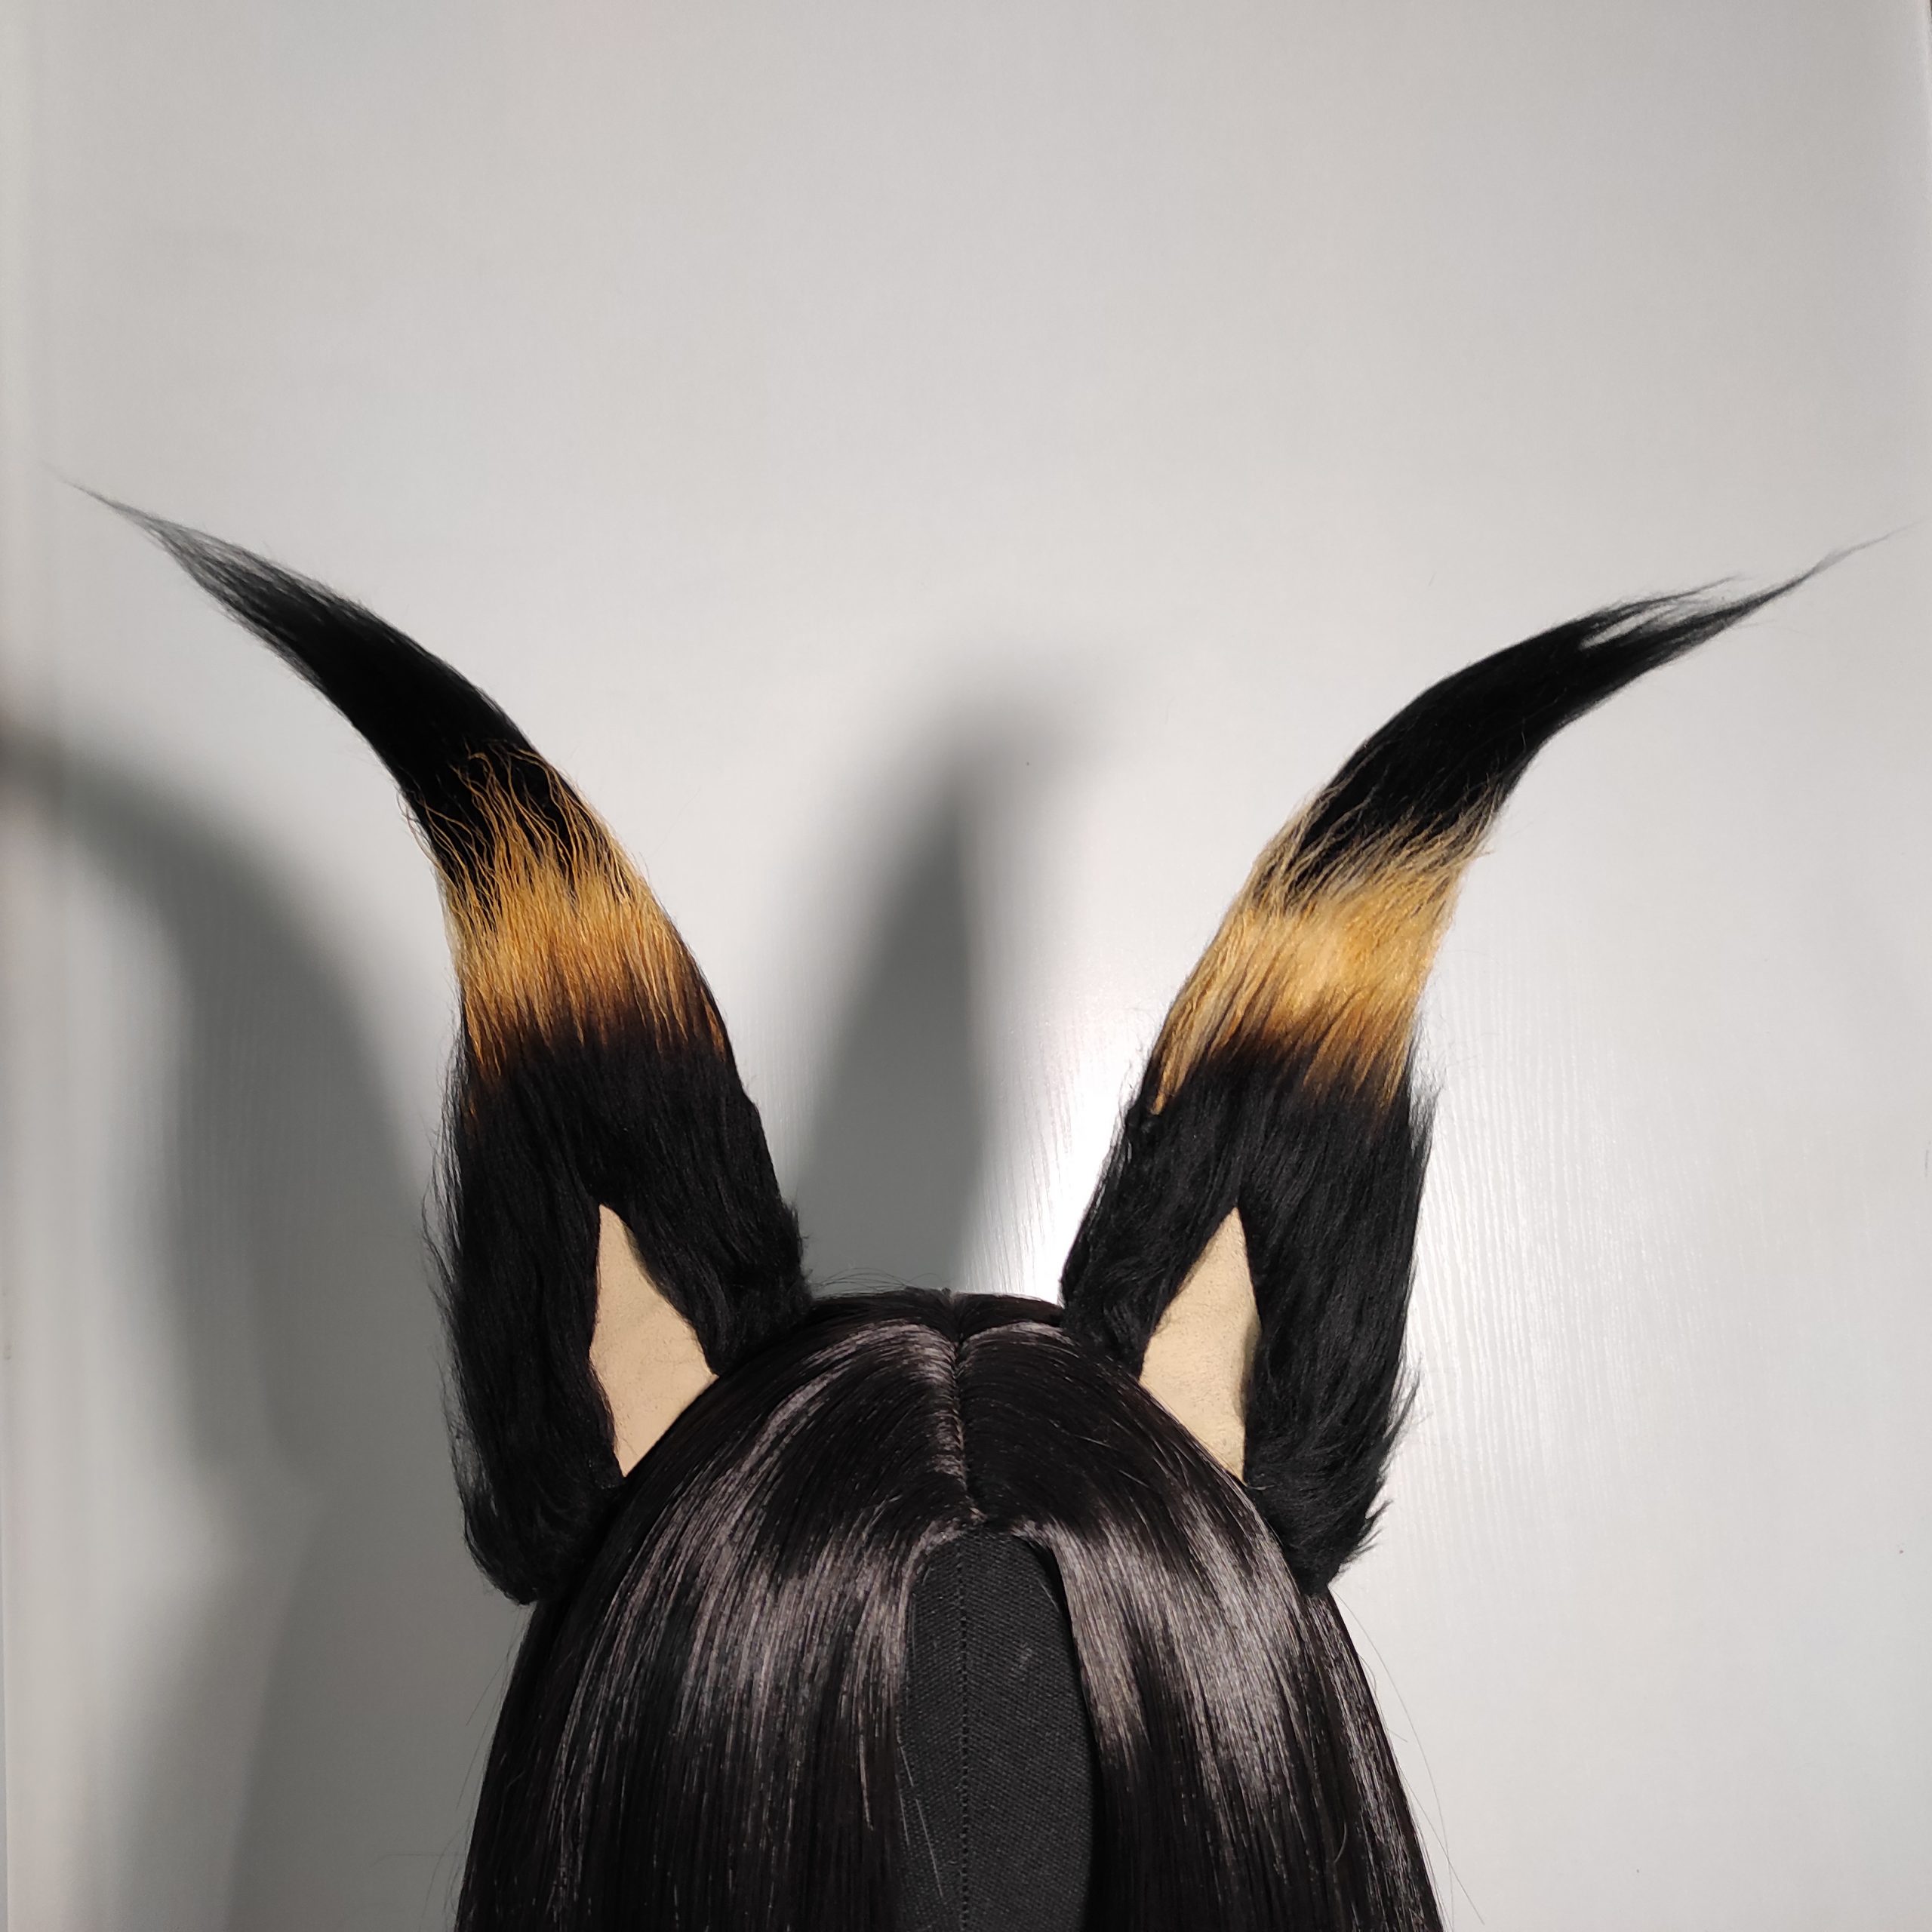
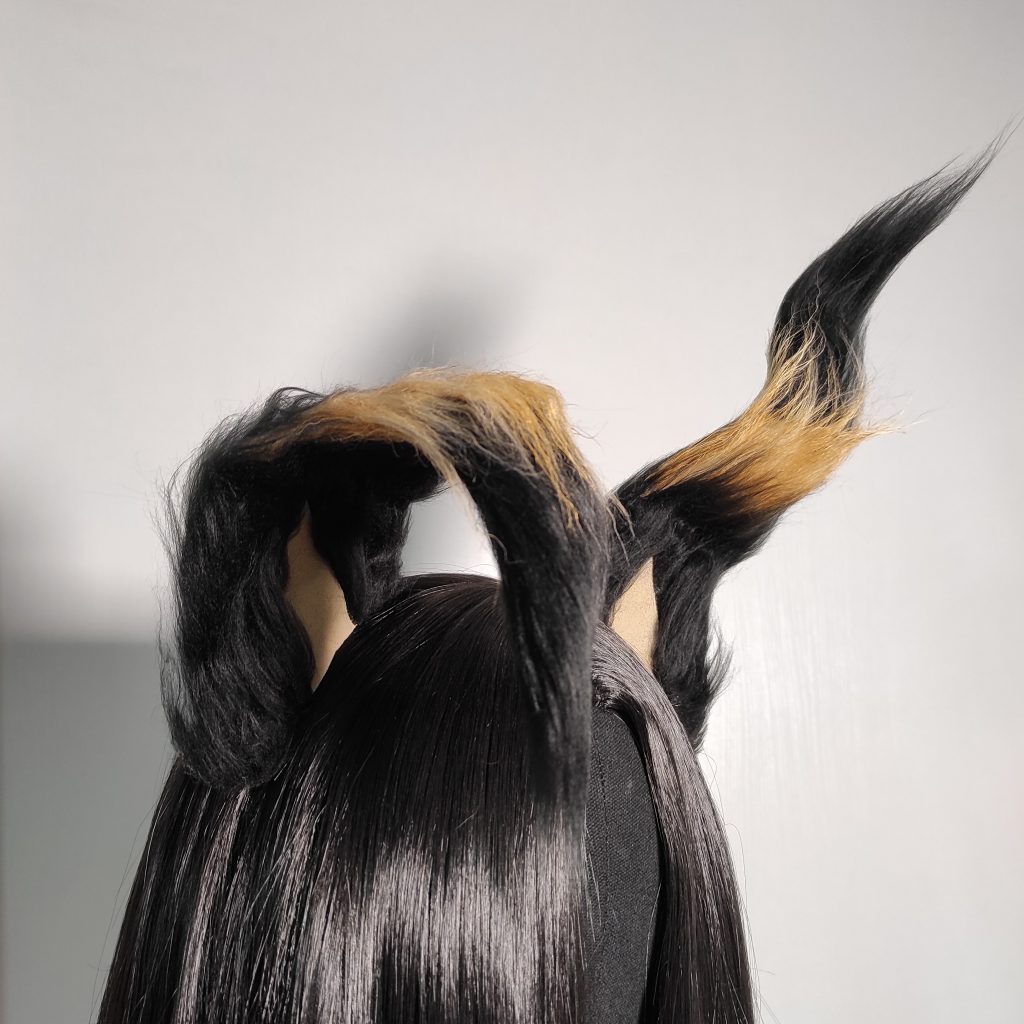
Once the skin part is glued to the ears, I wind the aluminum wire that protrudes from the bottom of the ears around a black headband in a discreet way and it’s done! ♥
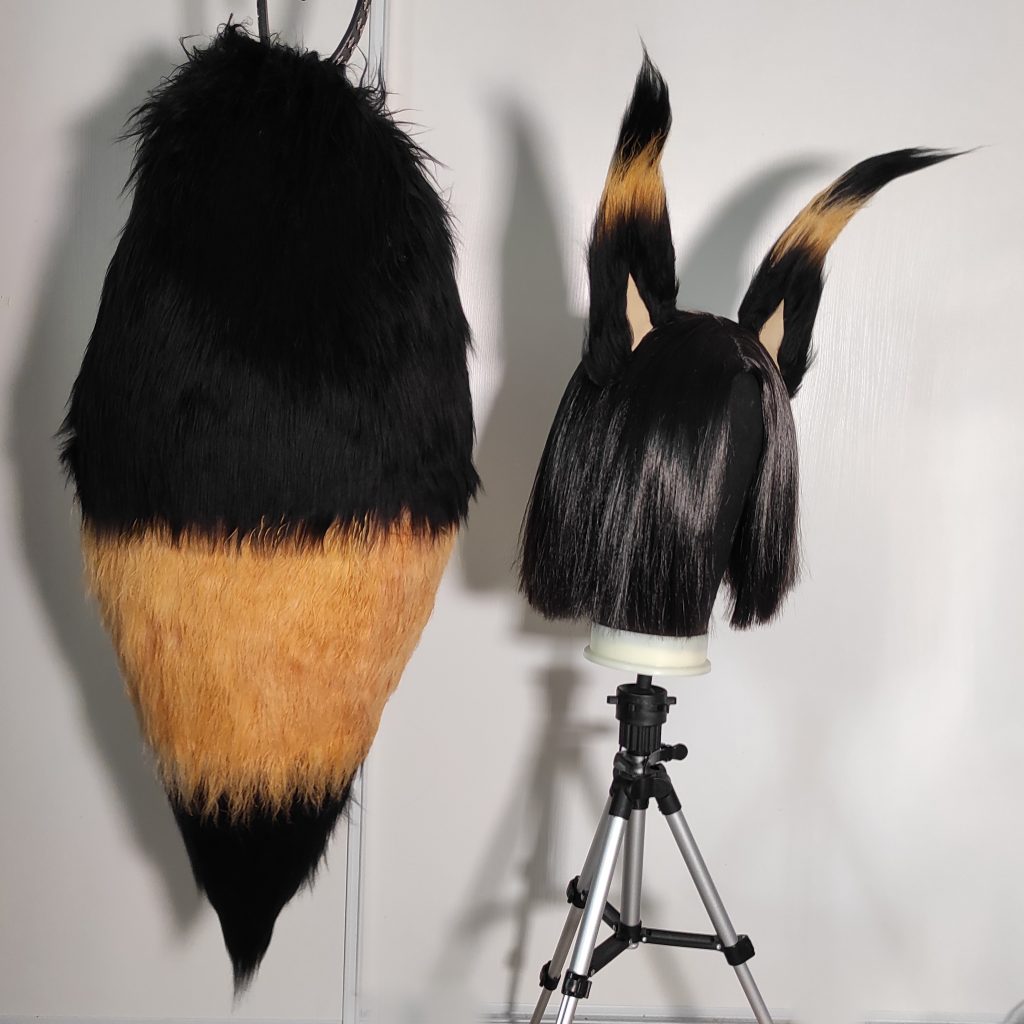
And here is a beautiful pair of foldable ears at will!
Tail assembly
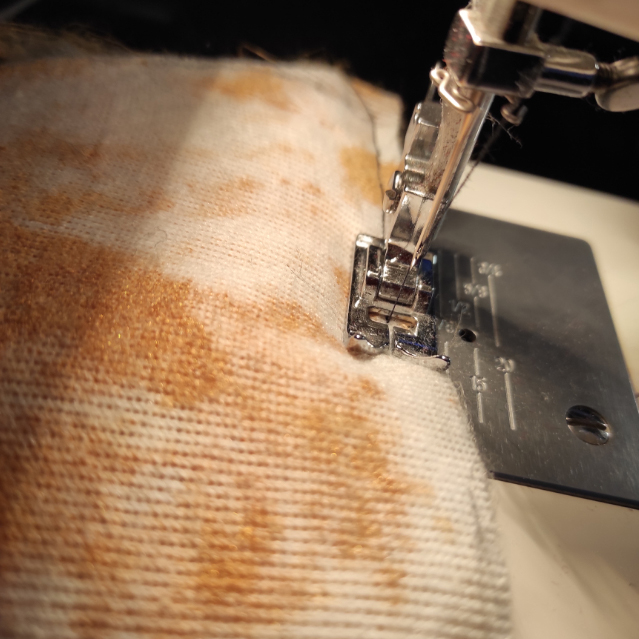
For the tail assembly I first sewn the golden parts to their respective black parts, then the two sides together. I’m thinking of leaving an opening at the base of the tail so that I can add the padding afterwards!
Moreover, for this tail, I used Colas Normand‘s cushion & pillow stuffing fiber. What I like about their fiber is that it doesn’t get packed into fluff in the bag: it stays light and fluffy and doesn’t clump when in use!
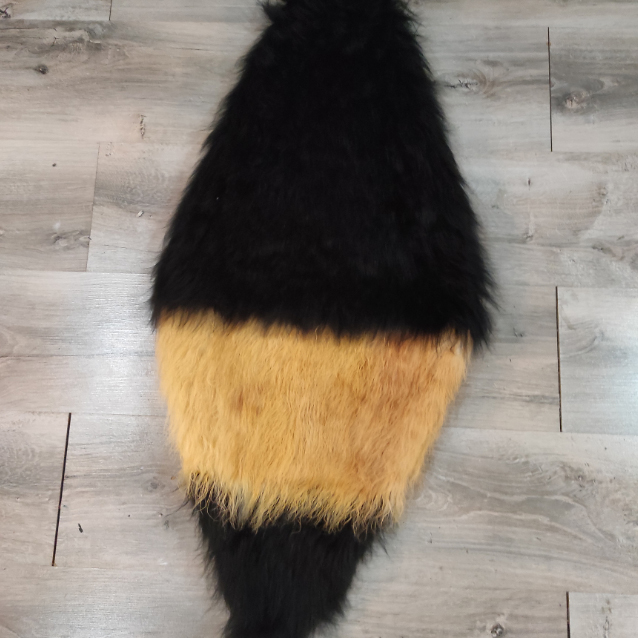

I then add a lot, A LOT of padding and then place an old belt at the end of my tail before closing the fabric around. A few hand stitches (to allow me to reopen the tail in case I need to remove/add some padding) and tadaa! ♥
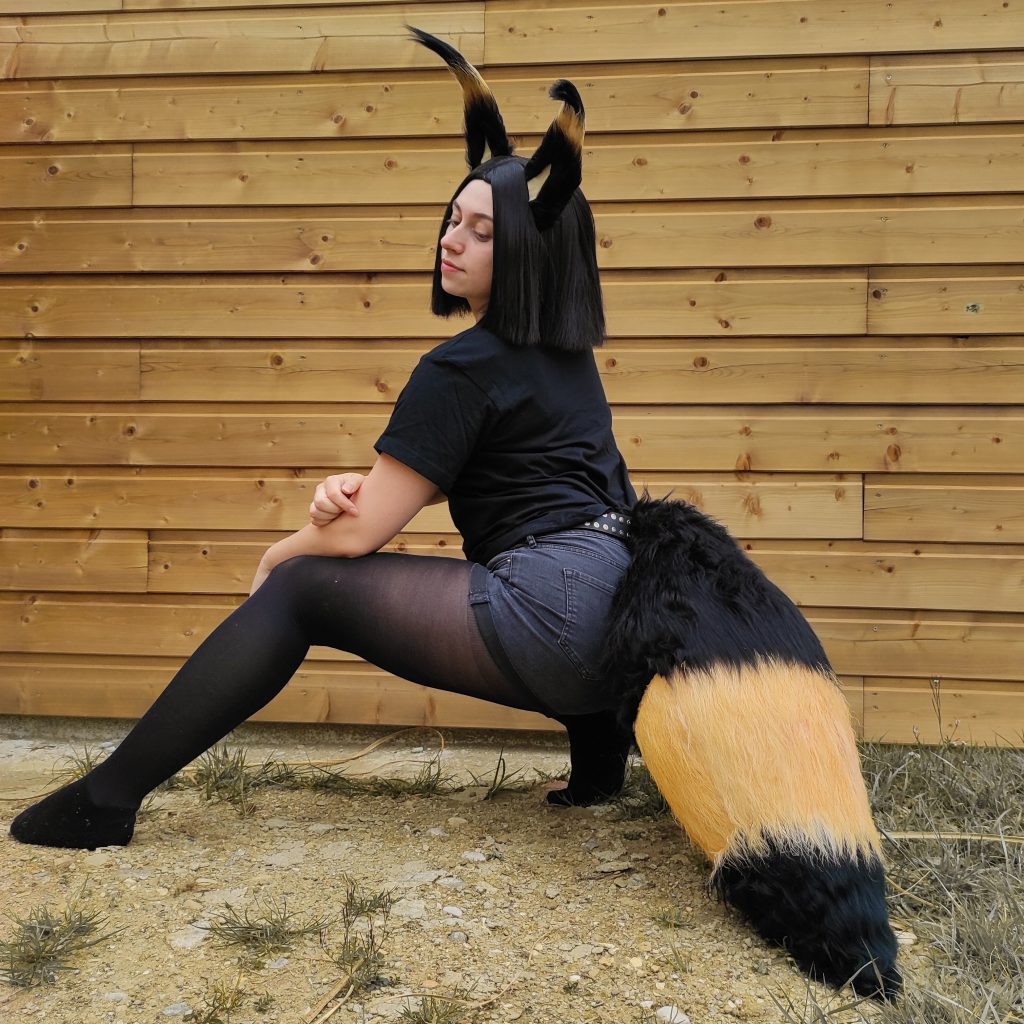
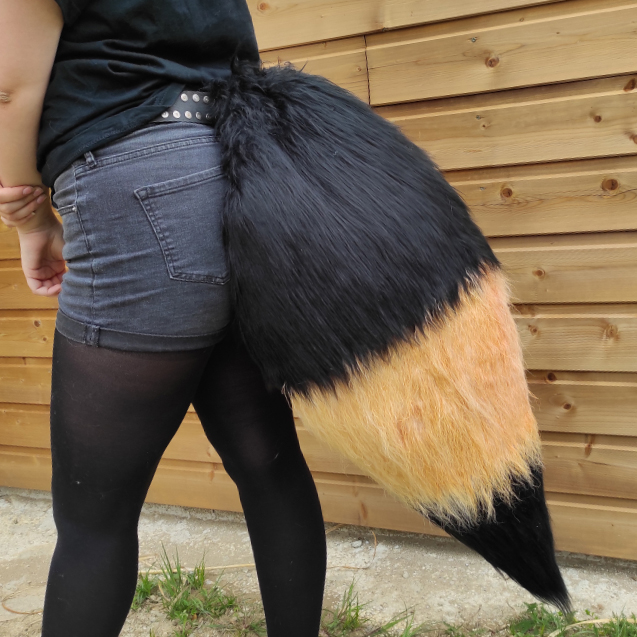
Here is the result once the set is worn! ♥
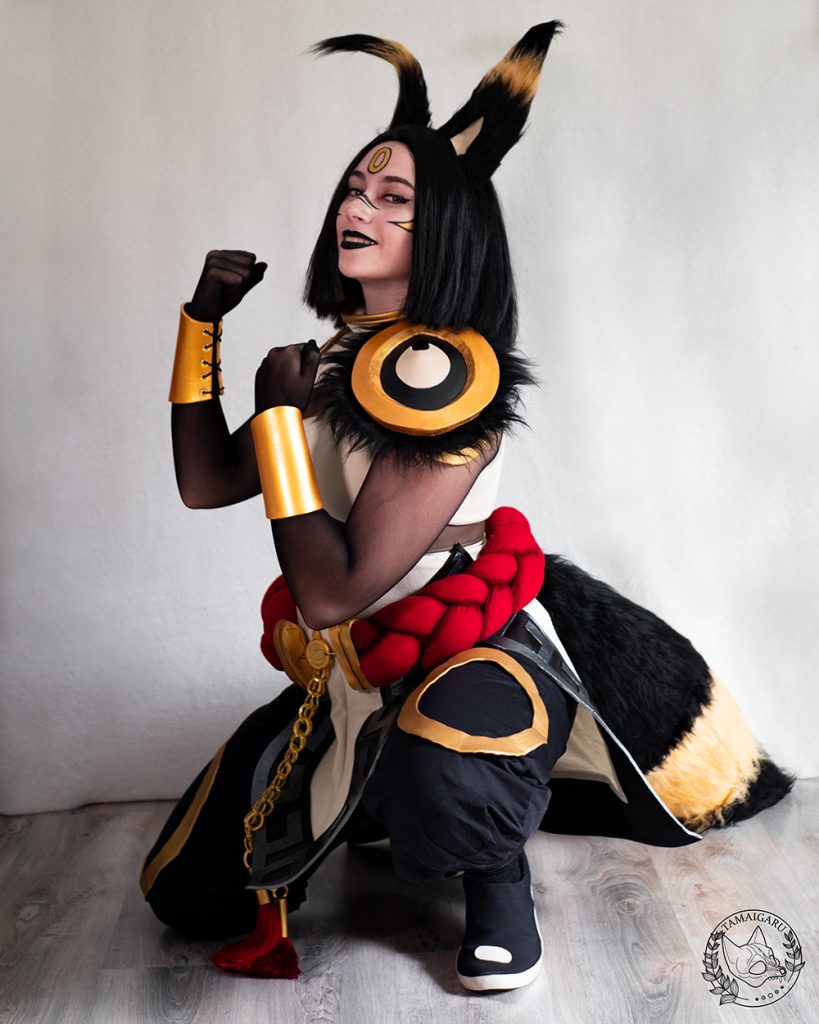
4 • The belt
I now come to the part that I found the most interesting to create: the belt!
Unique and imposing, this belt is an element that stands out a lot on the costume. So I had to make it as beautiful as possible! ♥
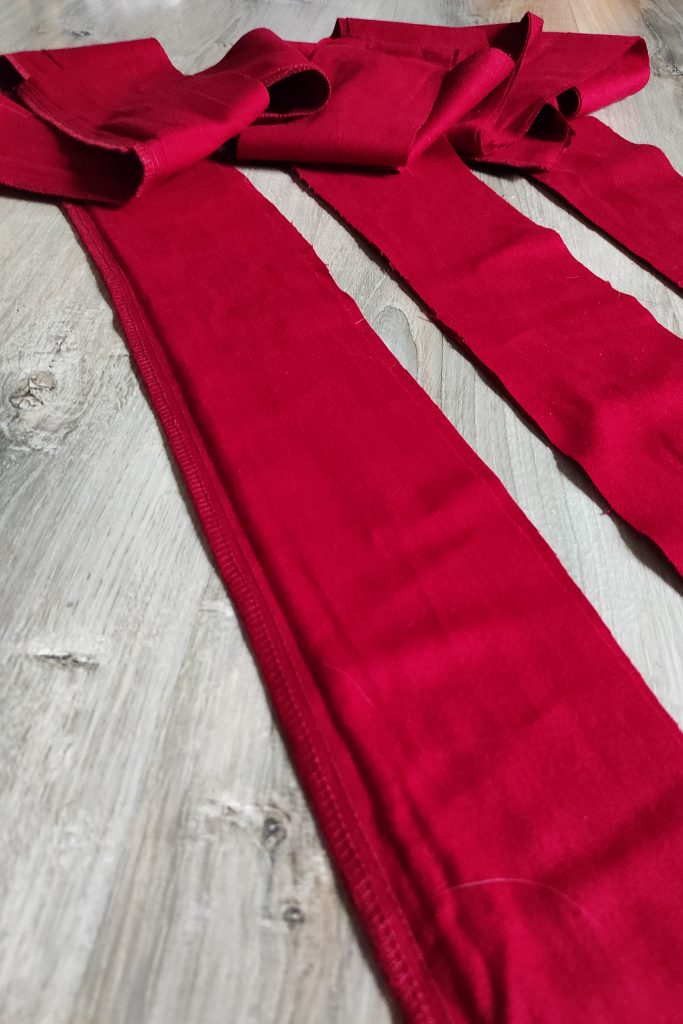
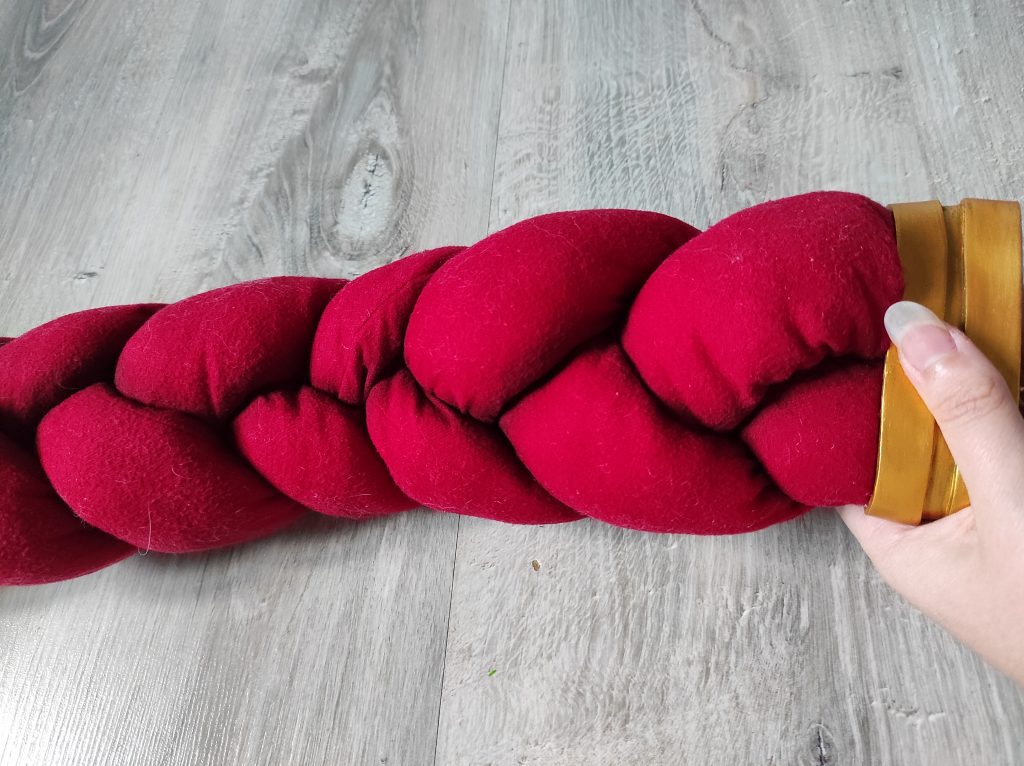
To get this beautiful puffy effect, I immediately thought of creating a braid with long strands of fabric. I also had everything I needed in stock: a beautiful deep red fabric that would go perfectly!
So I am embarking on the creation of these long sausages:
Only a few measurements concerning the thickness of my fabric strips were necessary. For the length, I’m just giving myself a good margin since I don’t know how much the braiding will reduce this measurement when finished!
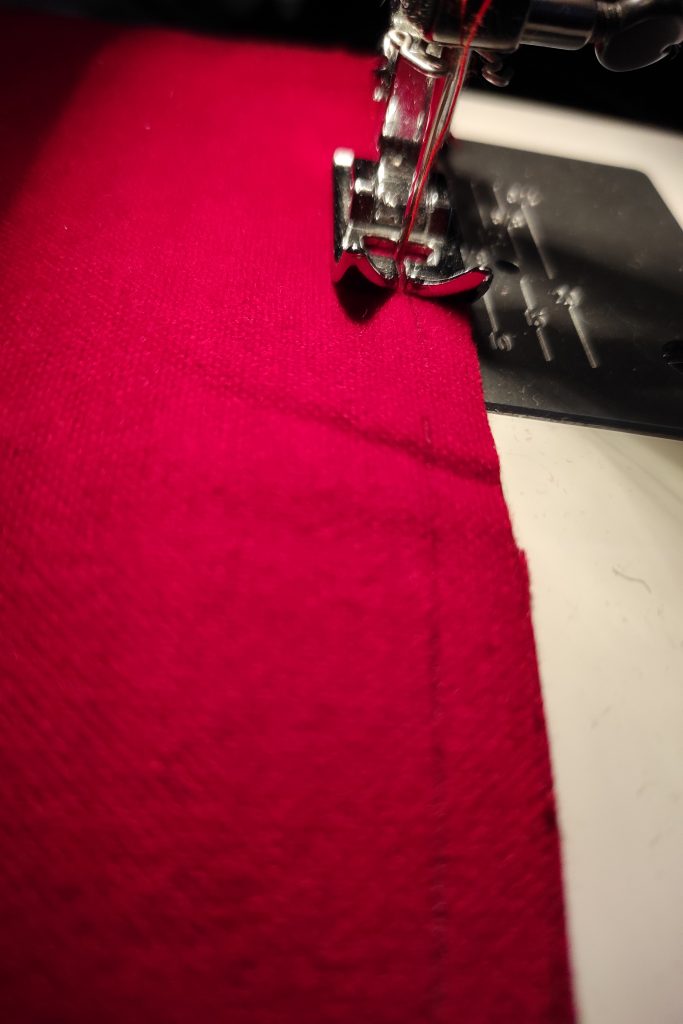
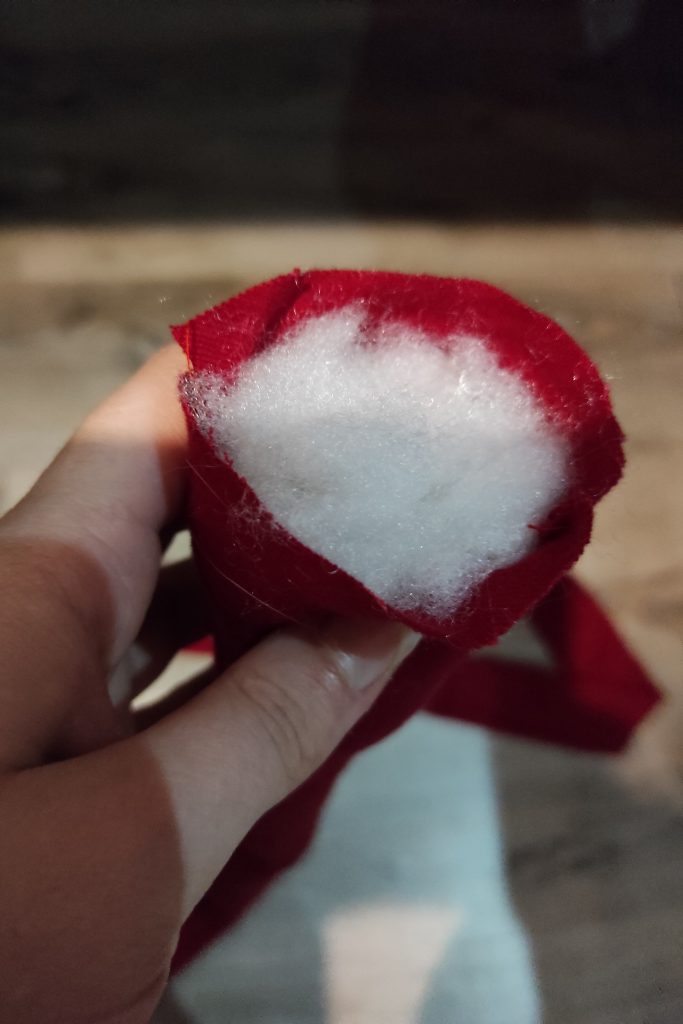
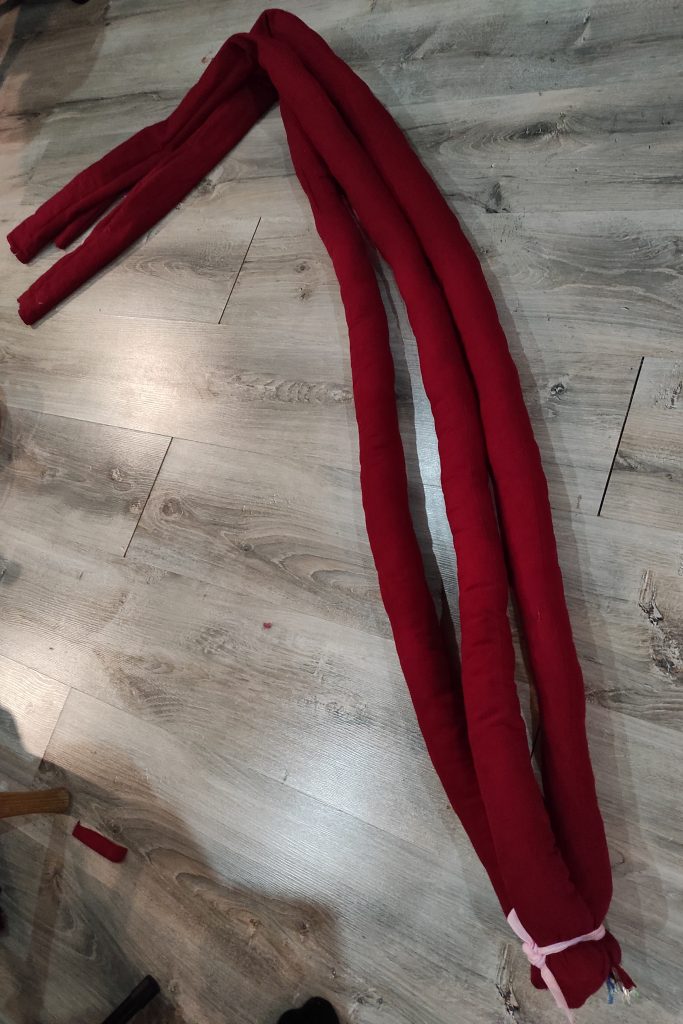
Once the bands are sewn, I turn each of them over and then pass them through the iron (this will prevent me from having additional folds at the end)! I then move on to the padding (a long step.. very long! 😆) and once again use Colas Normand‘s Cushion & Pillow Filling Fiber.
Now is the time to give shape to this belt!
I start by tightening the base of the three strands together to help it a cord to prevent everything from coming off once the braid has been made.
I then gradually braid my sausages, taking the time to hide the seams as much as possible in the braiding (The result will be much more aesthetic!).
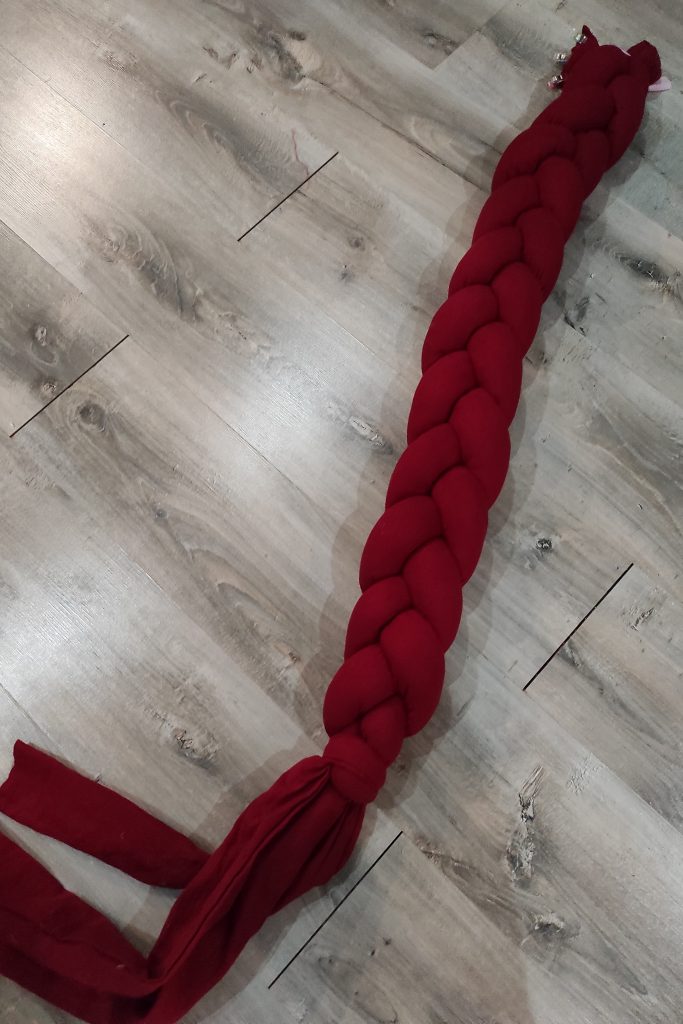
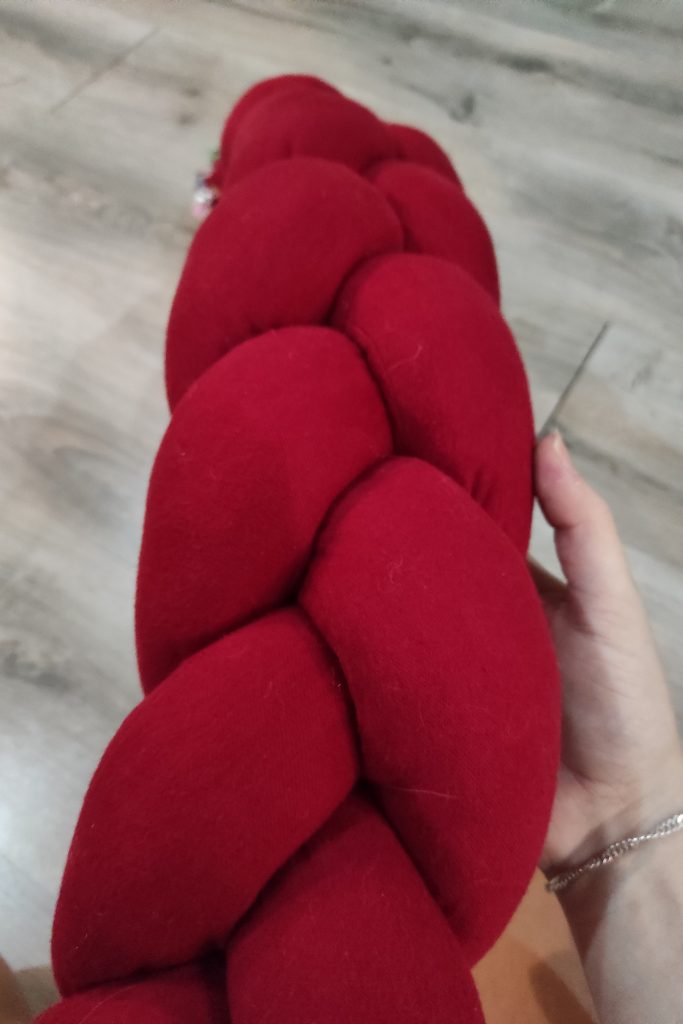
To see how far I have to stop, I take the time to try on the belt little by little. Once the braid is long enough, I simply sew each end to close it all! ♥
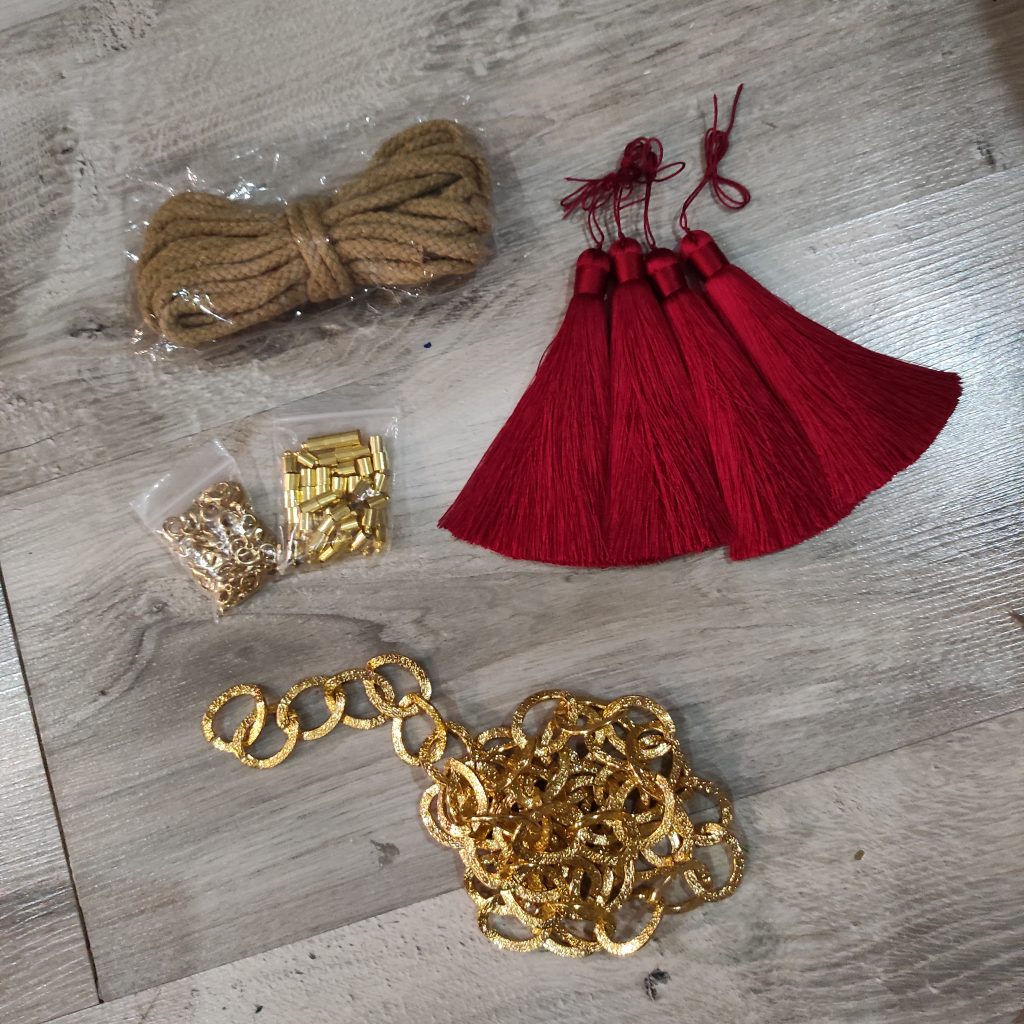
For the belt accessories, I bought a beautiful golden decorative chain, silk tassels and jewelry hooks, all on Aliexpress! ♥
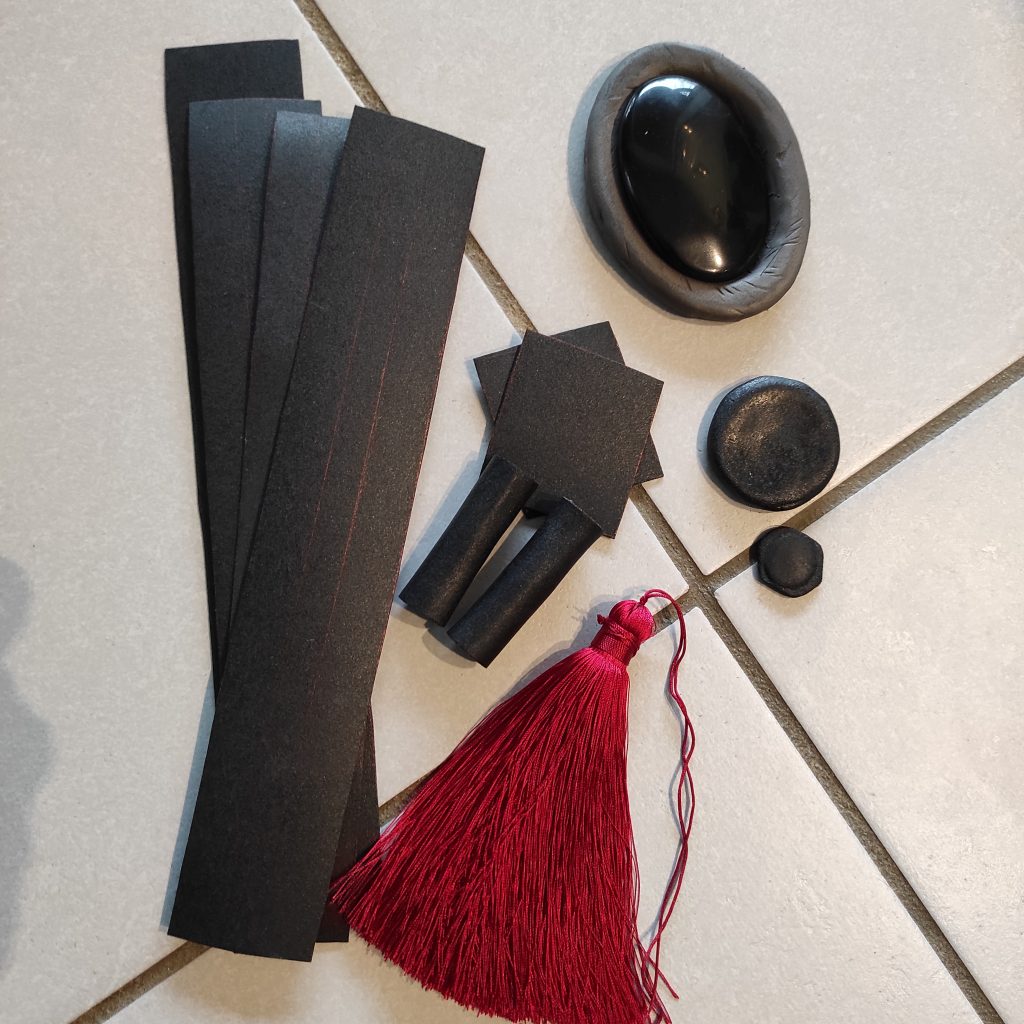
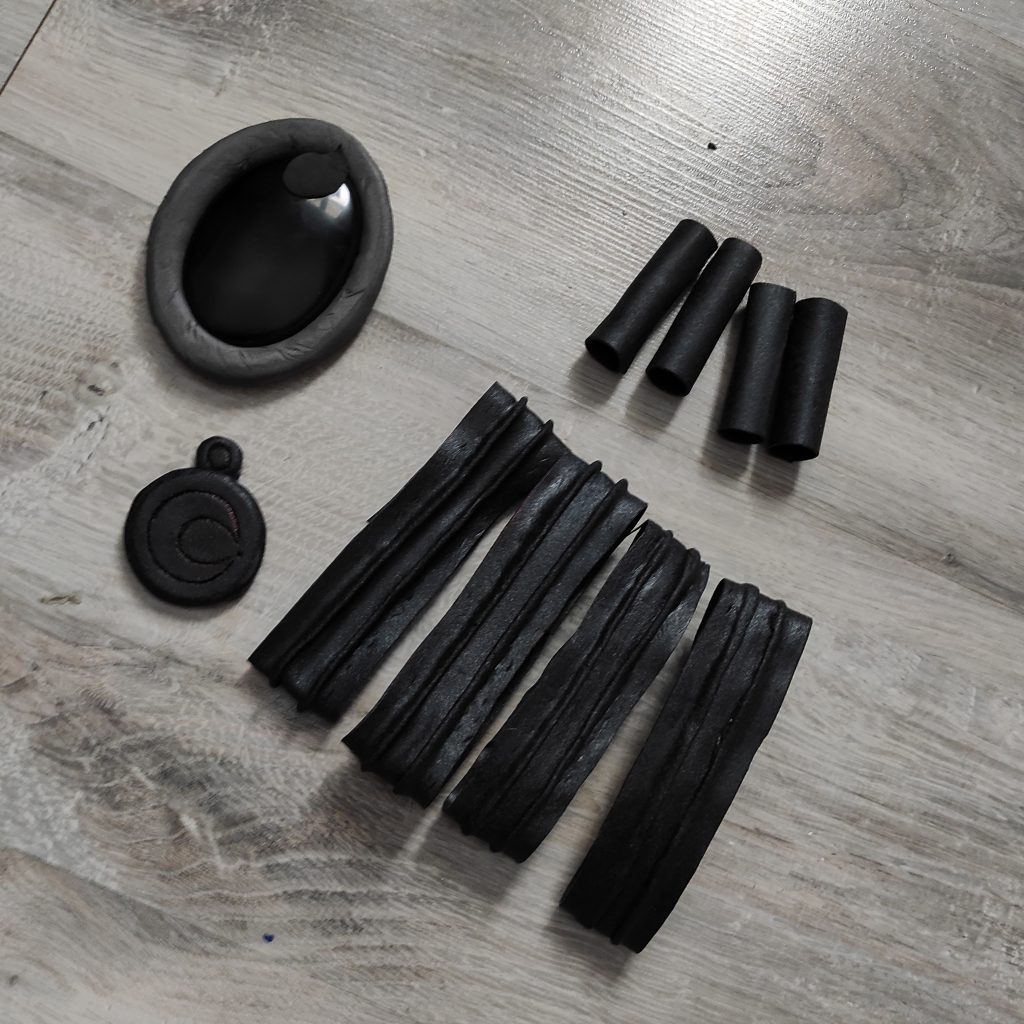
For the remaining parts of the belt, I create a base in Worbla (a thermoplastic that forms at will under the effect of heat!) That I will attach to the belt later.
For the assembly of the chain, I start by painting my Worbla cylinders in gold. I then thread them around the silk tassels and then tie everything at the end of the chains using the small cord already present.
To camouflage everything, I plug the top of the cylinders with foam clay (it’s like EVA foam, but in a clay form that dries in the air!). Once dry, I simply paint it the same color as the cylinders! ♥ (Unfortunately I didn’t take any pictures at the time, sorry!)
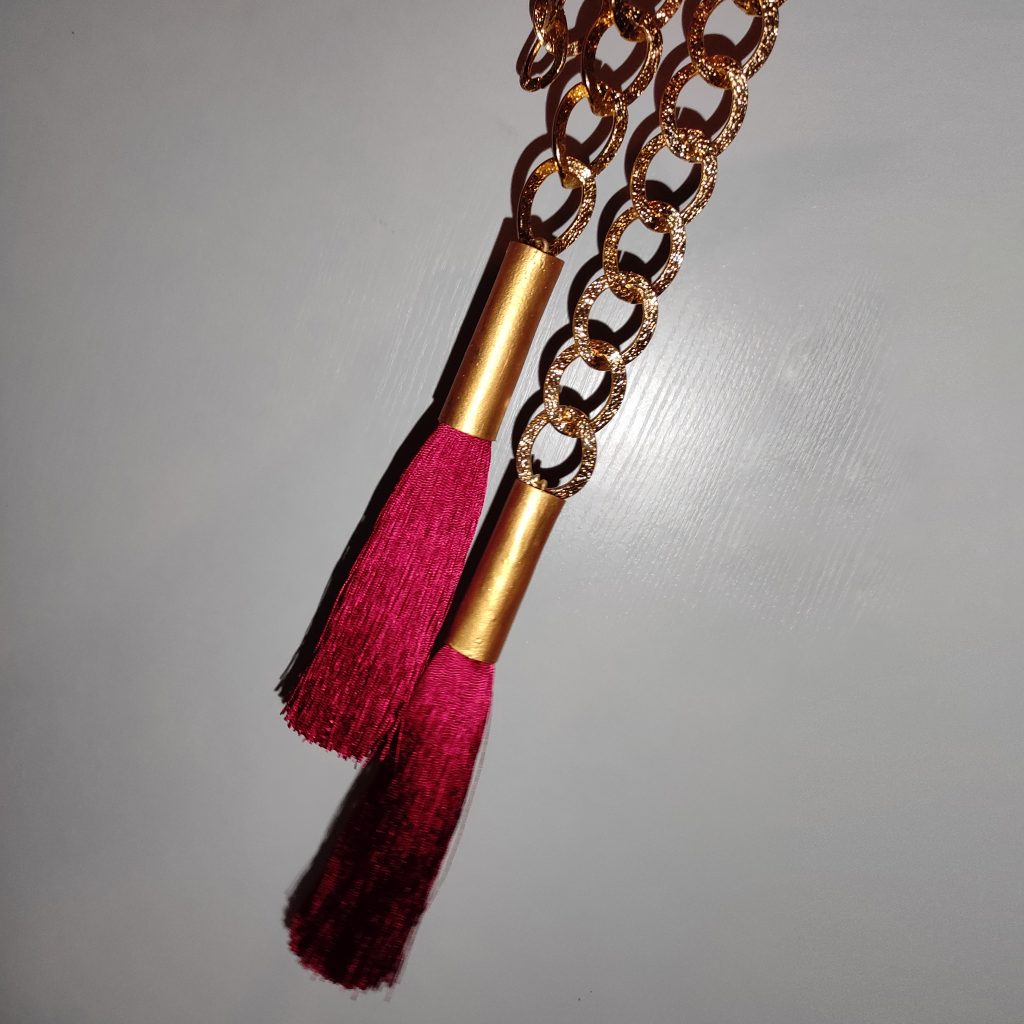
For this whole project, I used the Iridescent rich gold paint (n ° 837350) from Pébéo. For having tested several golden paints, this one is the best I have been able to use! It is quite covering and very pigmented: a real pleasure to work. ♥
You can find it right here!
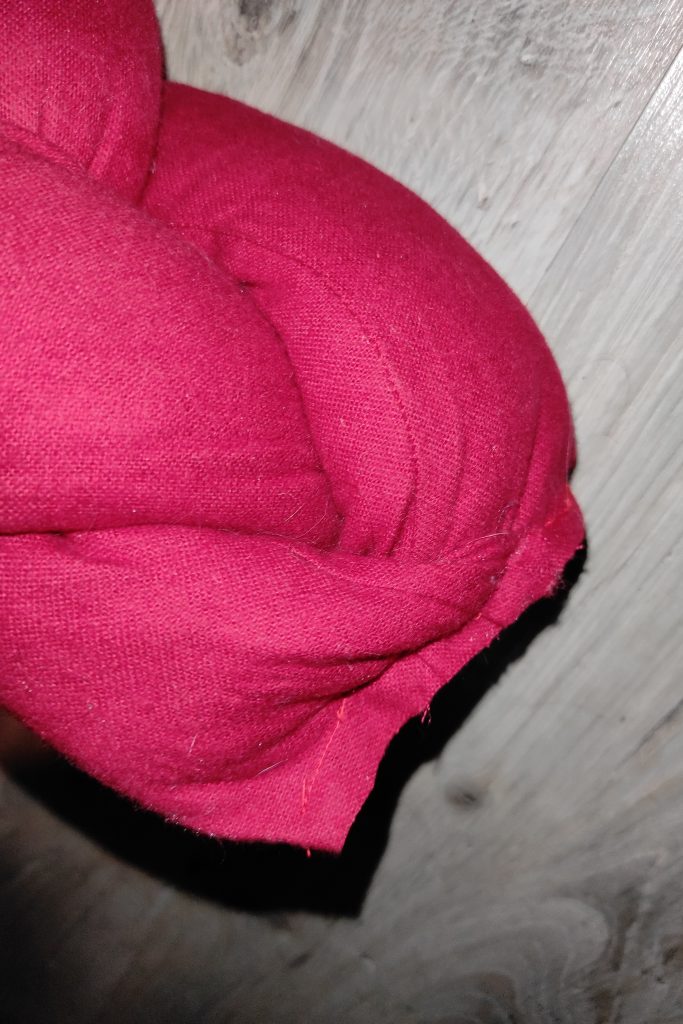
Let’s move on to the belt clip. Initially, I wanted to use only my parts of Worbla: for fixing but also for decoration. So I heat my pieces and glue them to my fabric. Result: it was a very bad idea (check out the photo below! 😂).
I choose to stick a layer of 2mm EVA foam on top for a cleaner decoration! (I still keep the Worbla part below: it is this that will maintain everything thanks to its solidity.)
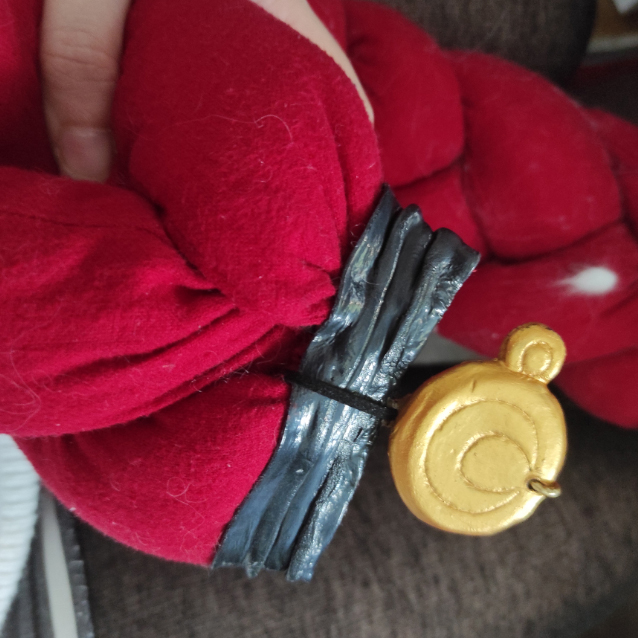
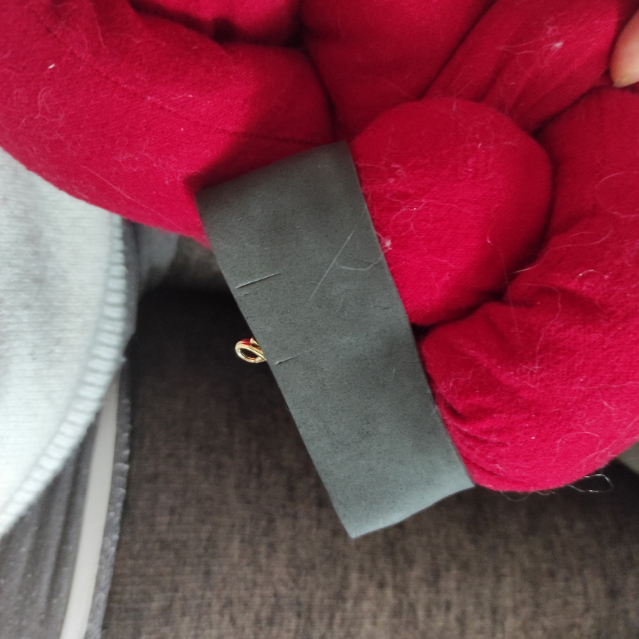
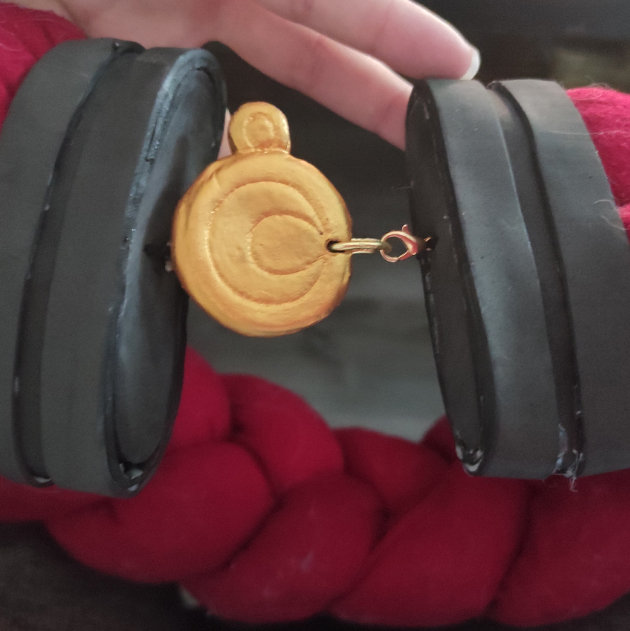
The belt closes with a small hook that hangs around the central piece. It’s quite discreet and very practical!
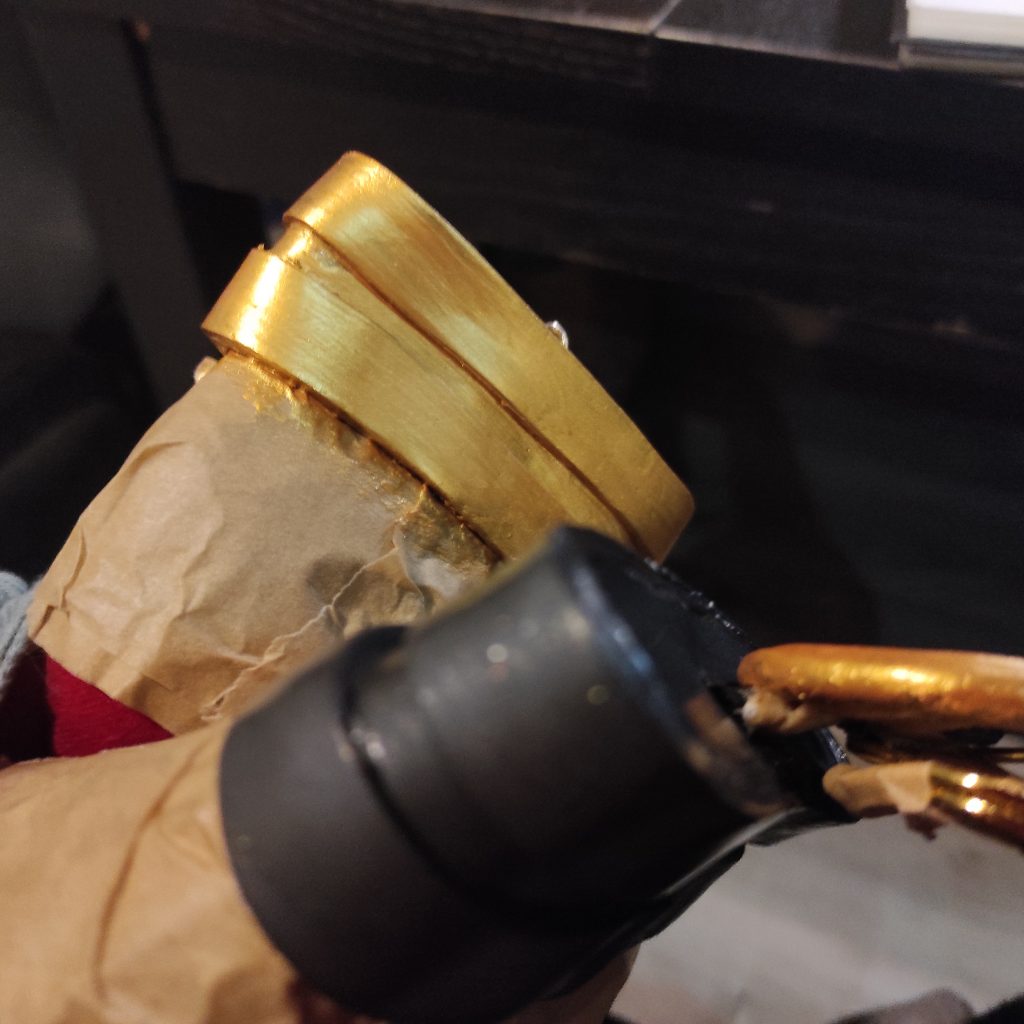
Once all the details have been added, I protect the fabric part by rolling it up with masking tape (so as not to damage my fabric when removing it!). I then add a layer of wood glue as a primer on the foam pieces, then add the gold paint.
Once the parts are painted, I fix the chain at the back of the central part using a piece of well-warmed Worbla. That’s it, everything is ready for the final!
To finish this belt, I add some shading to give it more dimension! ♥
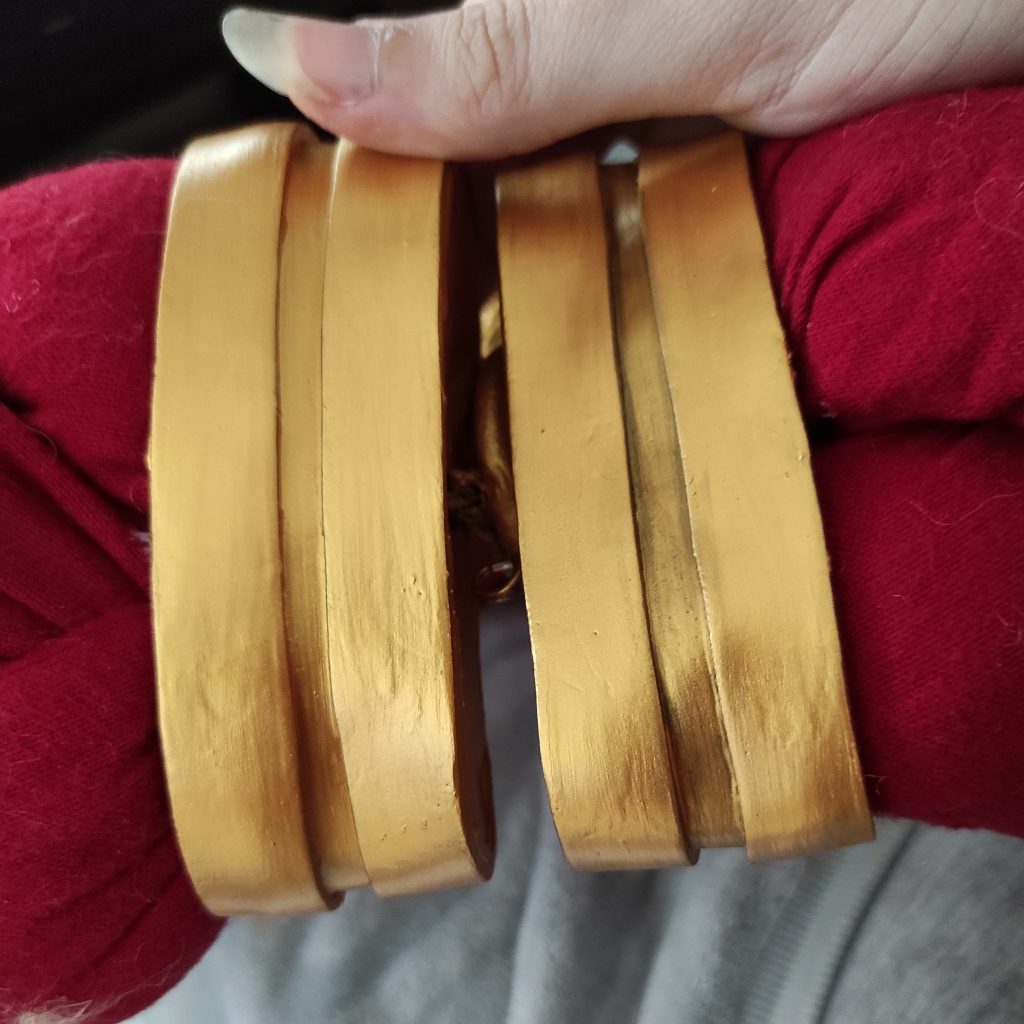
On the golden parts, I add a little black in the corners of each part.
On the fabric part, I choose to use a method discovered at Chimeral Cosplayart: Shading on fabrics with an airbrush! To keep it simple, I use an airbrush to apply darker paint where creases are already forming. For my belt, I put some between each fold of my braid!
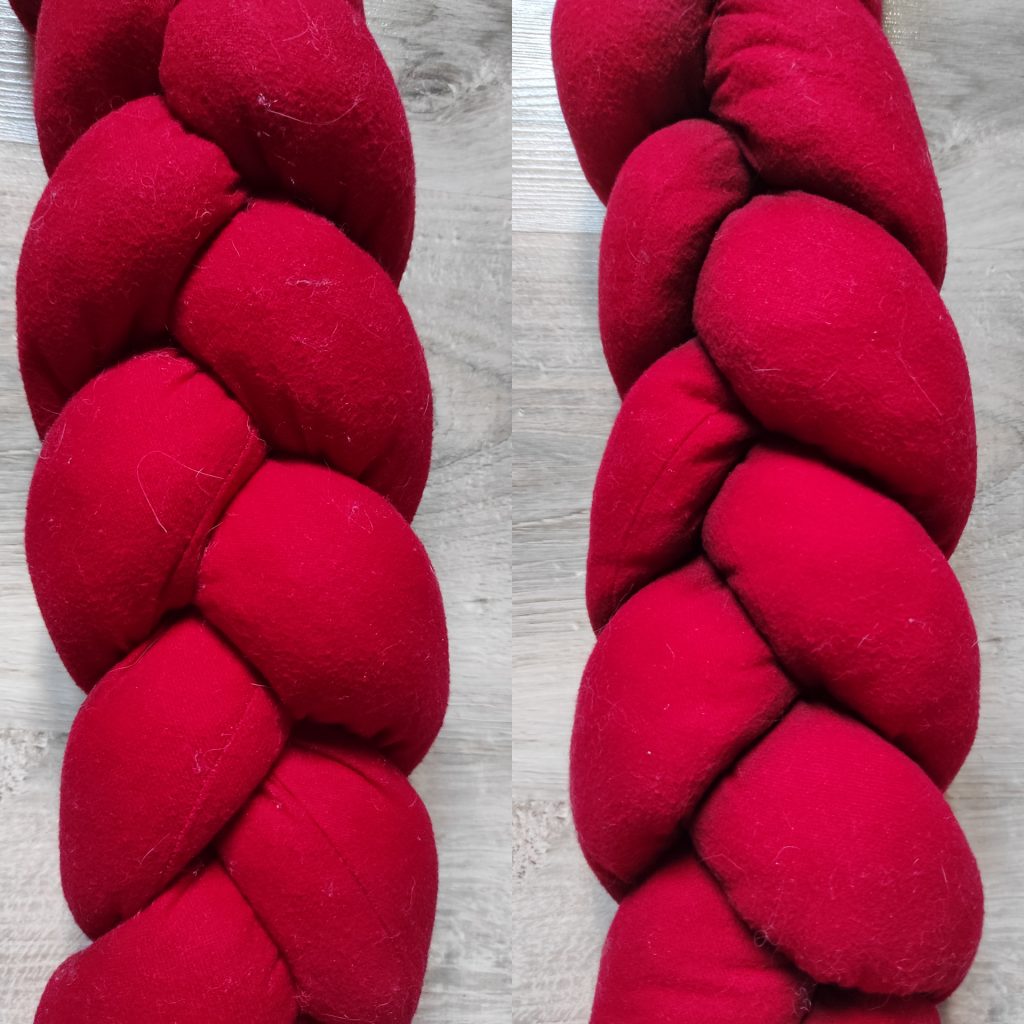
PAINTING TIP: If you want to bring out the details or give more dimension to a garment, you can do it with the help of an airbrush! Simply fill in your airbrush with the color you want, remembering to make it much darker than your fabric. Then gently deposit paint on your fabric until you get a result that you are satisfied with (you can do this on folds, on a flat part to add false folds but also on seams to mark them!). This method will allow you to bring out a lot more details in your photos, a real plus to show all the work you have provided! ♥

And this is the final result ! A super soft belt that stands out really well in the photos. ♥
It’s the accessory I’m most proud of on this whole project, it’s a real pleasure to see that it looks so good!
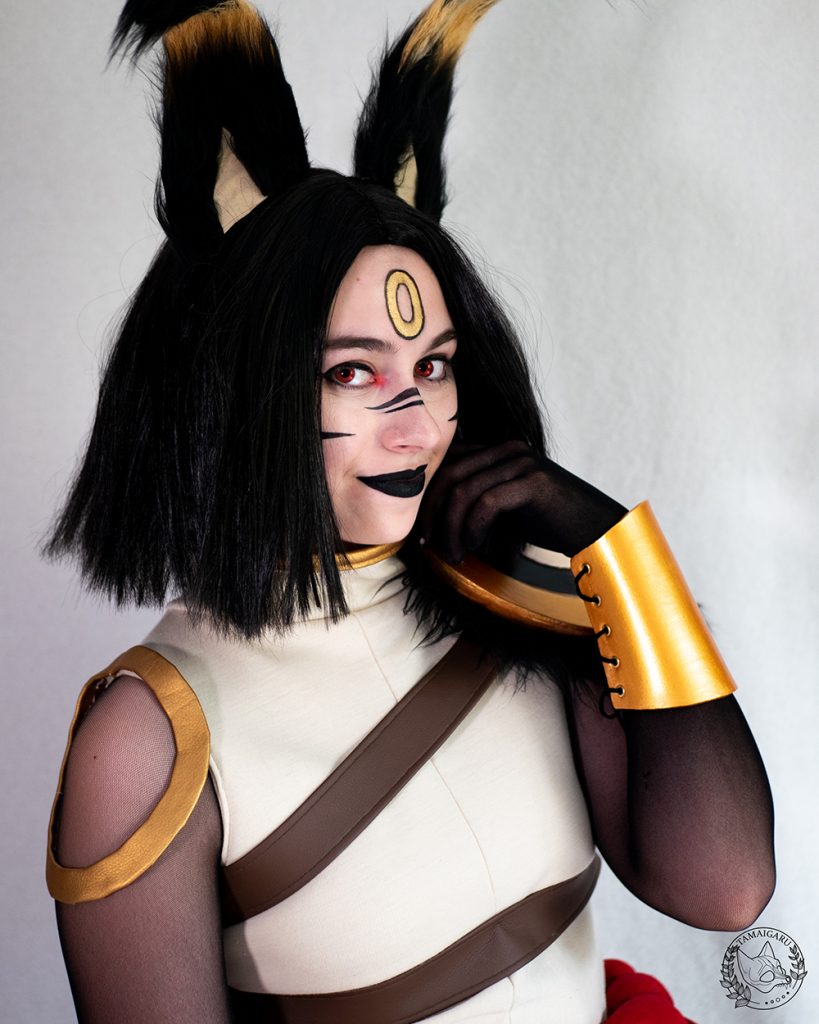
5 • The armor
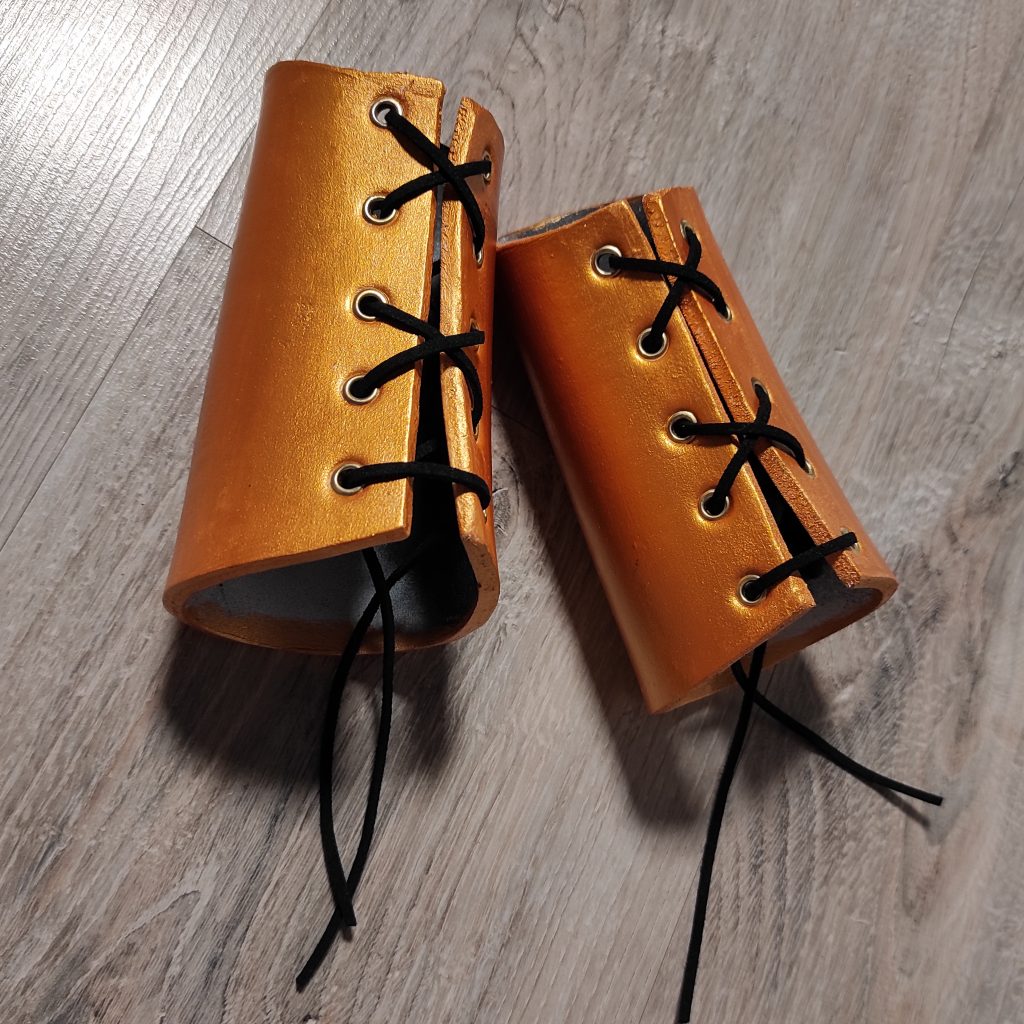
For the armor on the shoulder as well as the golden armbands, I chose to use 5mm thick EVA foam this time. Stronger and more rigid, this thickness is perfect for this kind of accessories! ♥
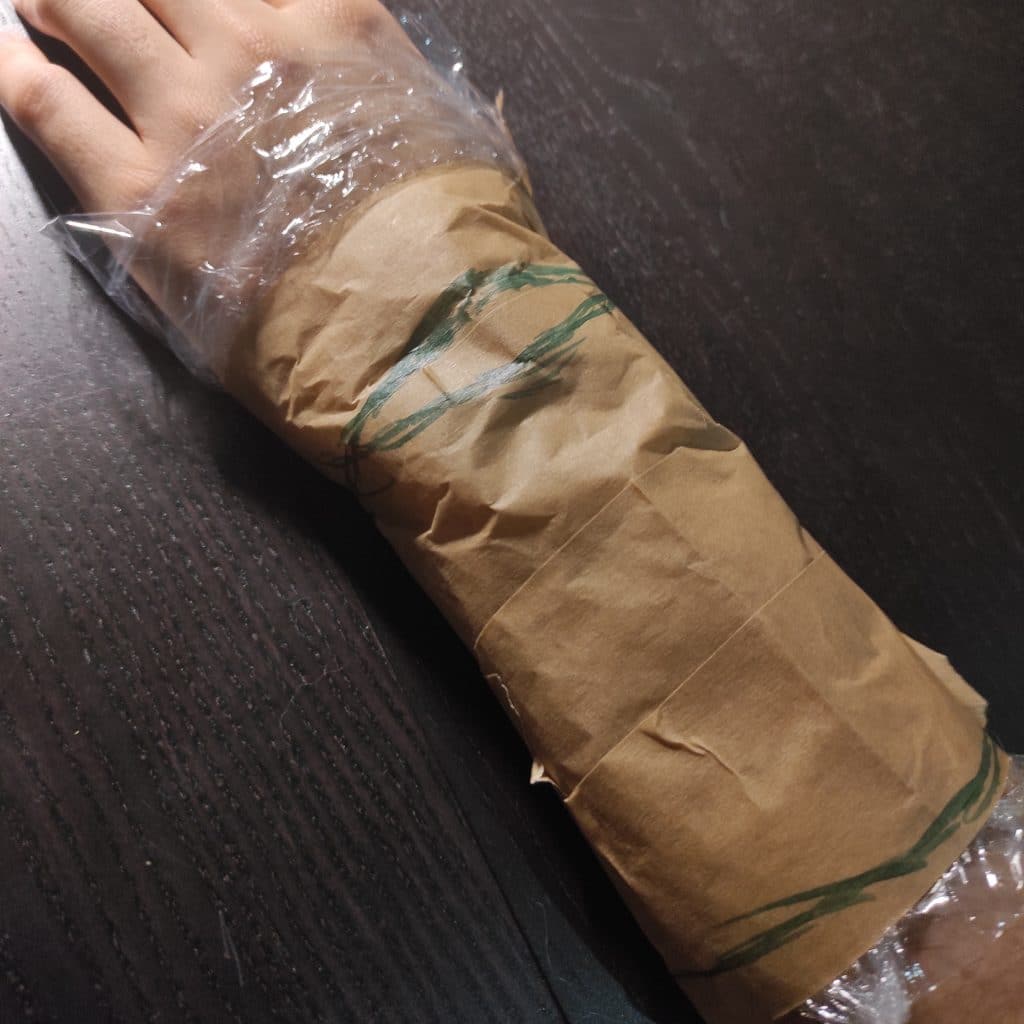
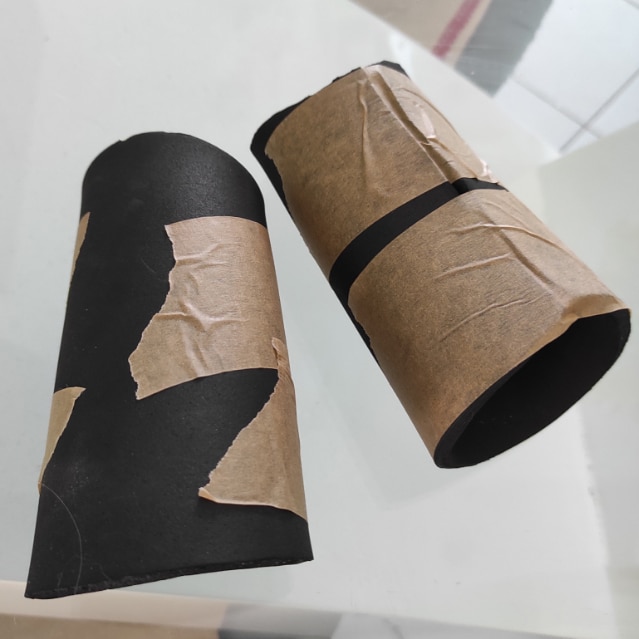
To get a pattern the size of my wrist, I roll it up in cellophane and then cover everything with paper tape (Laminated tape also works, but not all markers work on it!). I then draw the shape I want for my cuff, then a straight line where my opening will be. I then cut everything out and trace the pattern cleanly on a sheet of paper!
I then cut my two armbands in the foam and then pass them through a heat gun to form the material! (the foam can be formed with the help of heat, this allows here for example to make it keep the rounded shape of the wrist! If you do not have a heat gun, a hair dryer will also do the trick but it it will take you longer to heat your material. ♥)
To attach these armbands, I chose to create a lacing with a pretty black suede cord! So I drill the holes before underlaying and painting the cuffs, so as not to crack the paint once it is dry.
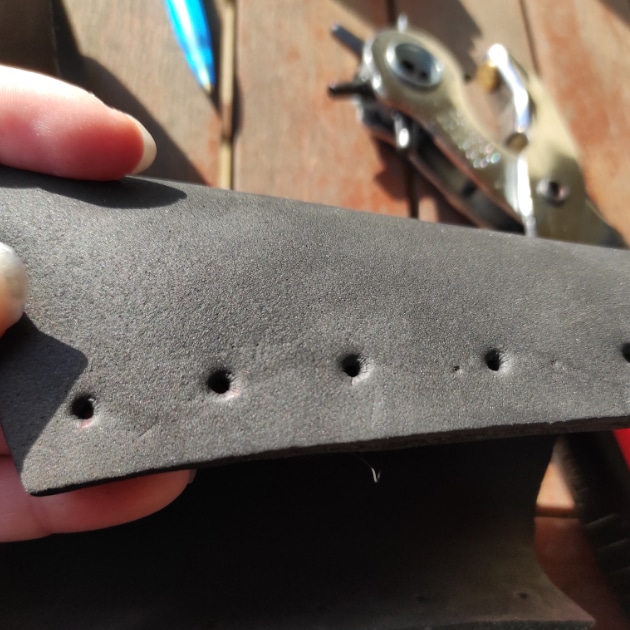
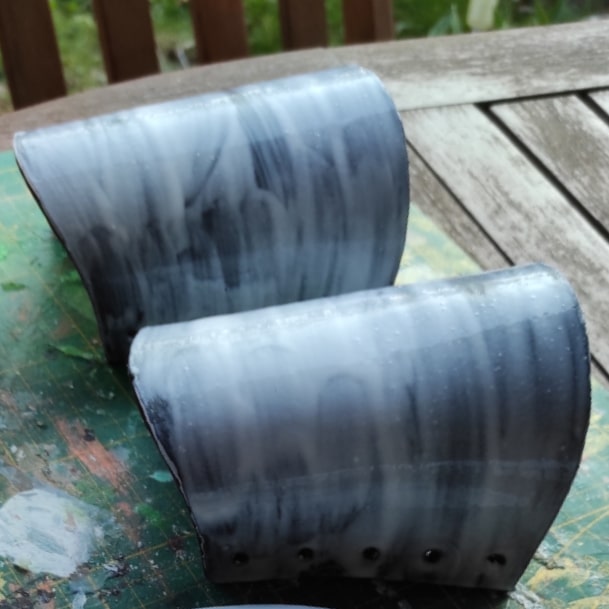
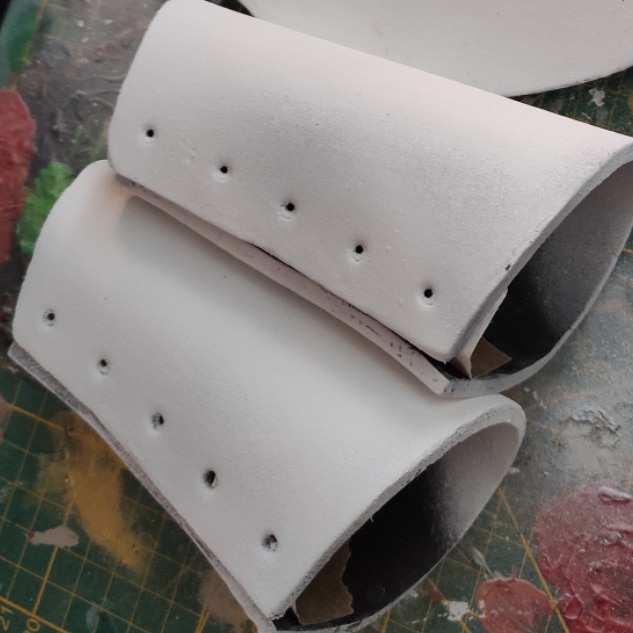

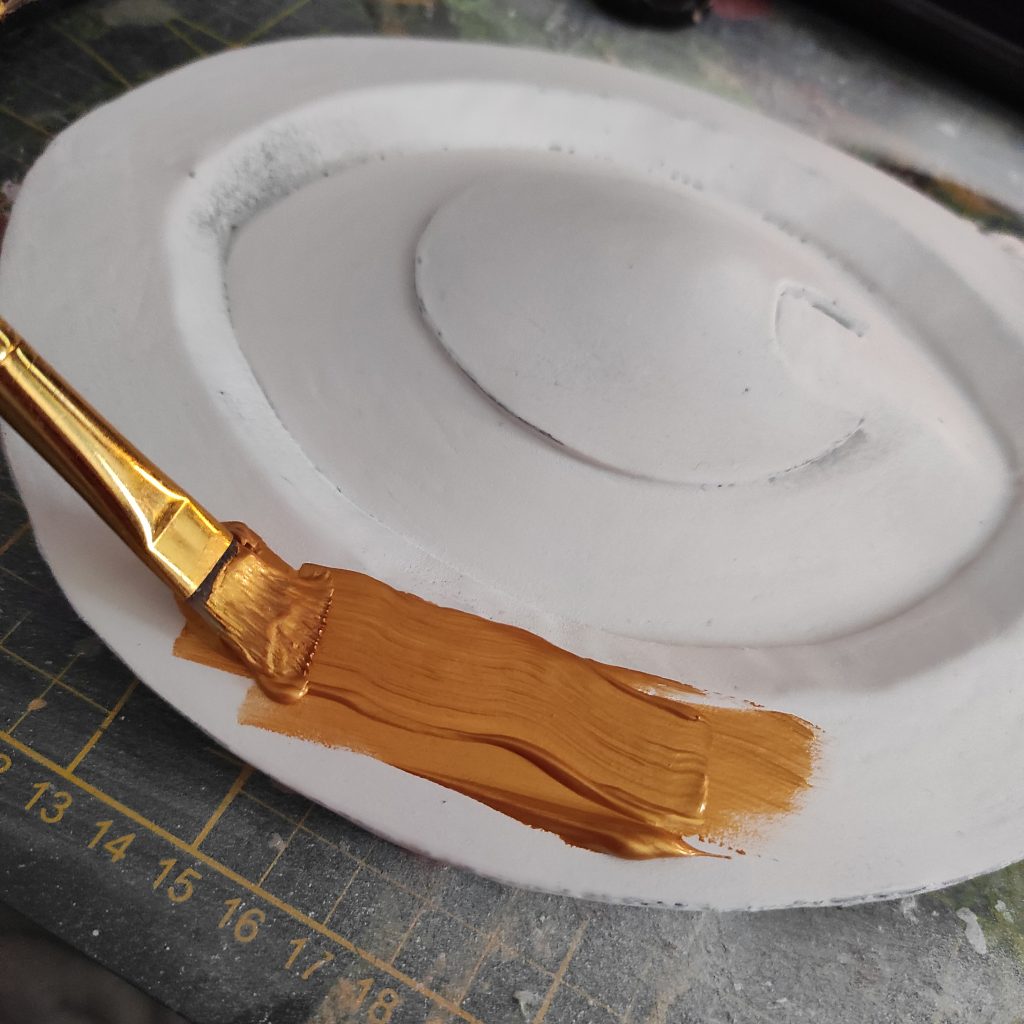
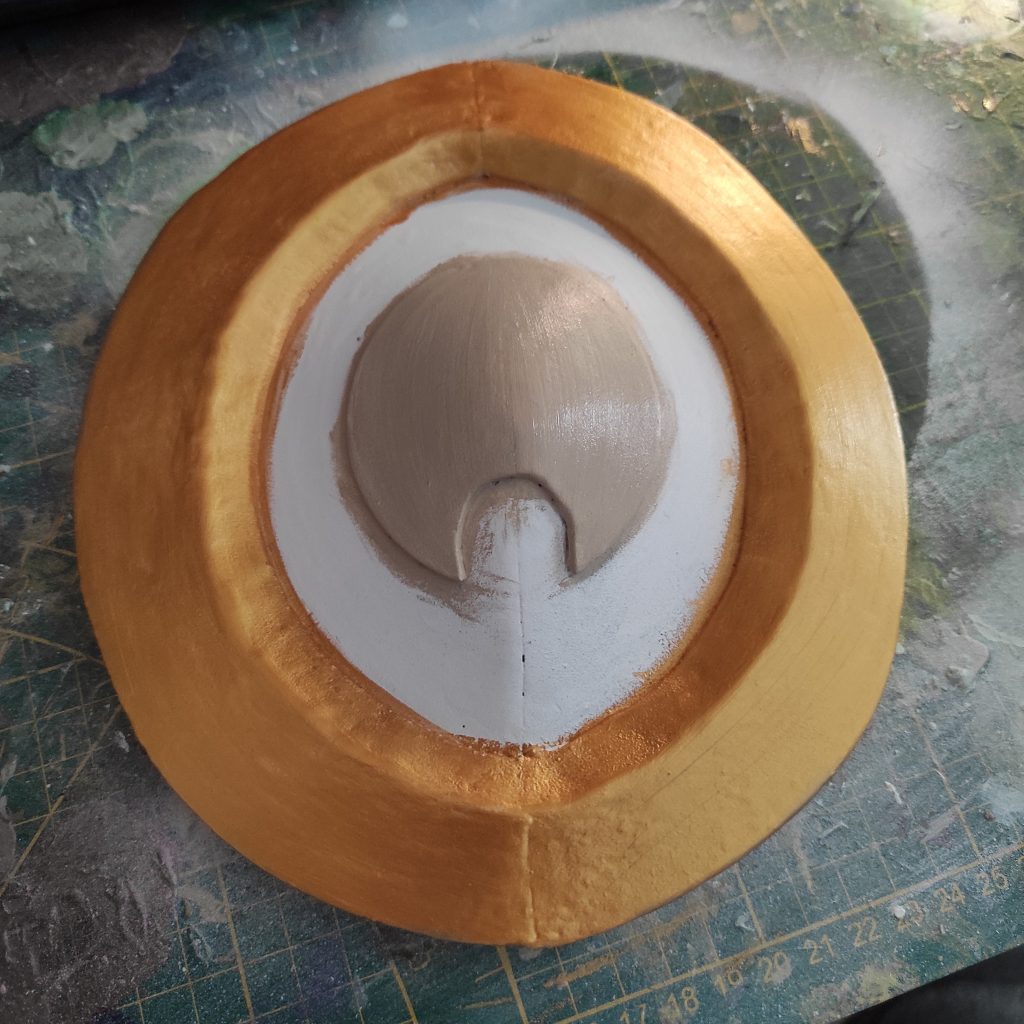
Once the holes are made, a light coat of wood glue (or an elastic primer such as Plasti Dip or Flexbond!) Is sufficient. A small coat of white spray paint (always the one from Action!) And everything is ready for color. For the gold, I once again use the paint from Pébéo!
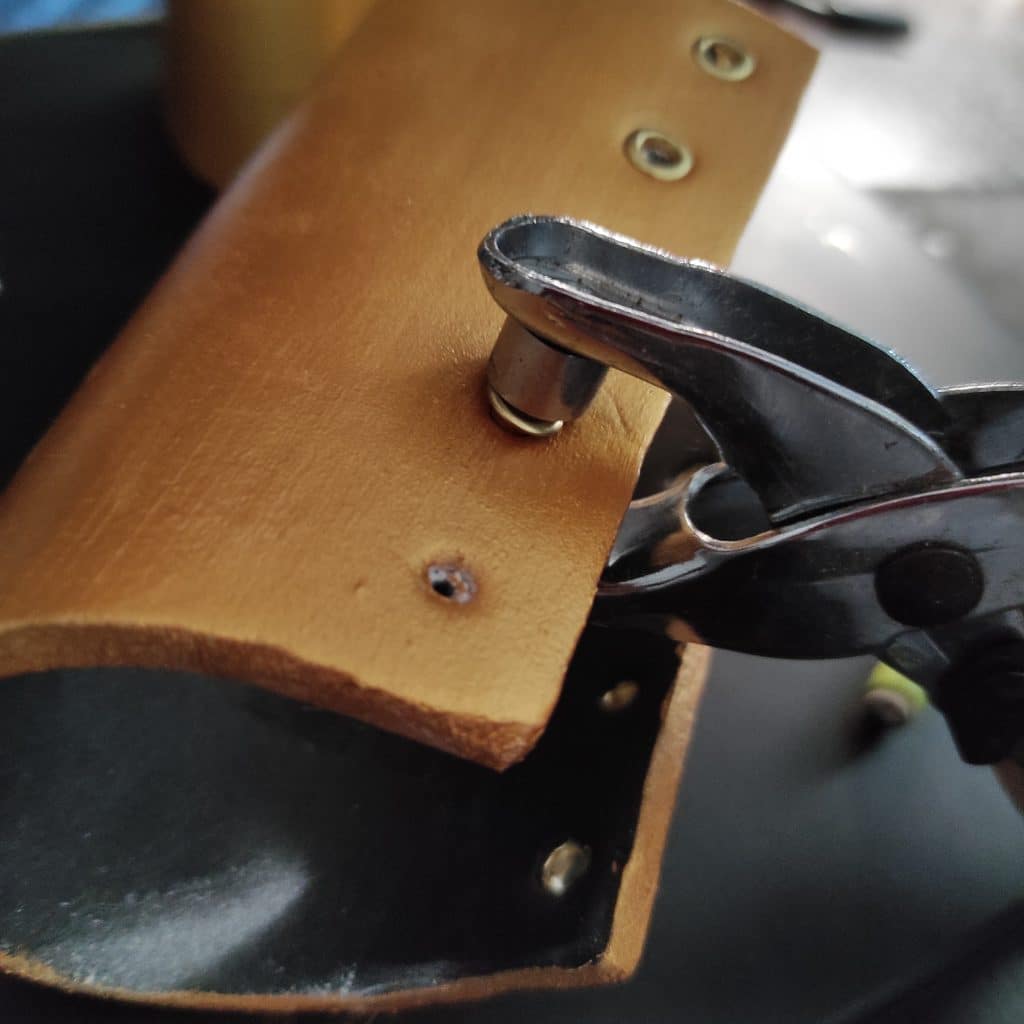
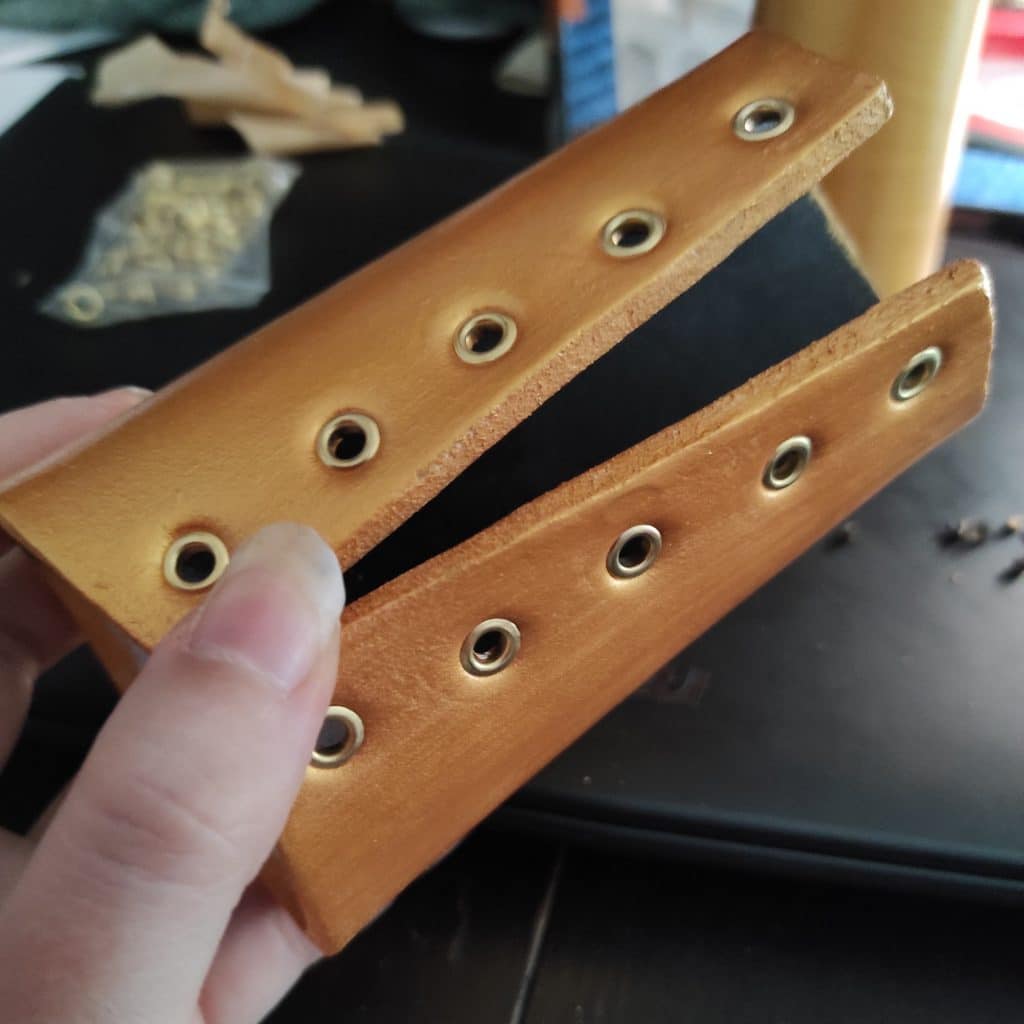
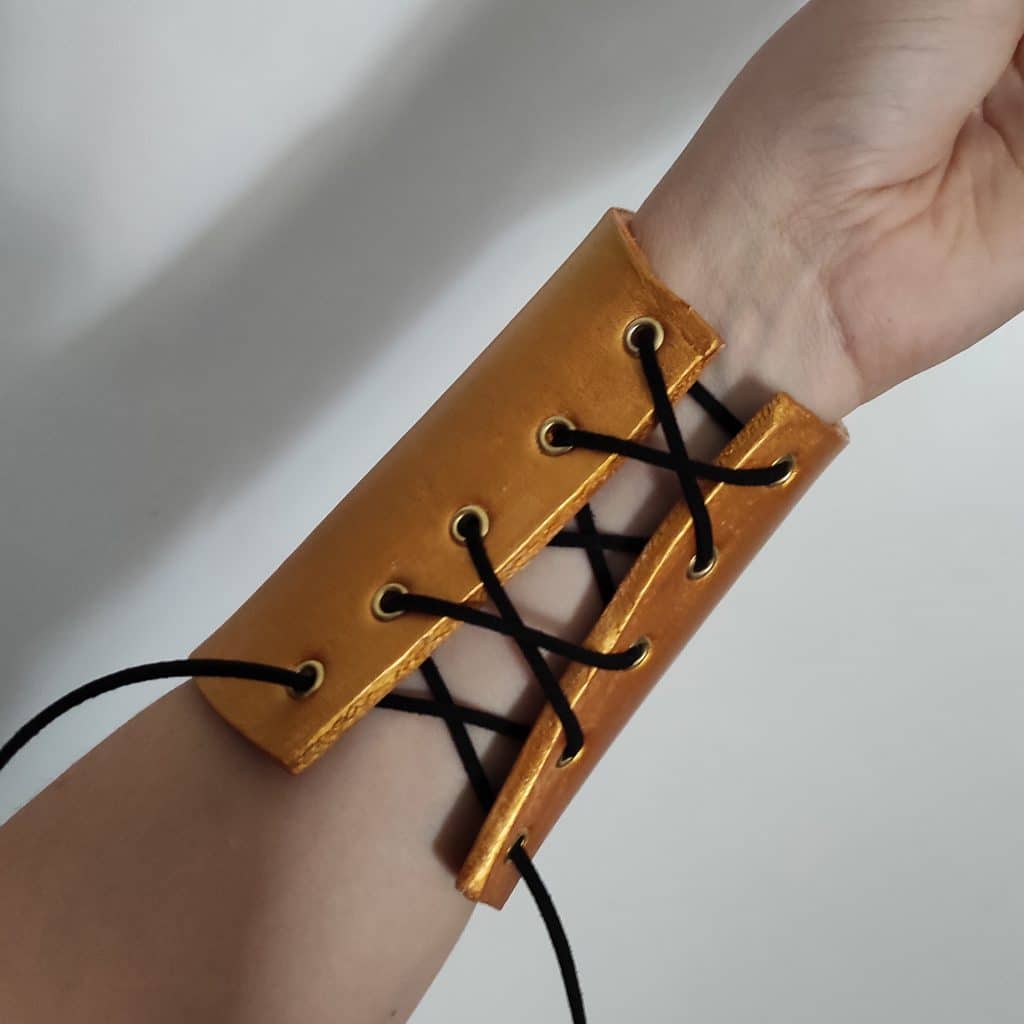
To reinforce the lacing holes and make them more aesthetic, I add golden eyelets. To fix them, I simply use an eyelet pliers which does its job very well!
I then add my lacing and.. Tadaa! ♥
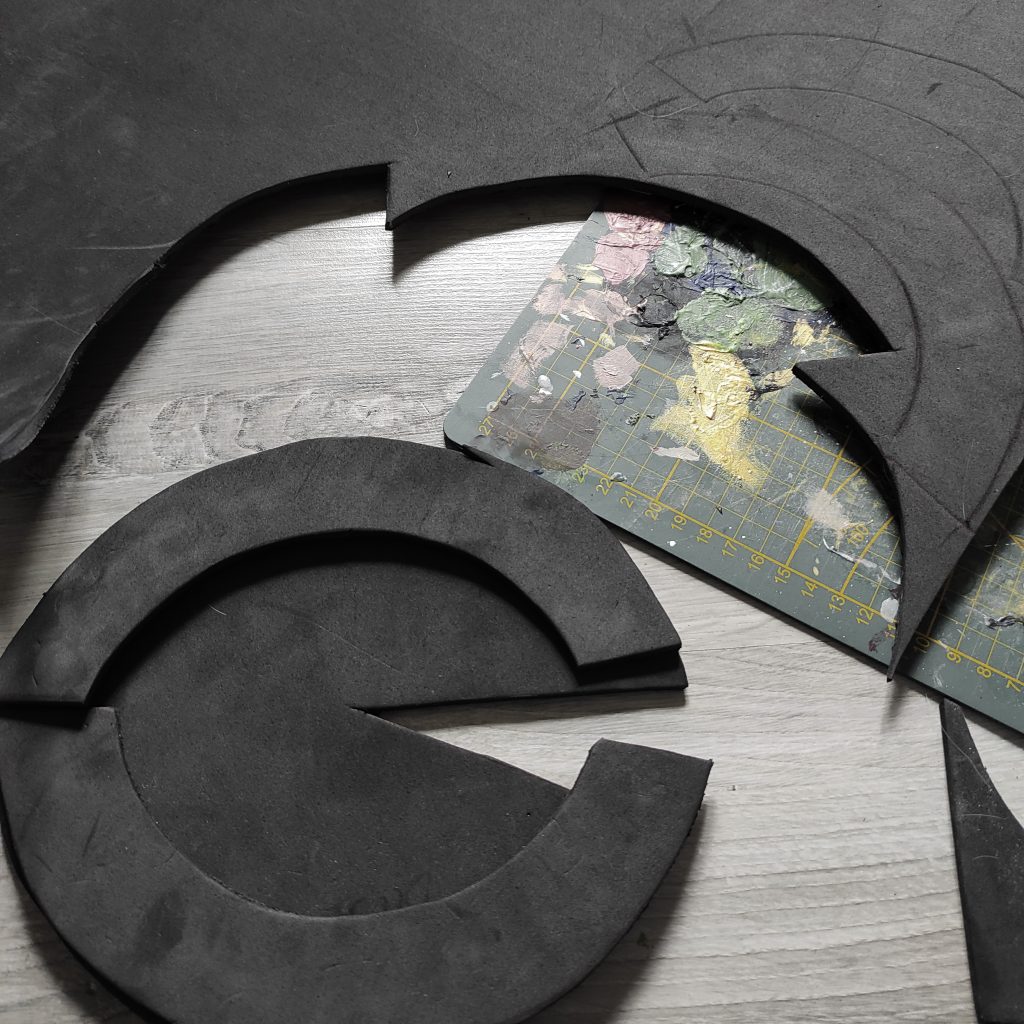
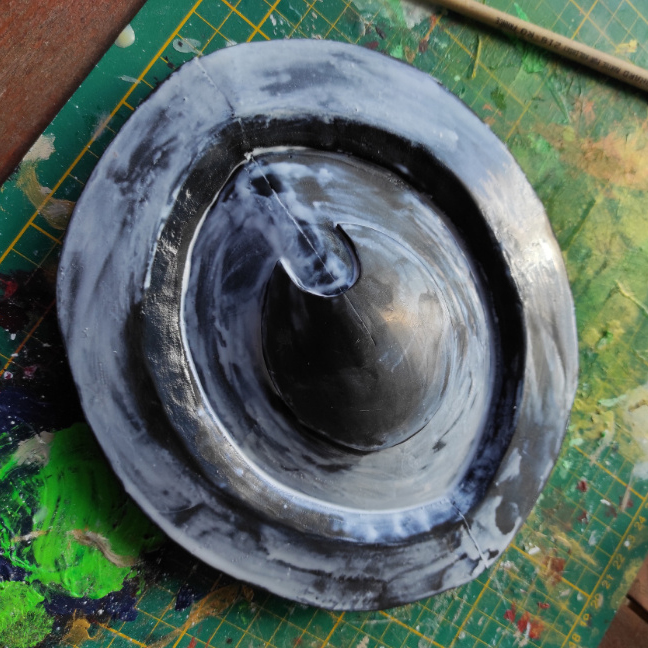
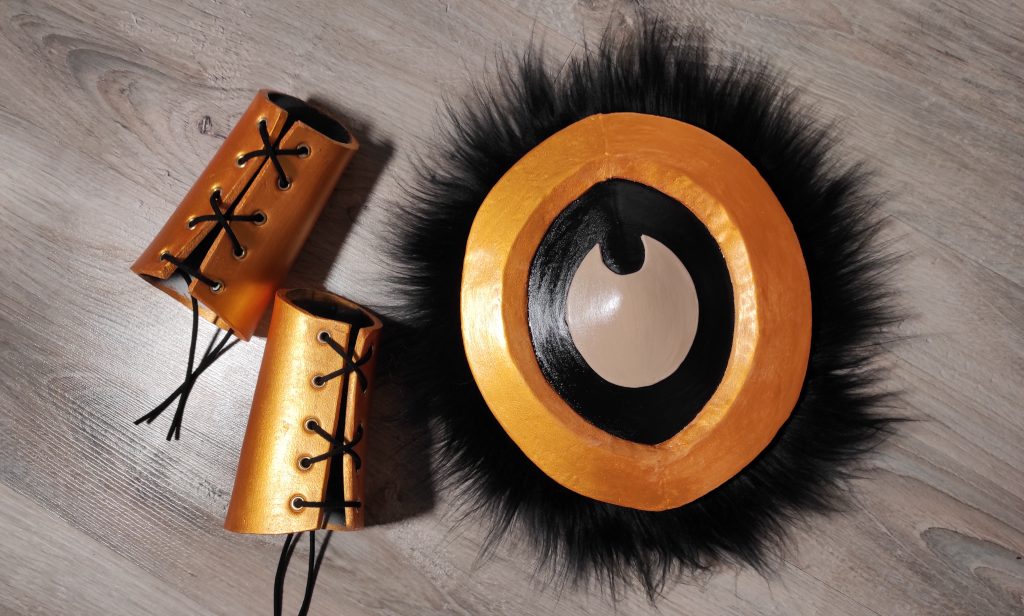
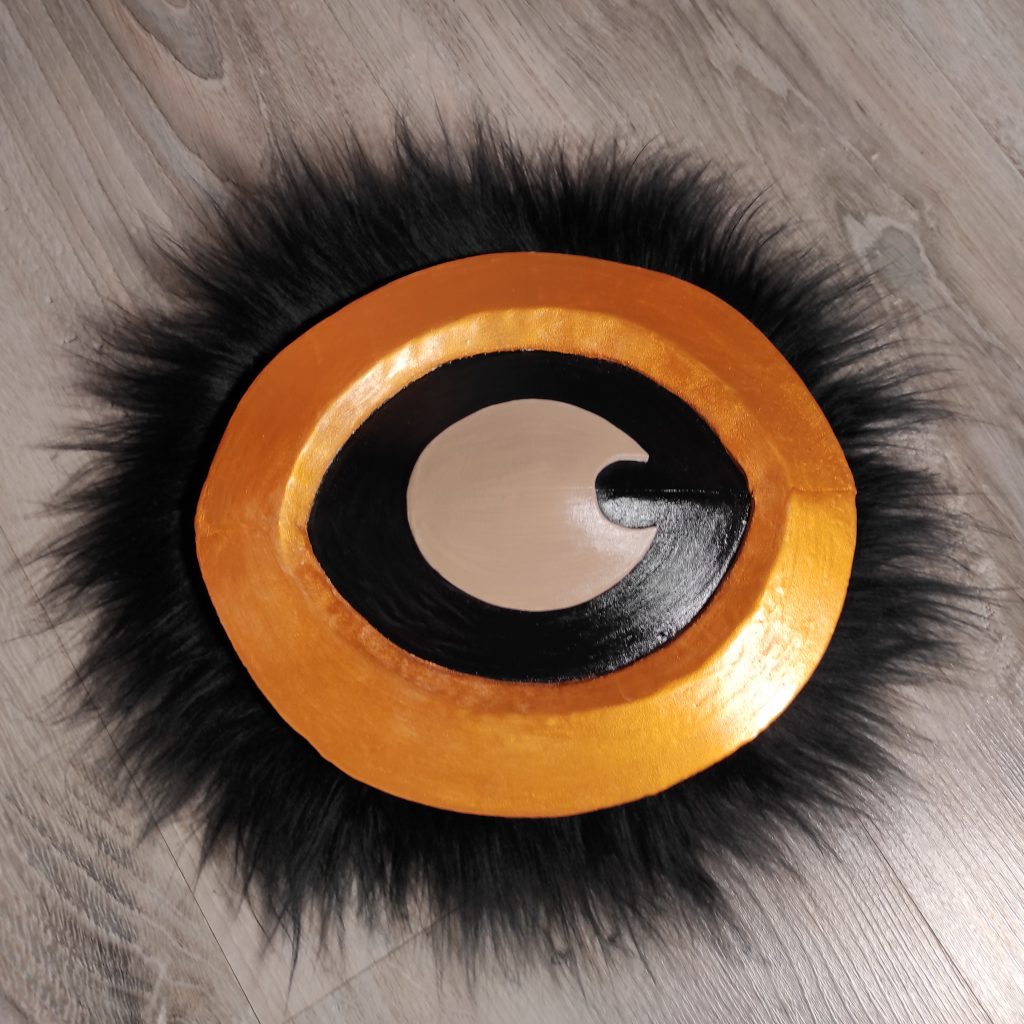
On the shoulder side, I patronize a circle a little bigger than what I need, then cut out a triangle on the inside with the point in the center. This will give a slightly rounded effect once the two outer ends are joined!
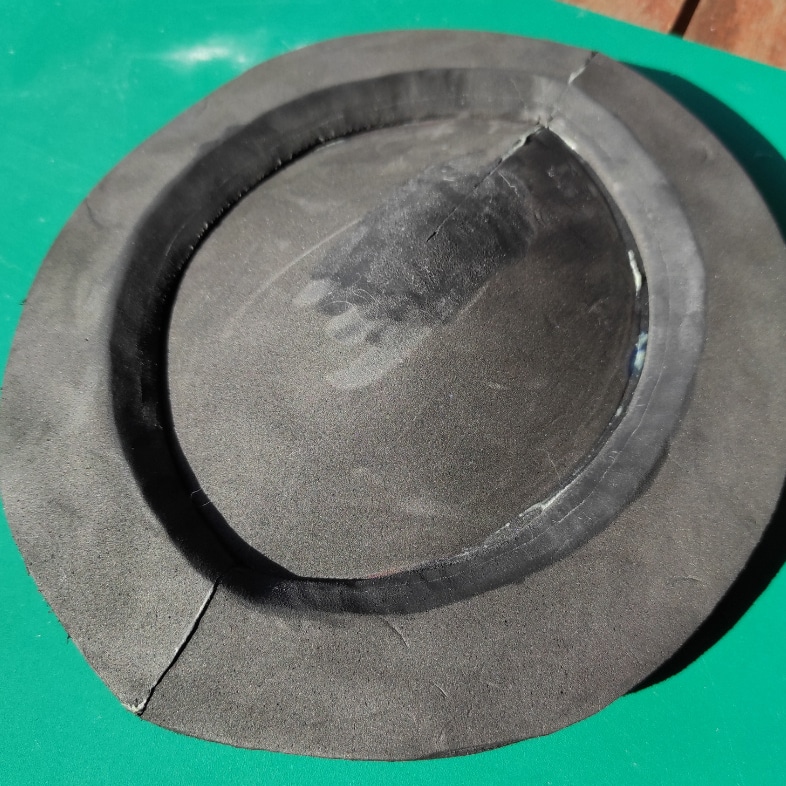
Once everything has been glued and sanded on the sides, I do a little fur test to check the rendering. Everything is OK ! ♥
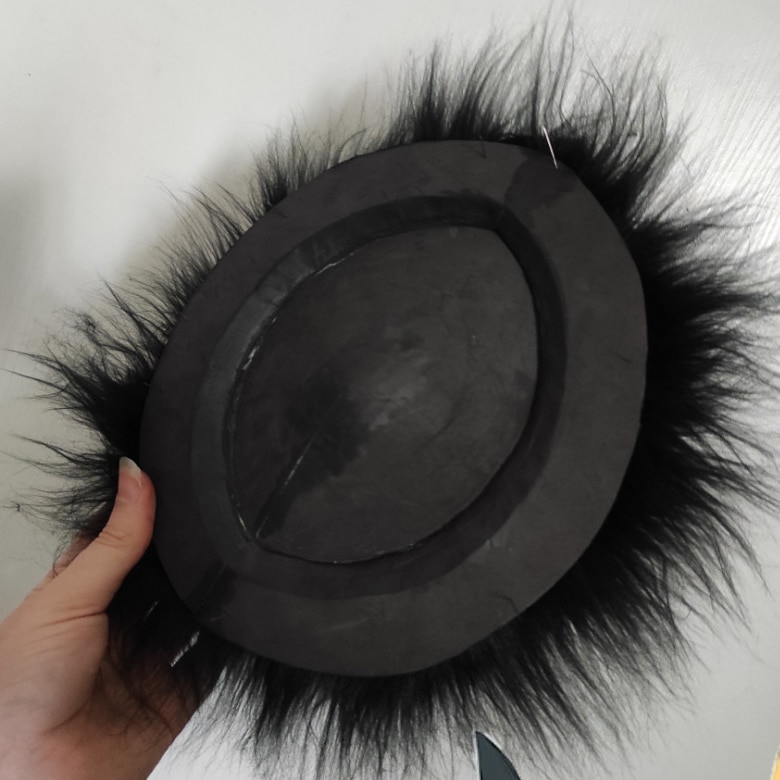
For painting, same method as before! A nice undercoat, then the paint. I start with the two lightest colors and then cleanly cover the rest with black. A little spray of varnish is necessary before adding the fur!

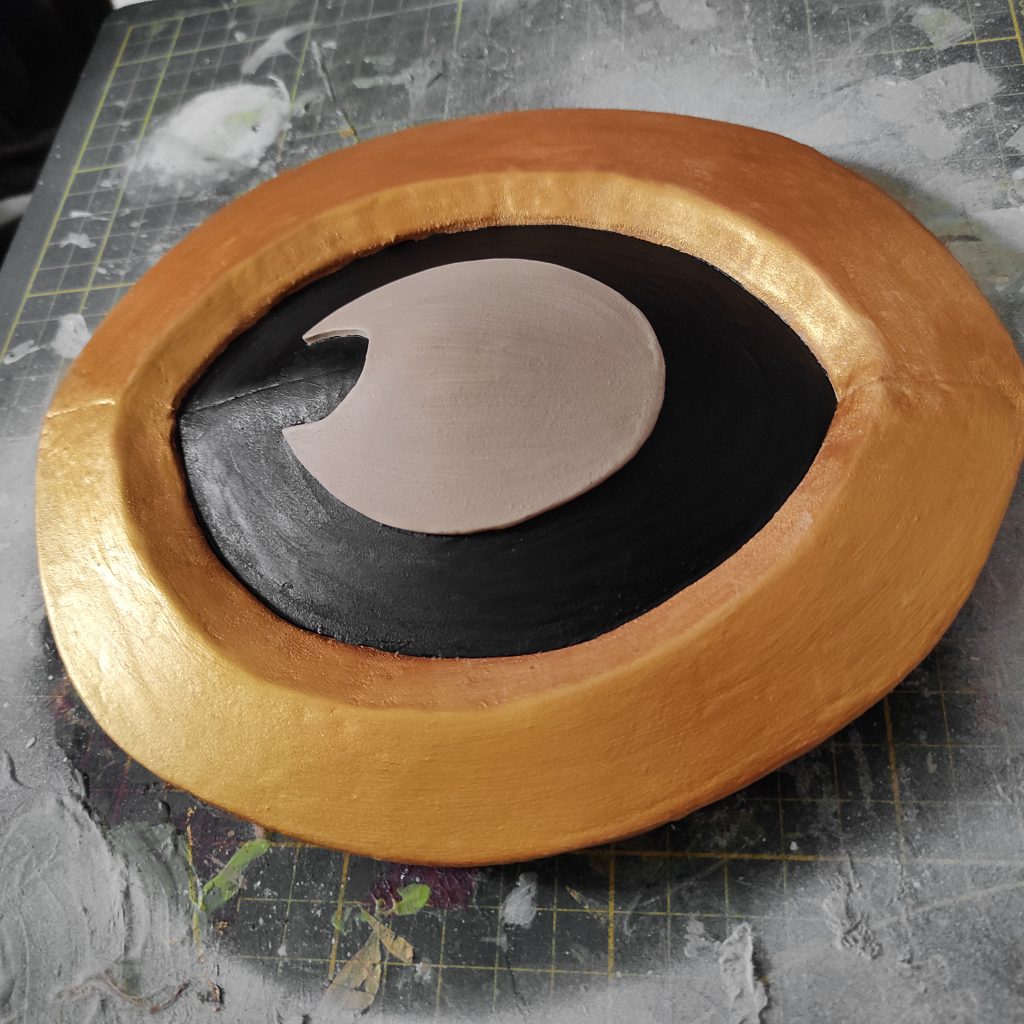
For the fur, I chose to stick strips of black fur that I had left from the previous accessories to waste as little as possible! So I just glue everything on the back of the piece of foam and then I comb everything to check that it is not missing in some places. To fix the clip created previously in Faux leather (see Part 1: the dress), I scrape / sand the ends to make them more abrasive and glue them with the glue directly to the back of my piece. My apologies for this little lack of photos on these two stages! : ‘)
And here is the result of the armor! ♥
6 • The final result
This is where this making of blog post ends, thank you for reading! ♥
This is the very first time that I put all the design of one of my costumes in writing so feel free to give me a little feedback by telling me what you liked, what was interesting or not and even what it’s missing if there’s something you want to know more about! ♥
You can also give me suggestions for the next blog posts that you would like to see 🥰
– Wrote in 2021, combined both blog posts in one for the cosplay tutorial contest –