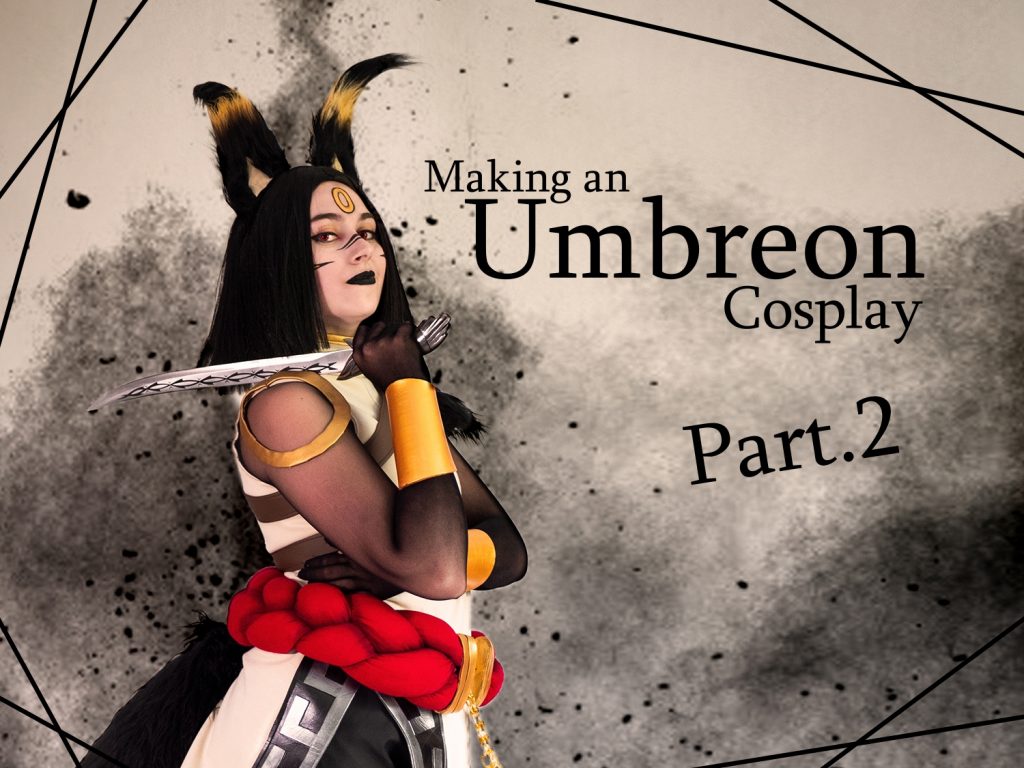
Hey! Today I’m back with the part two of this Umbreon blog post! ♥
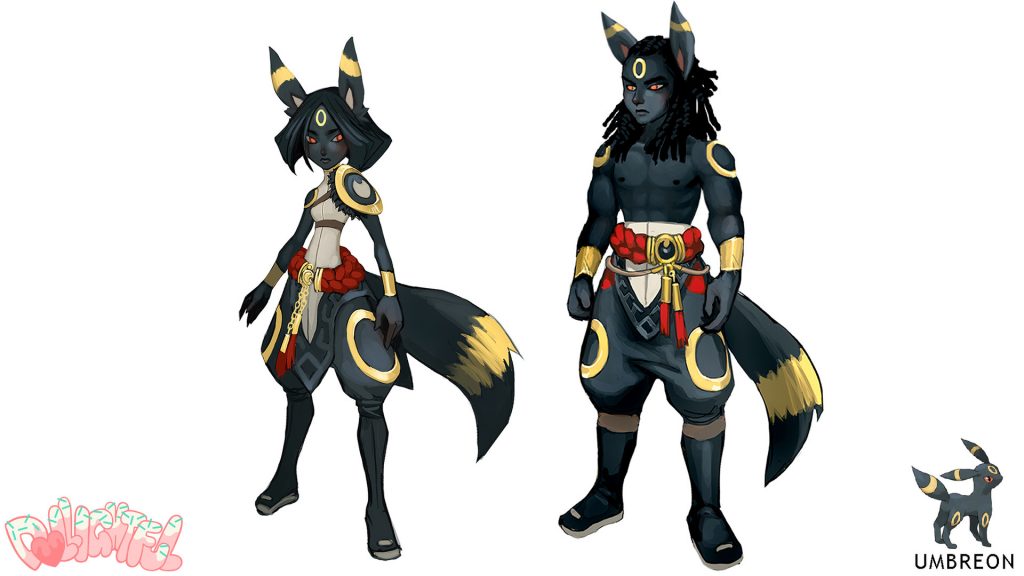
As a reminder, my reference was the following throughout the creation of my costume:
For the readability, I have chosen to divide this article into two parts.
In this second part, you will find the following chapters:
4 • The belt
5 • The armor
6 • The final result
In the first part, we already talked about the dress, the pants and the tail and ears! ♥
4 • The belt
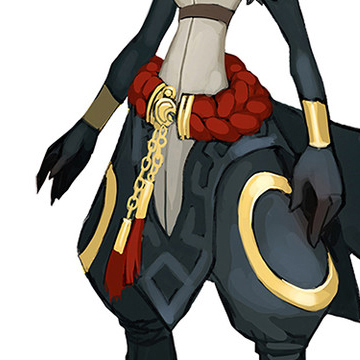
I now come to the part that I found the most interesting to create: the belt!
Unique and imposing, this belt is an element that stands out a lot on the costume. So I had to make it as beautiful as possible! ♥
To get this beautiful puffy effect, I immediately thought of creating a braid with long strands of fabric. I also had everything I needed in stock: a beautiful deep red fabric that would go perfectly!
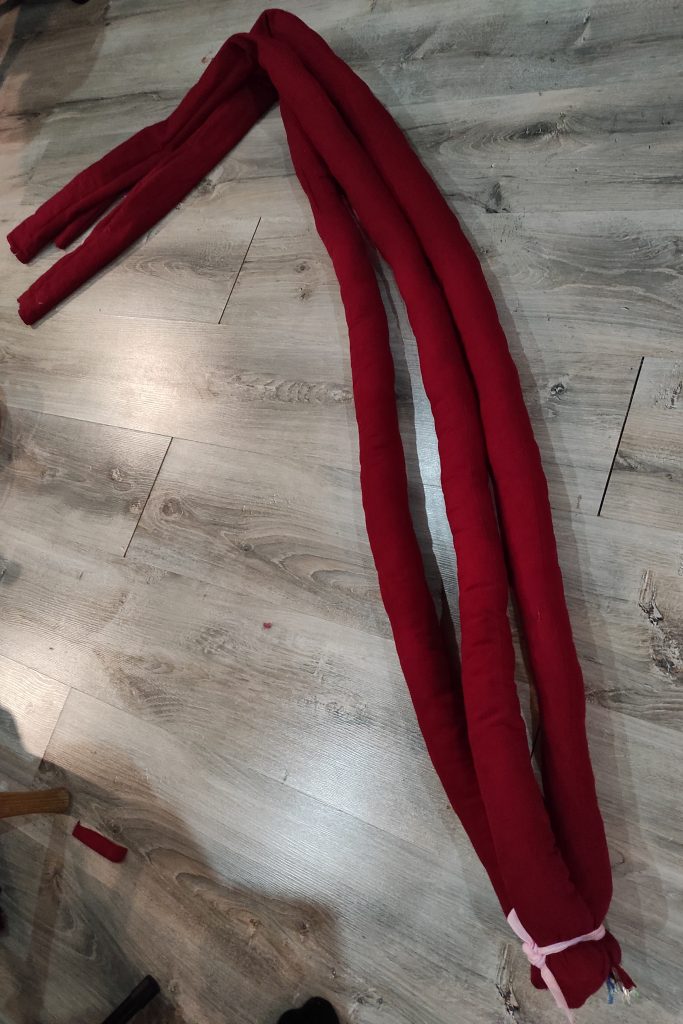
So I am embarking on the creation of these long sausages:
Only a few measurements concerning the thickness of my fabric strips were necessary. For the length, I’m just giving myself a good margin since I don’t know how much the braiding will reduce this measurement when finished!
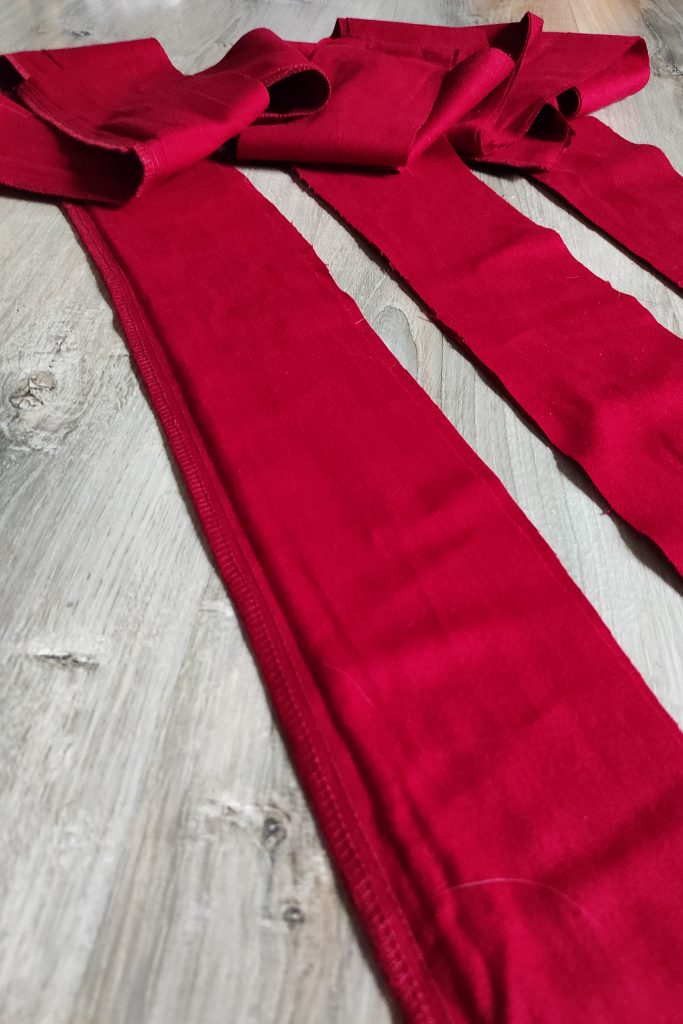
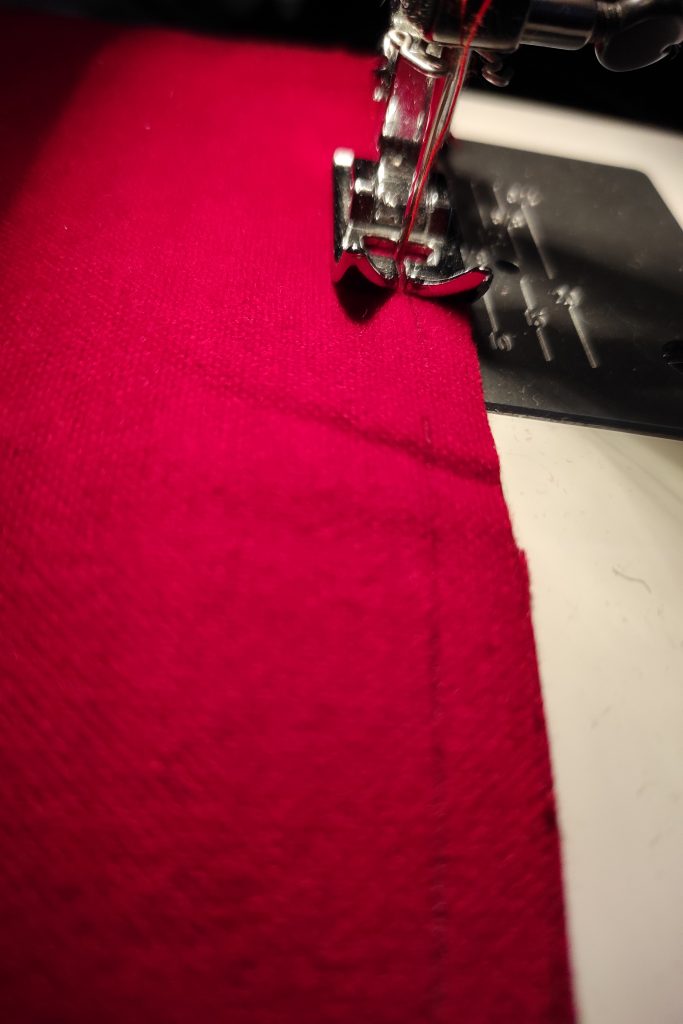
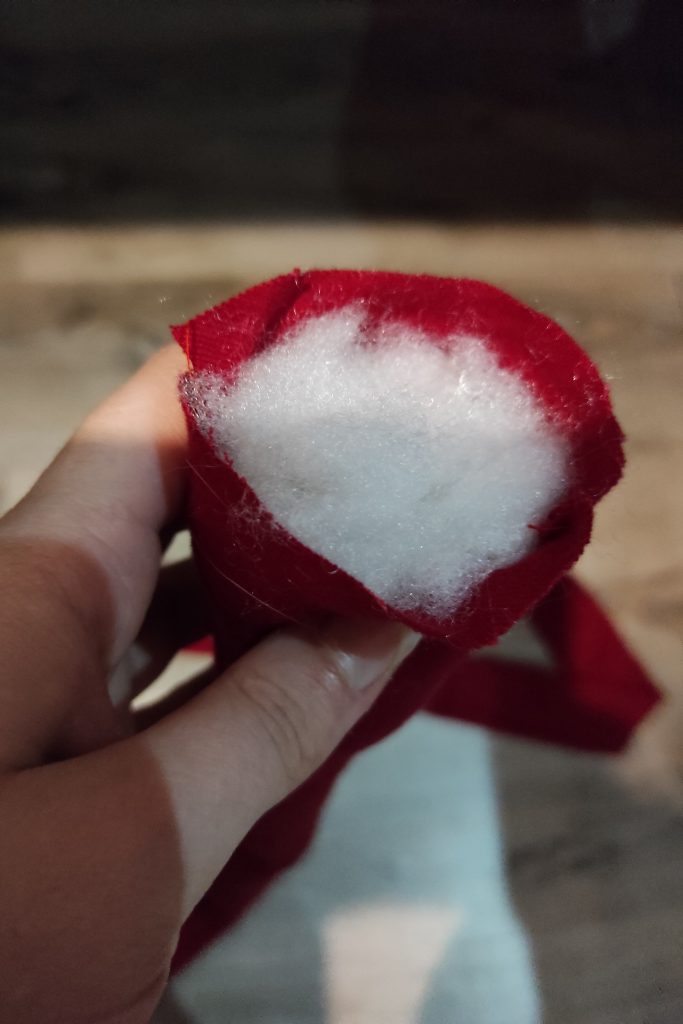
Once the bands are sewn, I turn each of them over and then pass them through the iron (this will prevent me from having additional folds at the end)! I then move on to the padding (a long step.. very long! 😆) and once again use Colas Normand‘s Cushion & Pillow Filling Fiber.
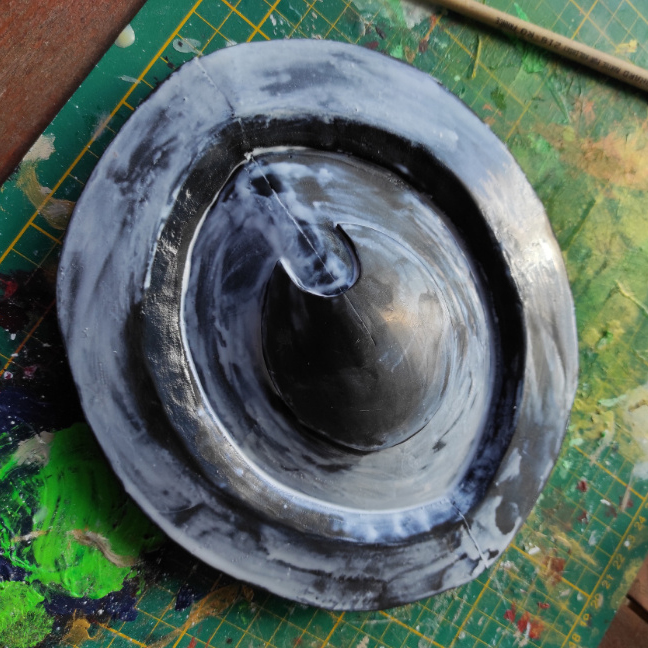
Now is the time to give shape to this belt!
I start by tightening the base of the three strands together to help it a cord to prevent everything from coming off once the braid has been made.
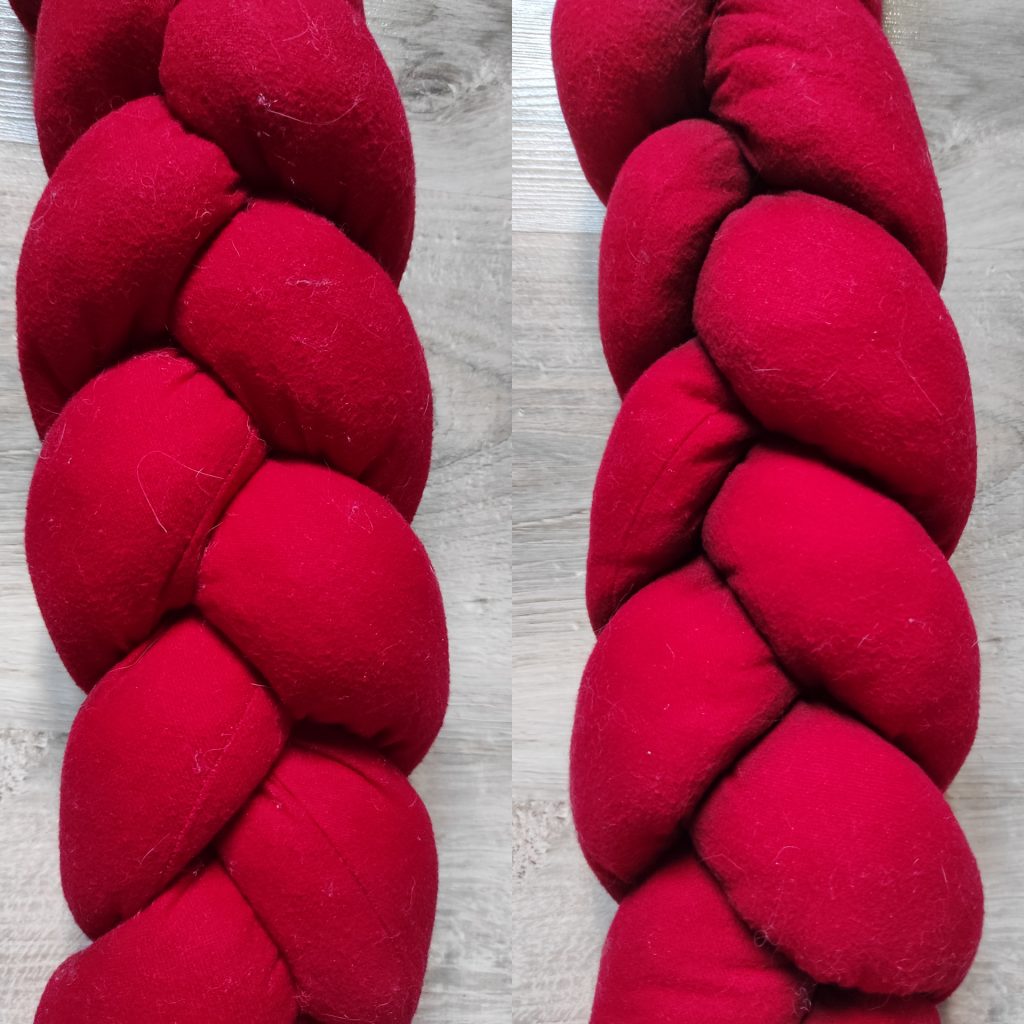
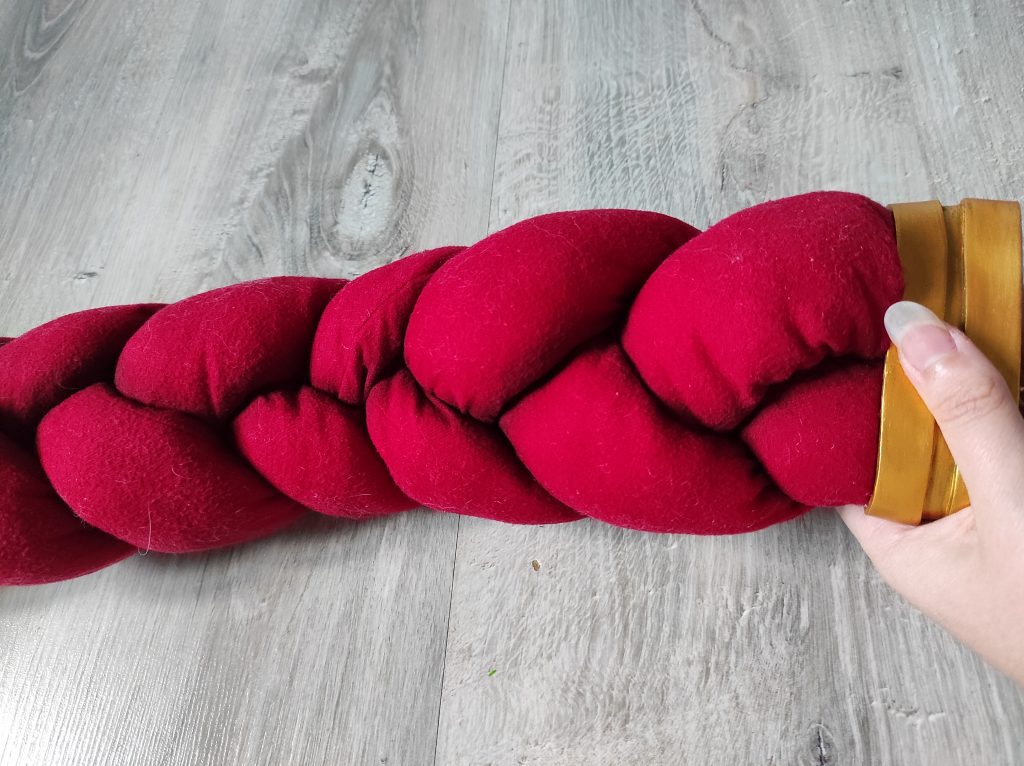
I then gradually braid my sausages, taking the time to hide the seams as much as possible in the braiding (The result will be much more aesthetic!).
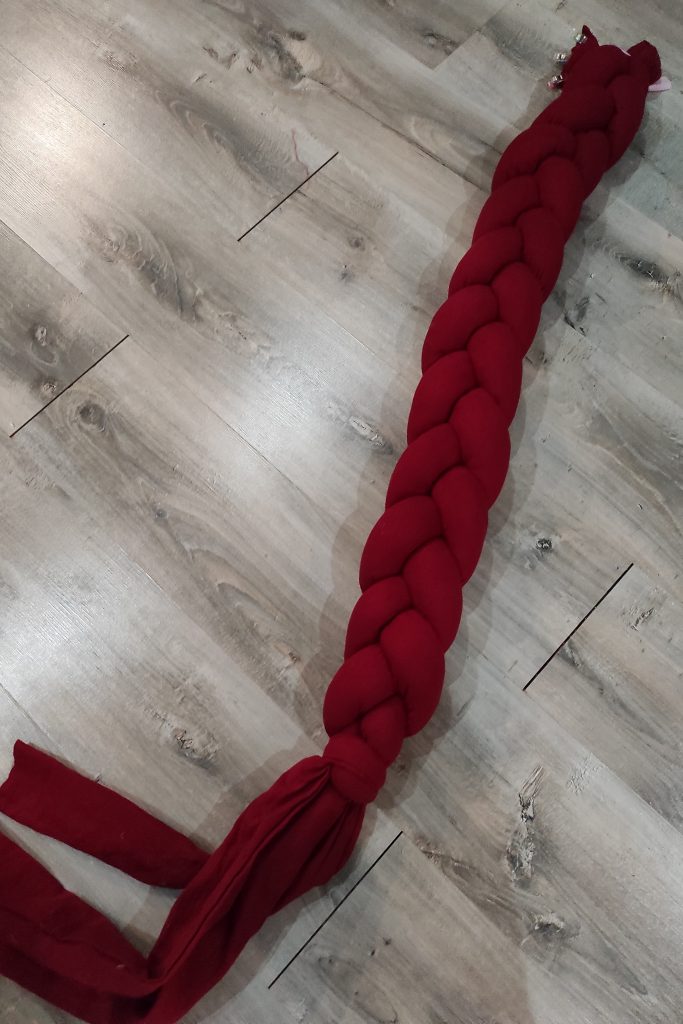
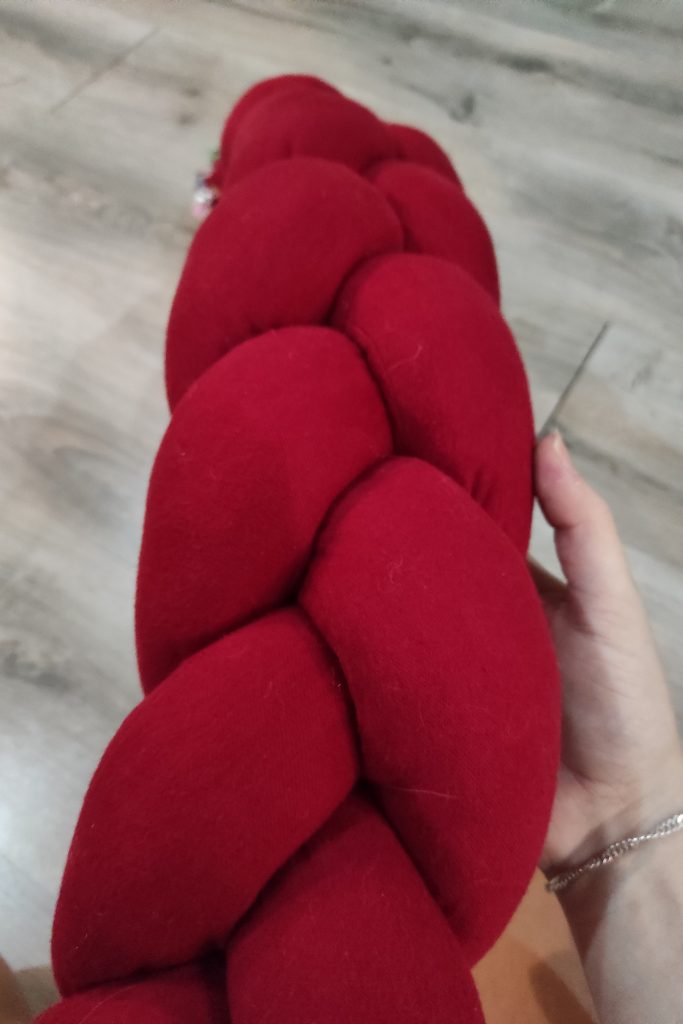
To see how far I have to stop, I take the time to try on the belt little by little. Once the braid is long enough, I simply sew each end to close it all! ♥
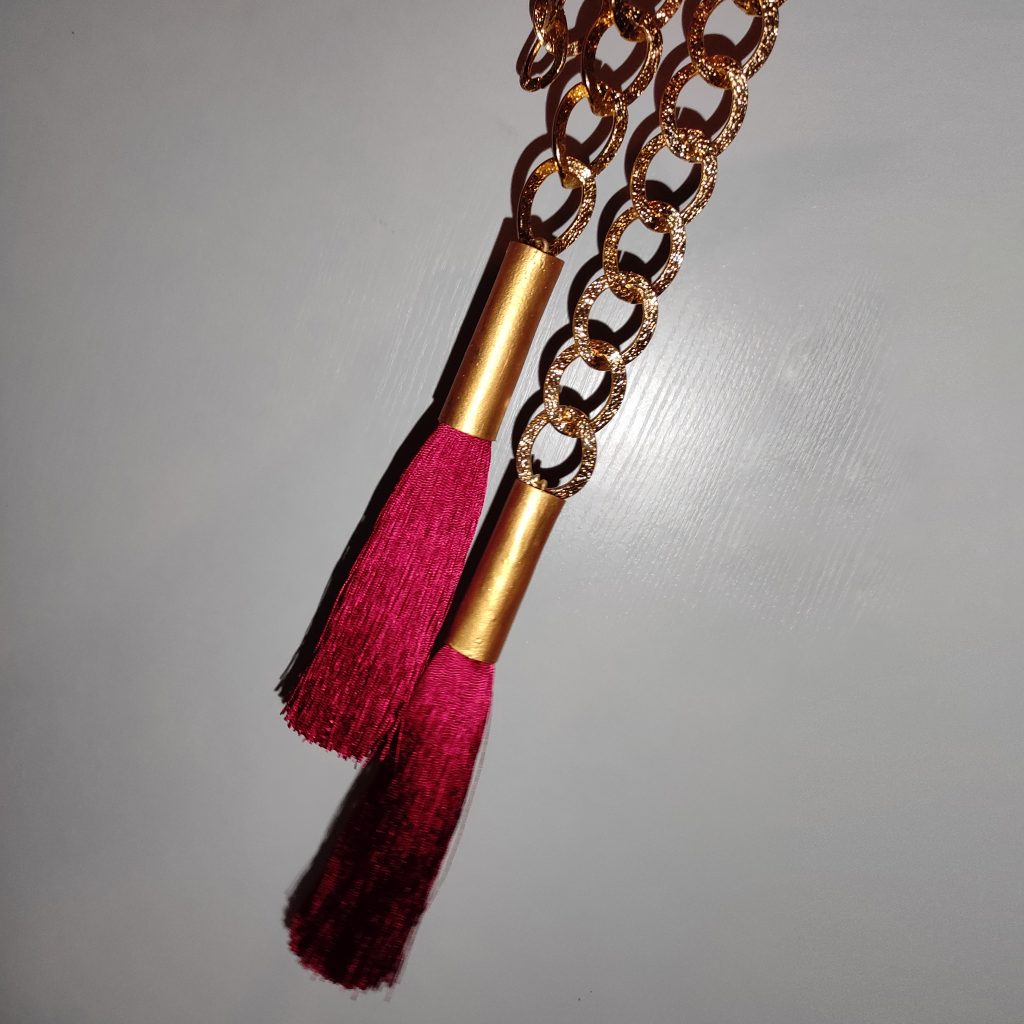
For the belt accessories, I bought a beautiful golden decorative chain, silk tassels and jewelry hooks, all on Aliexpress! ♥
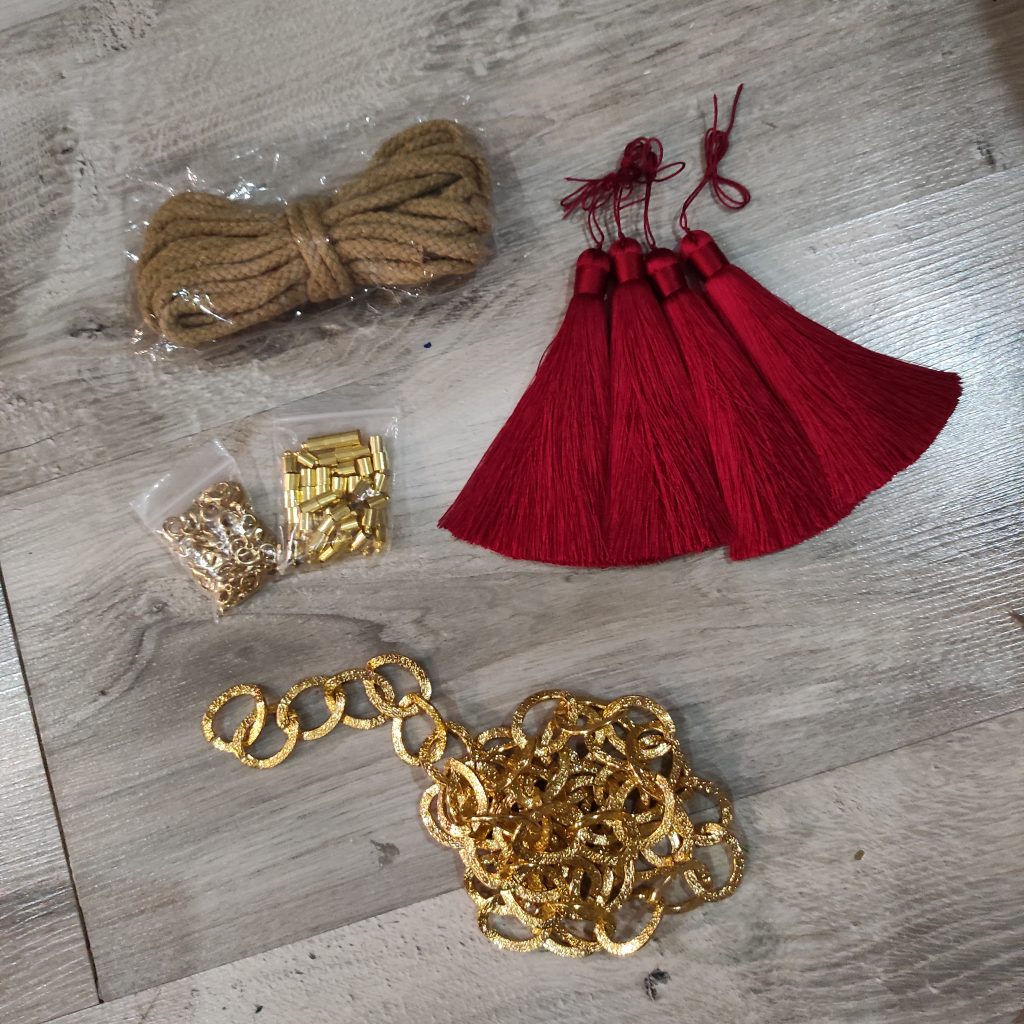
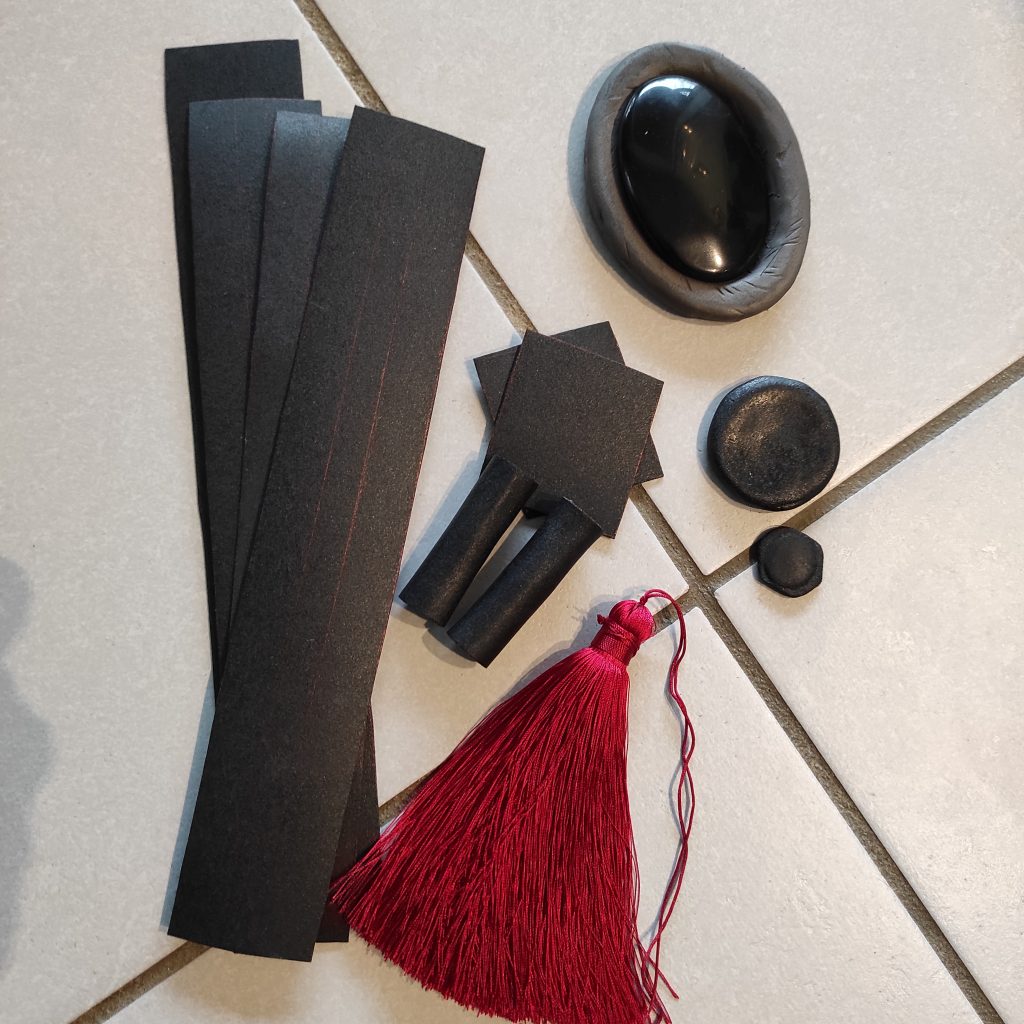
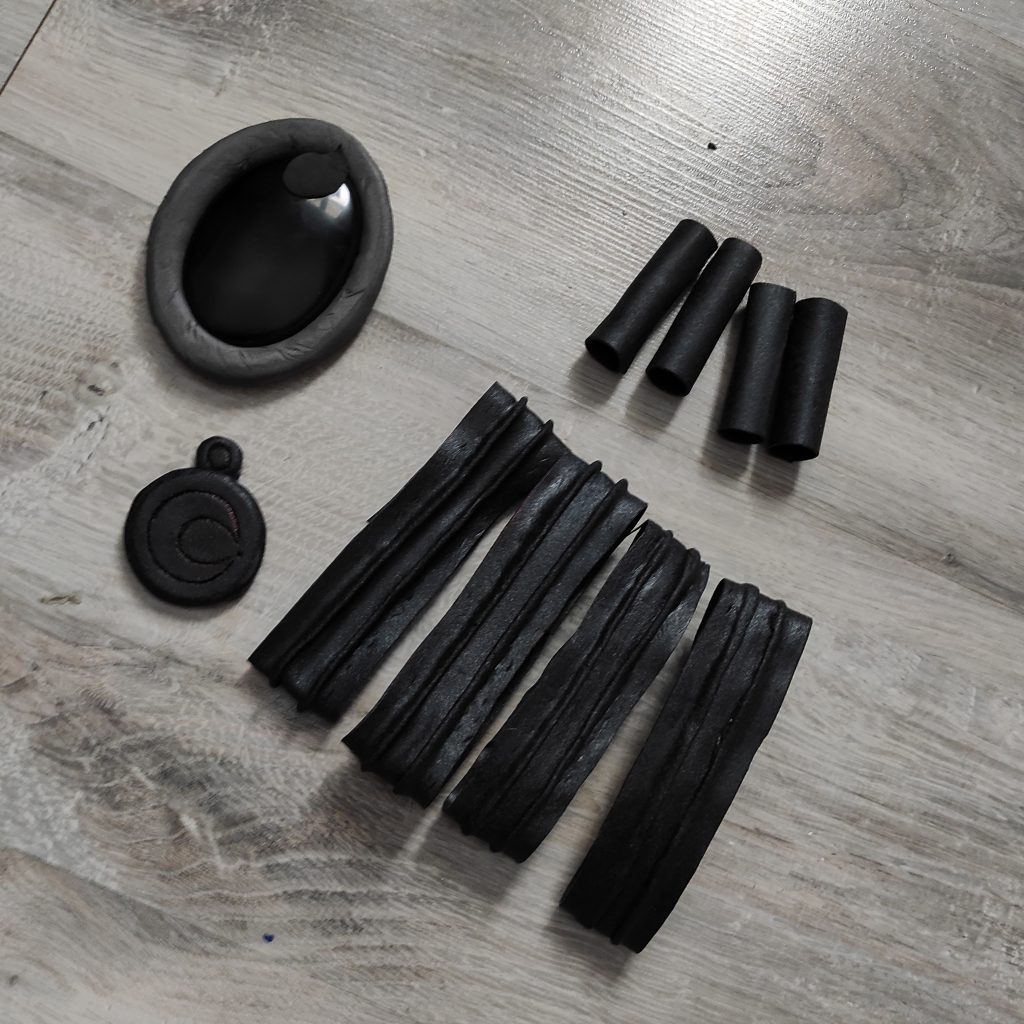
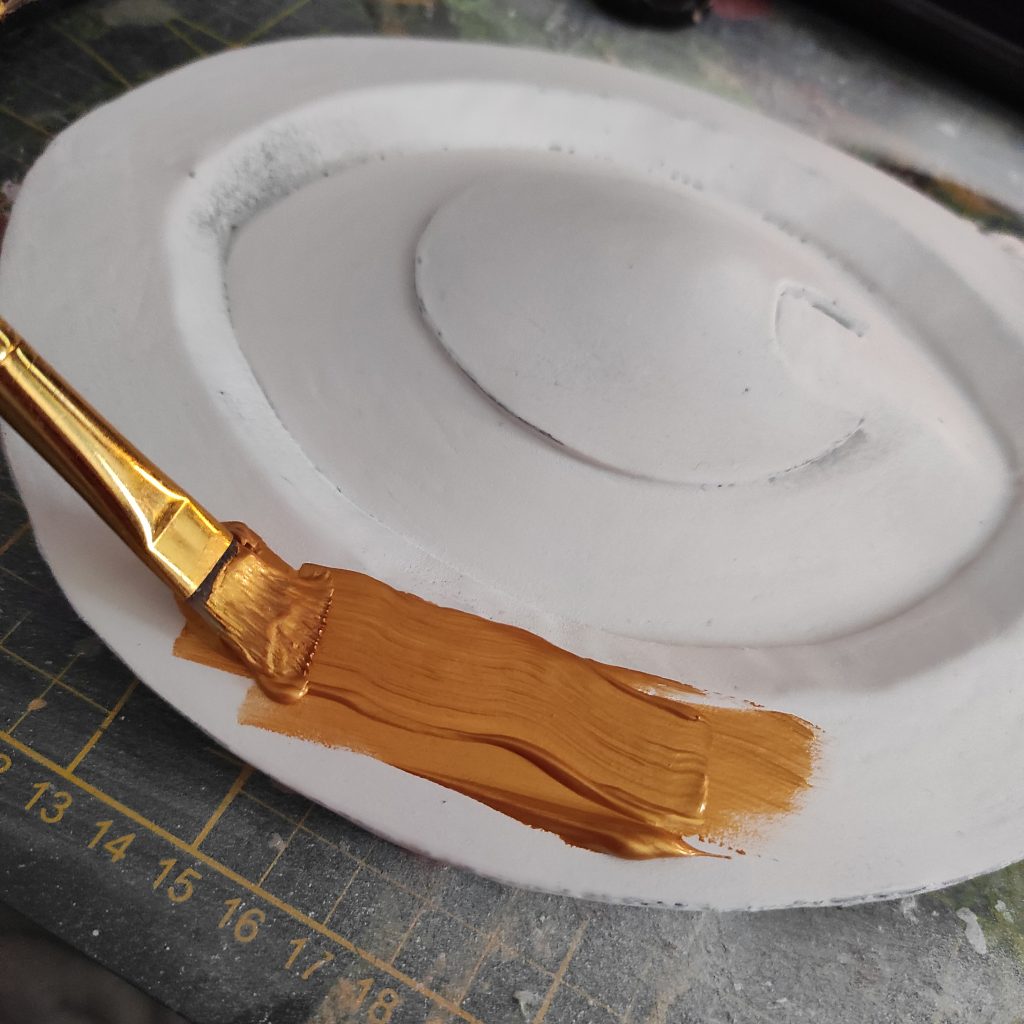
For the remaining parts of the belt, I create a base in Worbla (a thermoplastic that forms at will under the effect of heat!) That I will attach to the belt later.
For the assembly of the chain, I start by painting my Worbla cylinders in gold. I then thread them around the silk tassels and then tie everything at the end of the chains using the small cord already present.
To camouflage everything, I plug the top of the cylinders with foam clay (it’s like EVA foam, but in a clay form that dries in the air!). Once dry, I simply paint it the same color as the cylinders! ♥ (Unfortunately I didn’t take any pictures at the time, sorry!)
For this whole project, I used the Iridescent rich gold paint (n ° 837350) from Pébéo. For having tested several golden paints, this one is the best I have been able to use! It is quite covering and very pigmented: a real pleasure to work. ♥
You can find it right here!
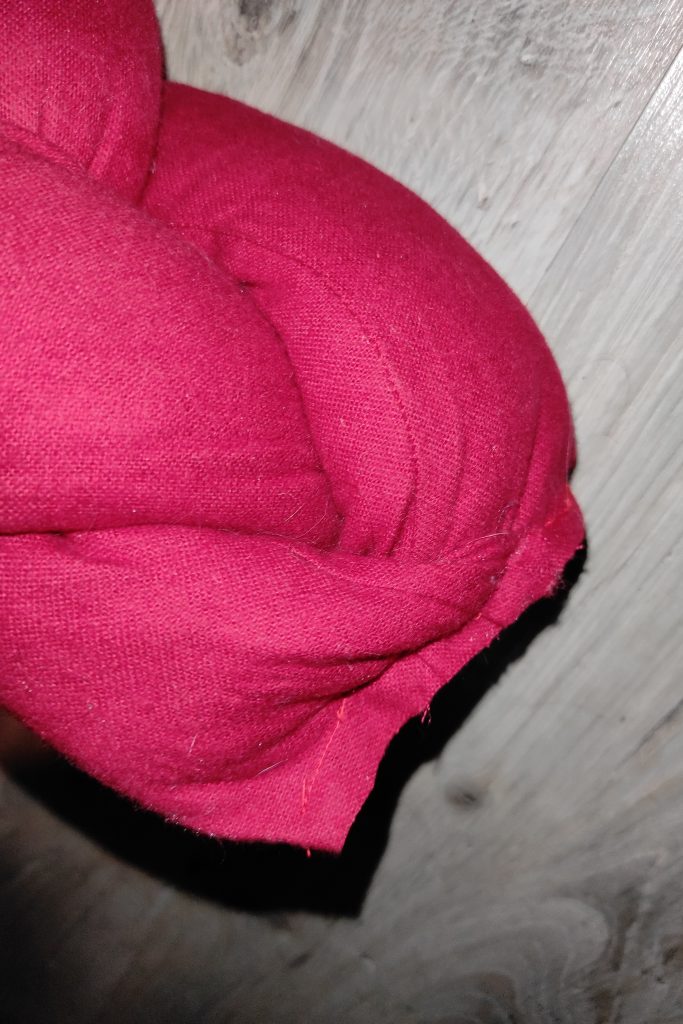
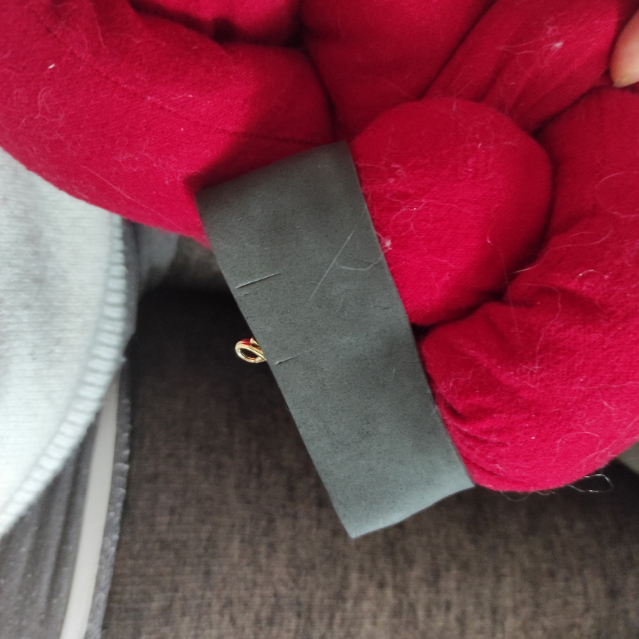
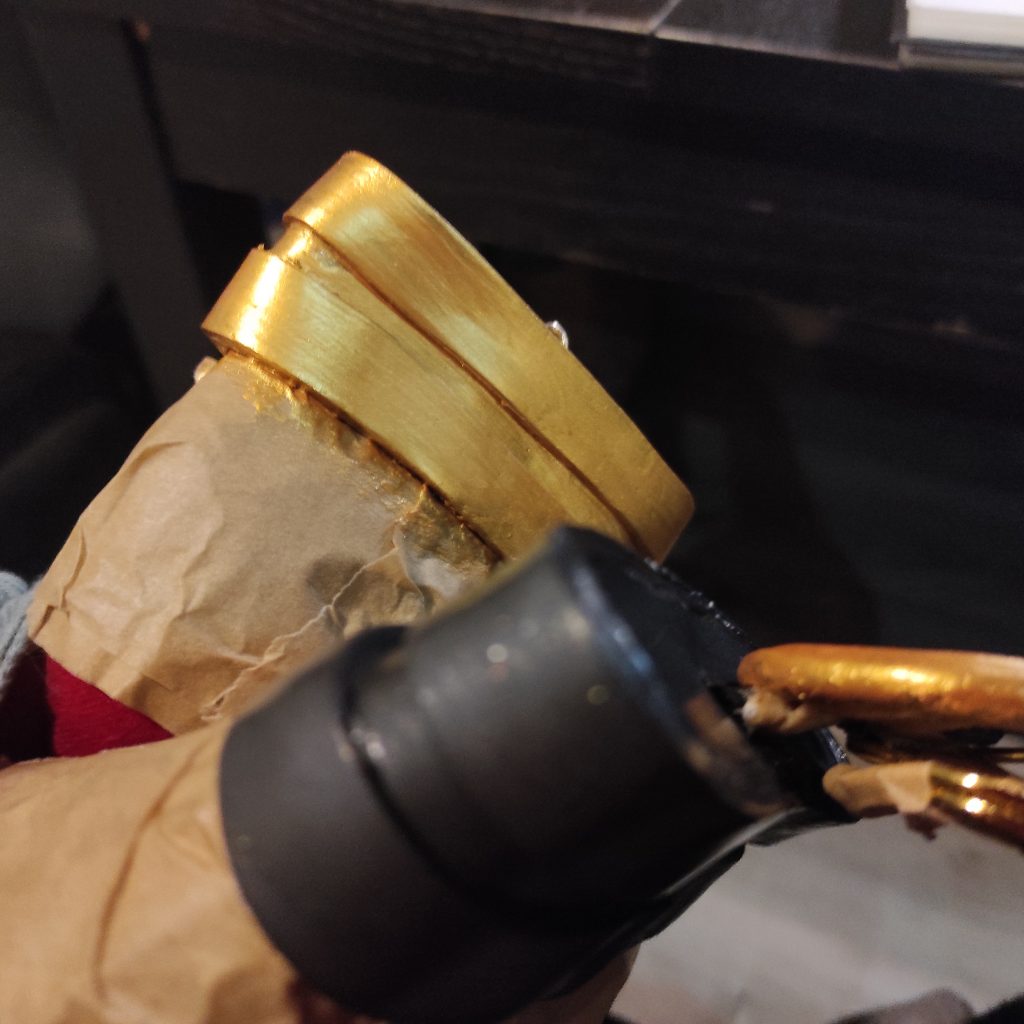
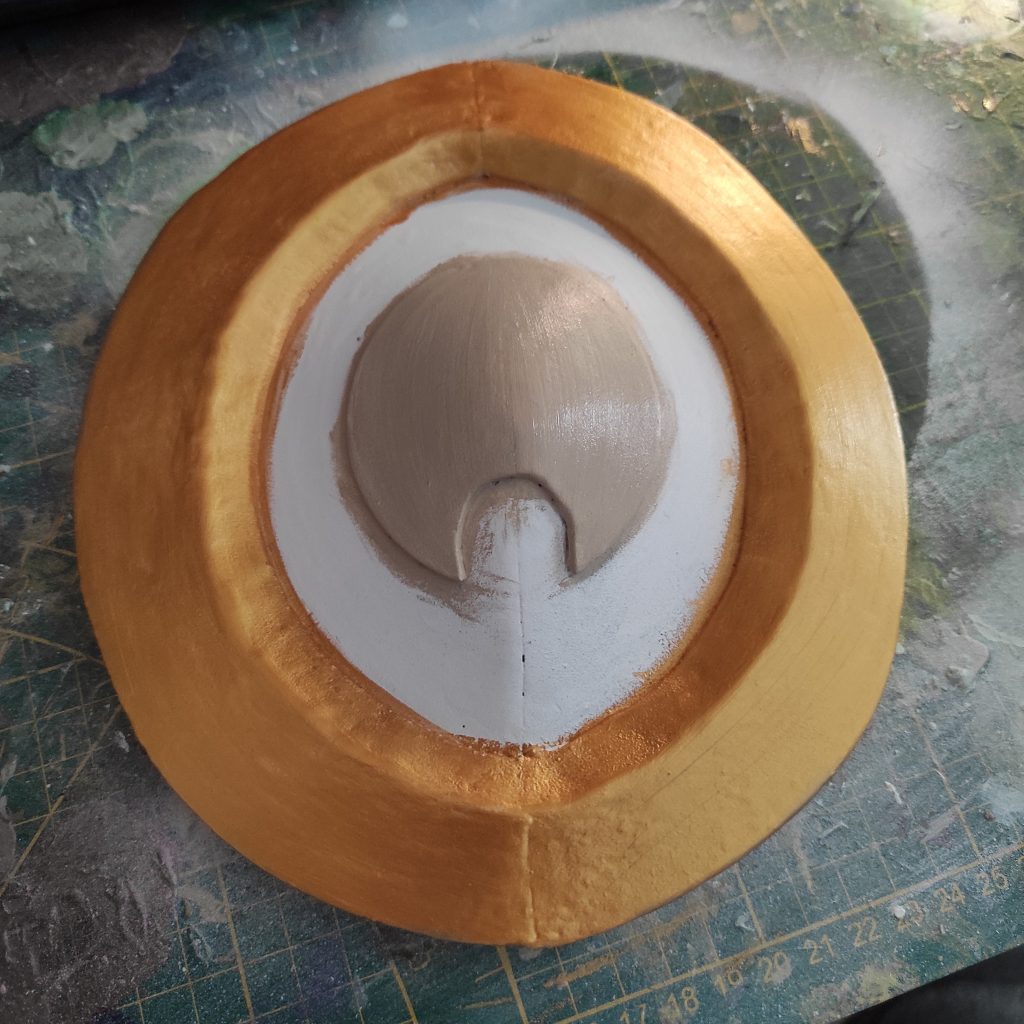
Let’s move on to the belt clip. Initially, I wanted to use only my parts of Worbla: for fixing but also for decoration. So I heat my pieces and glue them to my fabric. Result: it was a very bad idea (check out the photo below! 😂).
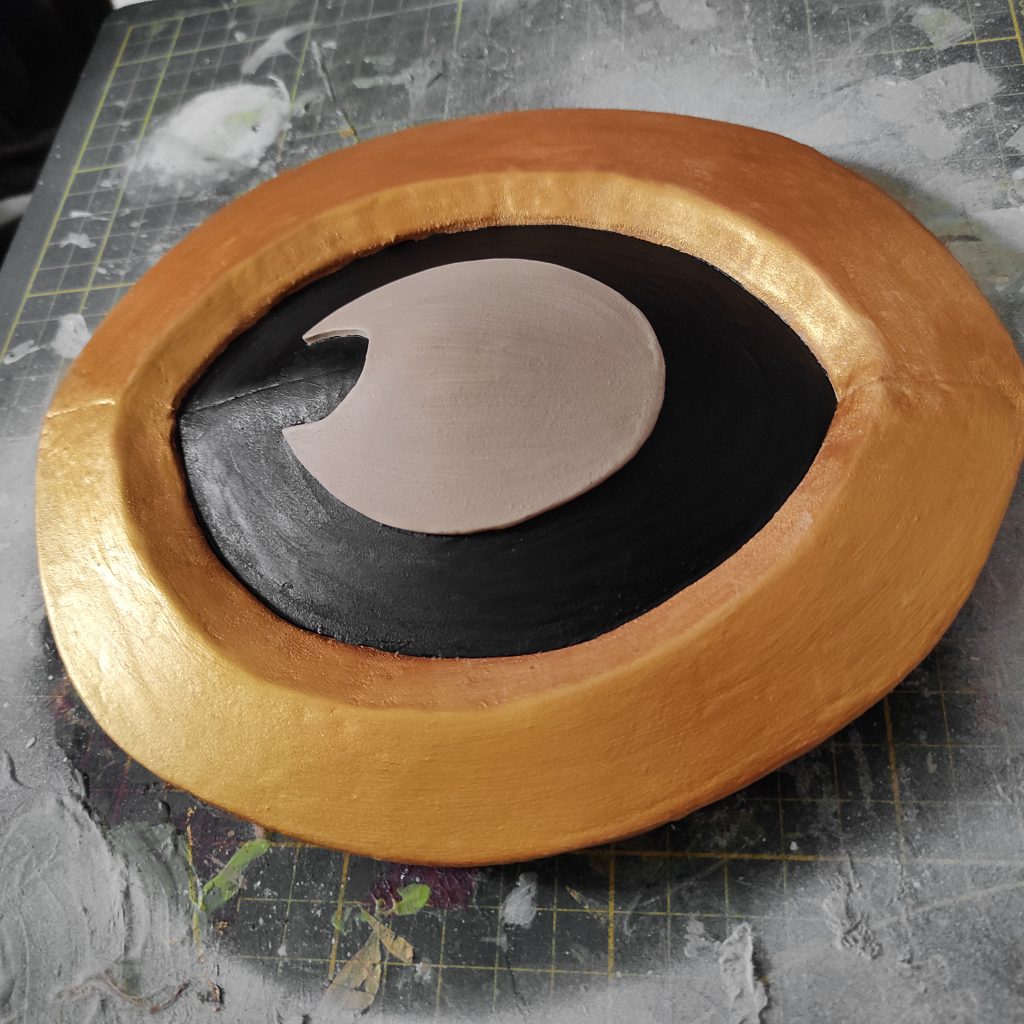
I choose to stick a layer of 2mm EVA foam on top for a cleaner decoration! (I still keep the Worbla part below: it is this that will maintain everything thanks to its solidity.)
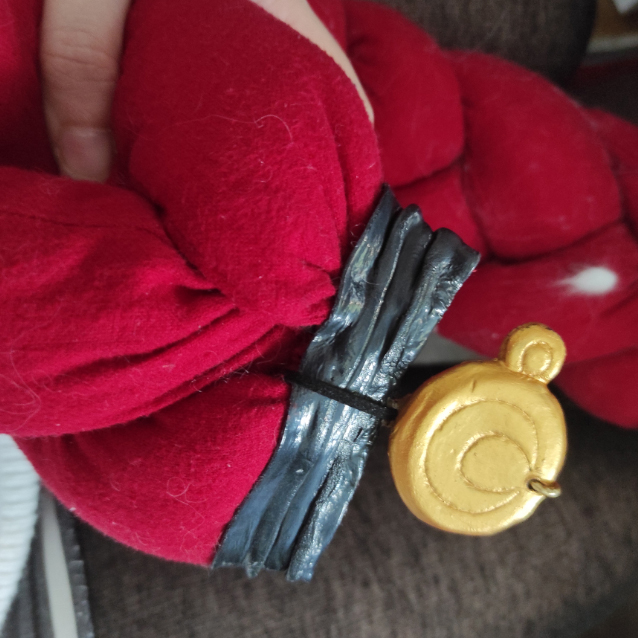
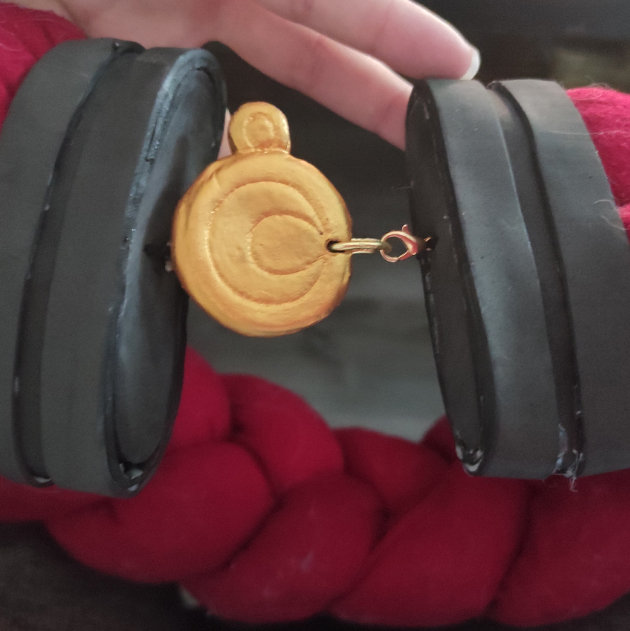
The belt closes with a small hook that hangs around the central piece. It’s quite discreet and very practical!
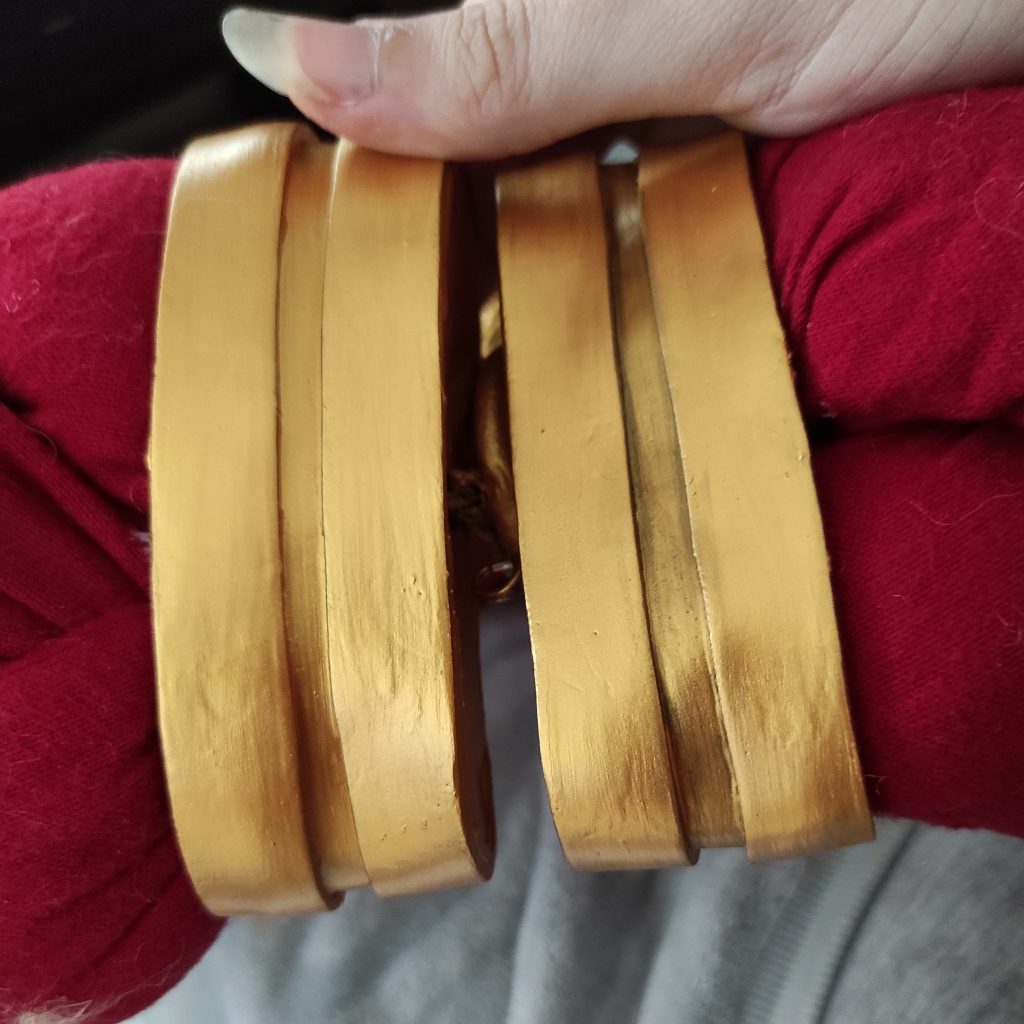
Once all the details have been added, I protect the fabric part by rolling it up with masking tape (so as not to damage my fabric when removing it!). I then add a layer of wood glue as a primer on the foam pieces, then add the gold paint.
Once the parts are painted, I fix the chain at the back of the central part using a piece of well-warmed Worbla. That’s it, everything is ready for the final!
To finish this belt, I add some shading to give it more dimension! ♥
On the golden parts, I add a little black in the corners of each part.
On the fabric part, I choose to use a method discovered at Chimeral Cosplayart: Shading on fabrics with an airbrush! To keep it simple, I use an airbrush to apply darker paint where creases are already forming. For my belt, I put some between each fold of my braid!
PAINTING TIP: If you want to bring out the details or give more dimension to a garment, you can do it with the help of an airbrush! Simply fill in your airbrush with the color you want, remembering to make it much darker than your fabric. Then gently deposit paint on your fabric until you get a result that you are satisfied with (you can do this on folds, on a flat part to add false folds but also on seams to mark them!). This method will allow you to bring out a lot more details in your photos, a real plus to show all the work you have provided! ♥

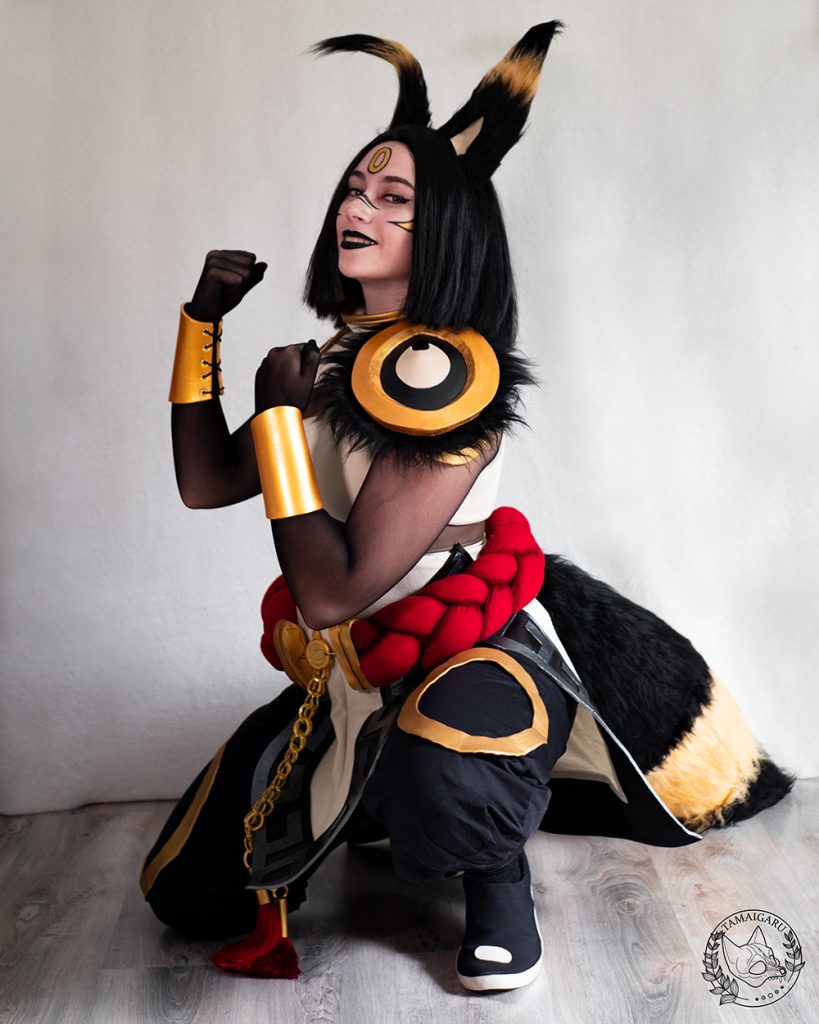
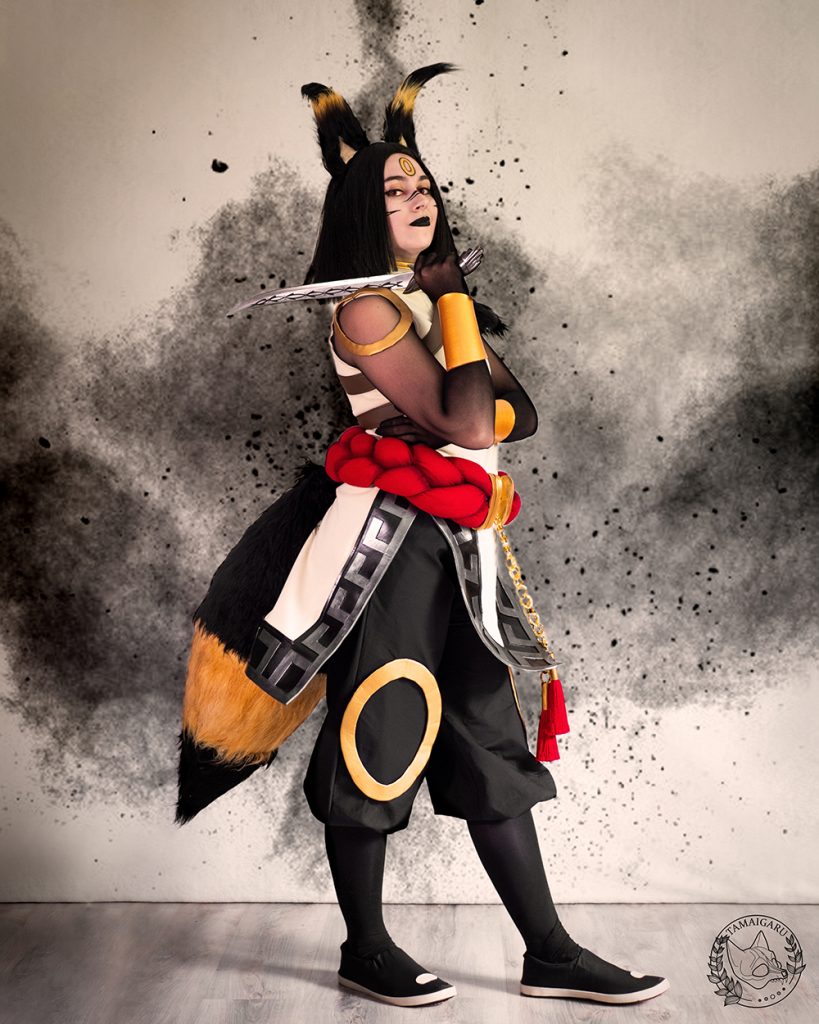
And this is the final result ! A super soft belt that stands out really well in the photos. ♥
It’s the accessory I’m most proud of on this whole project, it’s a real pleasure to see that it looks so good!
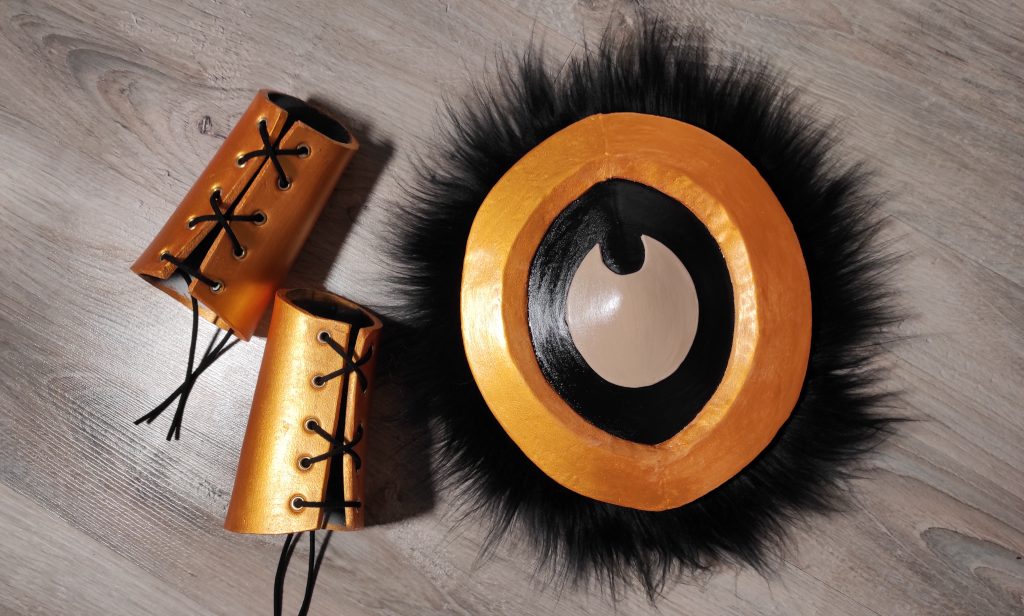
5 • The armor
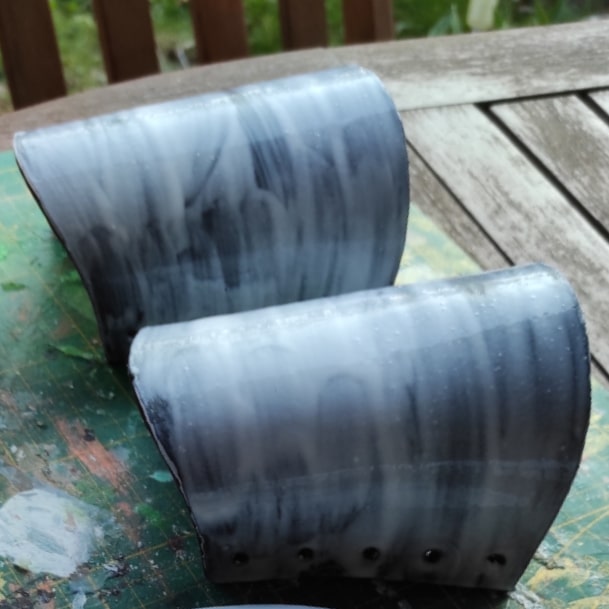
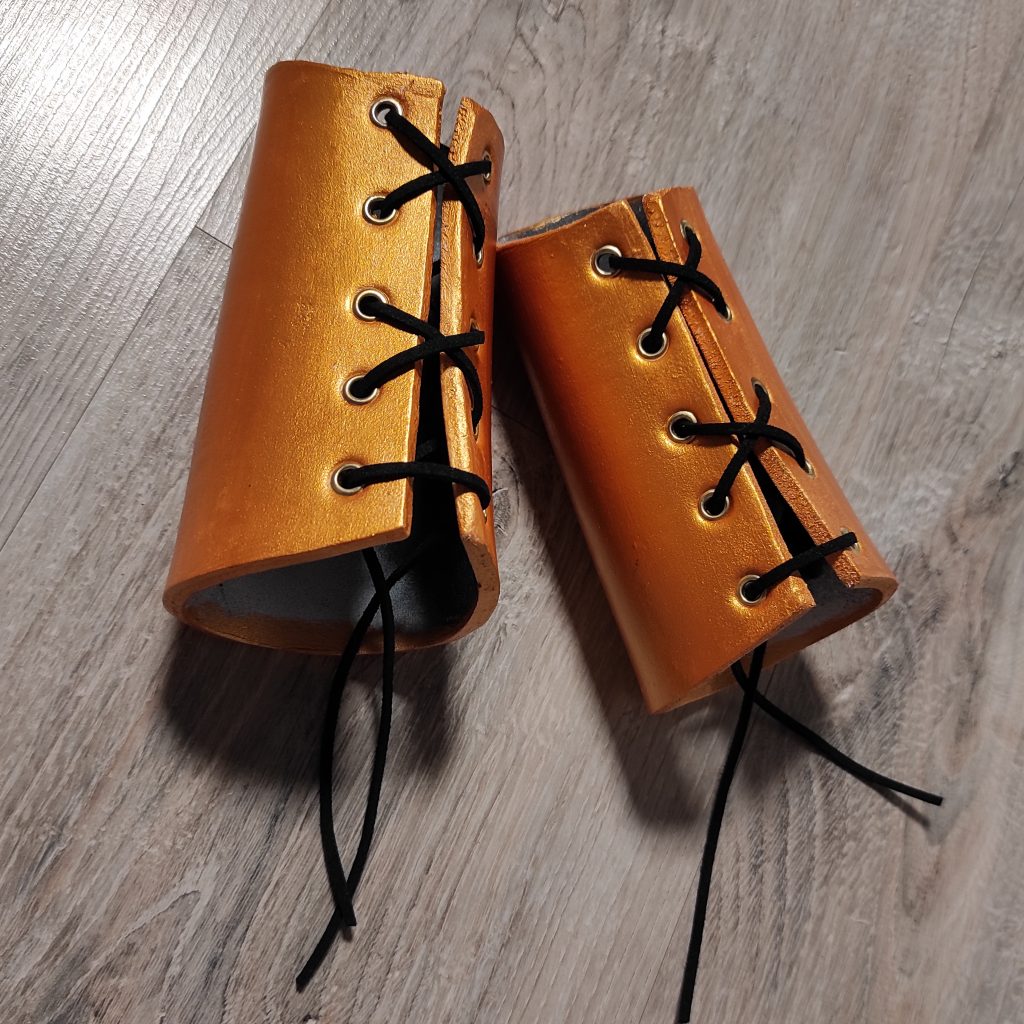
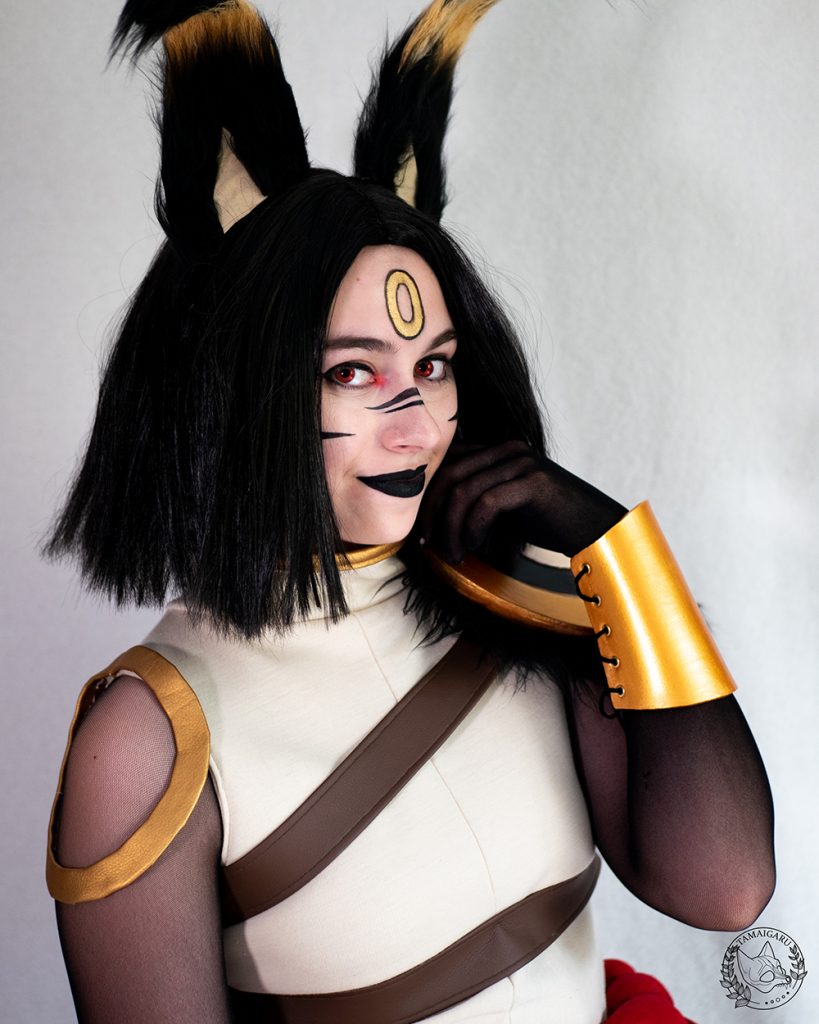
For the armor on the shoulder as well as the golden armbands, I chose to use 5mm thick EVA foam this time. Stronger and more rigid, this thickness is perfect for this kind of accessories! ♥
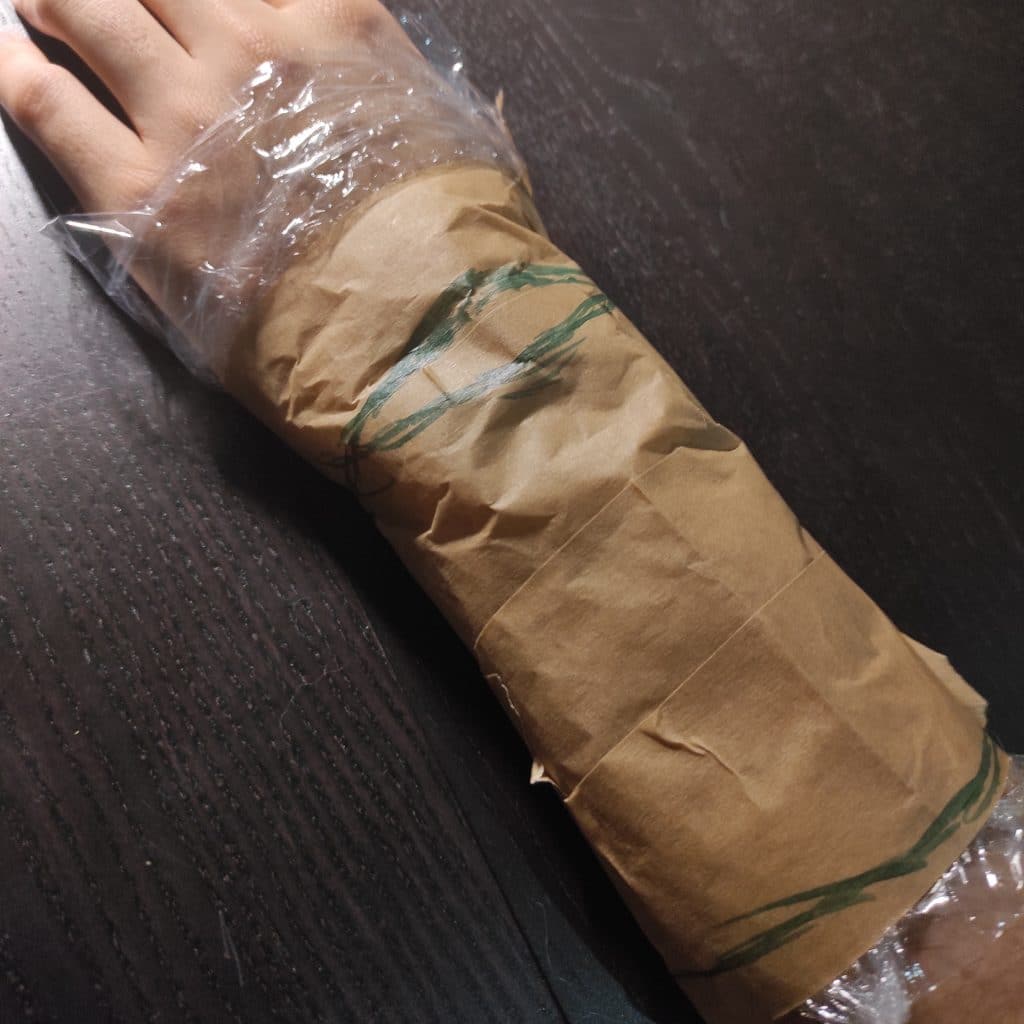
To get a pattern the size of my wrist, I roll it up in cellophane and then cover everything with paper tape (Laminated tape also works, but not all markers work on it!). I then draw the shape I want for my cuff, then a straight line where my opening will be. I then cut everything out and trace the pattern cleanly on a sheet of paper!
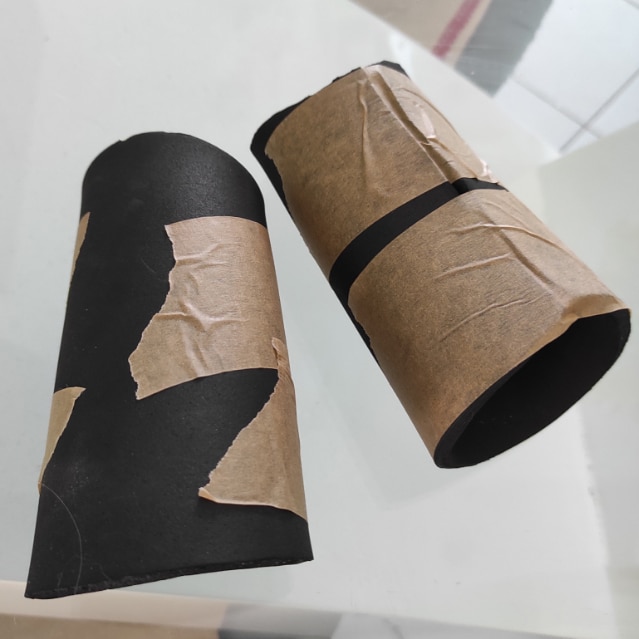
I then cut my two armbands in the foam and then pass them through a heat gun to form the material! (the foam can be formed with the help of heat, this allows here for example to make it keep the rounded shape of the wrist! If you do not have a heat gun, a hair dryer will also do the trick but it it will take you longer to heat your material. ♥)
To attach these armbands, I chose to create a lacing with a pretty black suede cord! So I drill the holes before underlaying and painting the cuffs, so as not to crack the paint once it is dry.
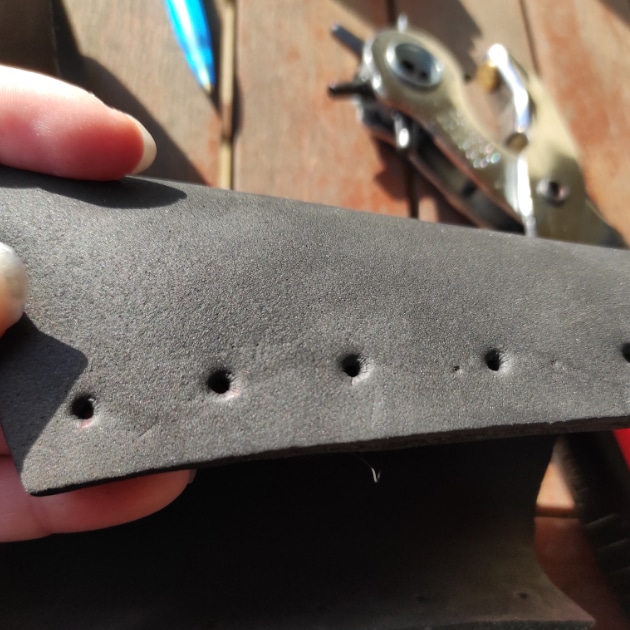
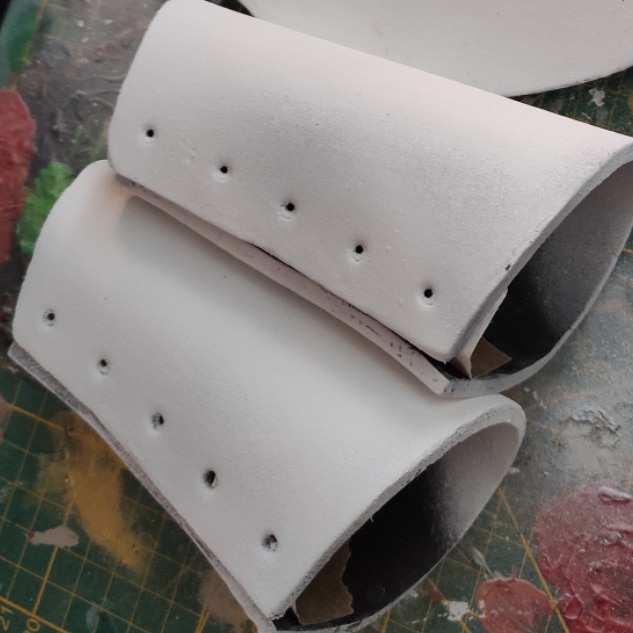

Once the holes are made, a light coat of wood glue (or an elastic primer such as Plasti Dip or Flexbond!) Is sufficient. A small coat of white spray paint (always the one from Action!) And everything is ready for color. For the gold, I once again use the paint from Pébéo!
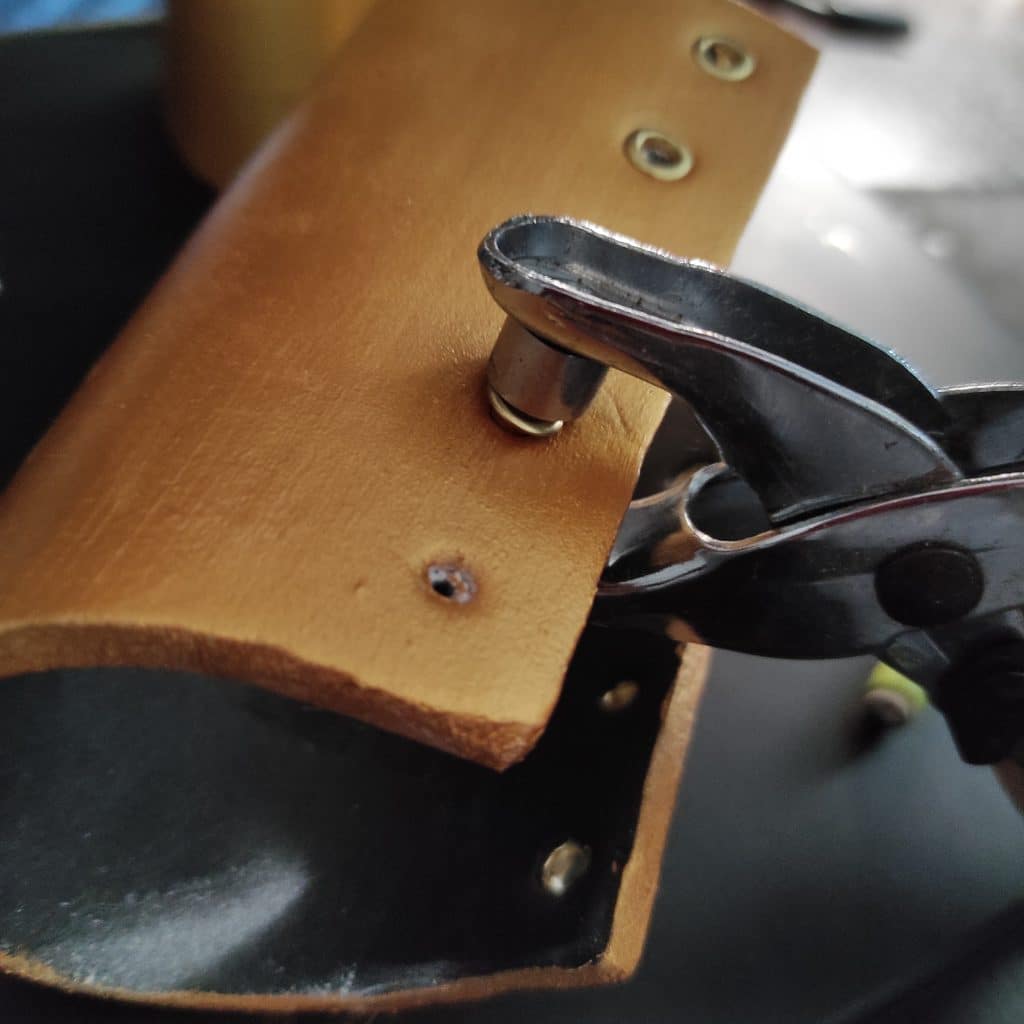
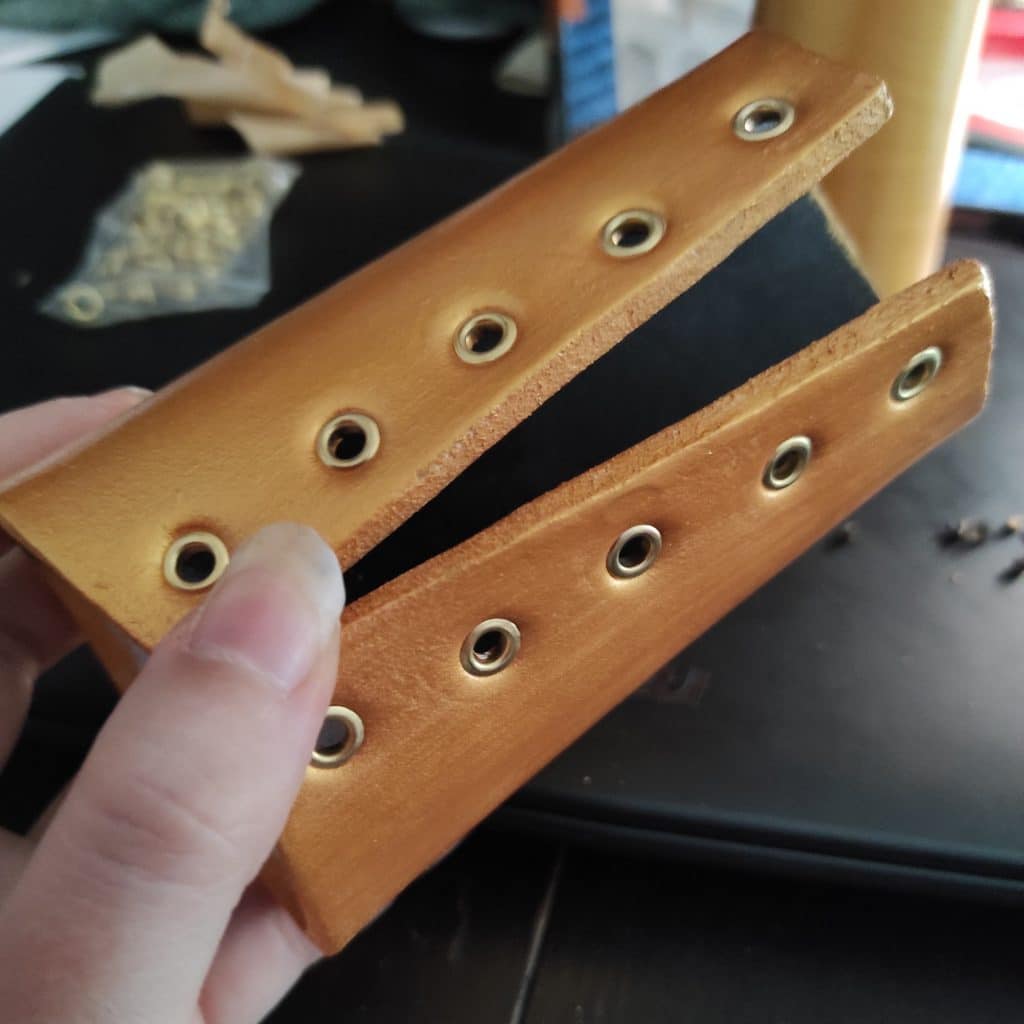
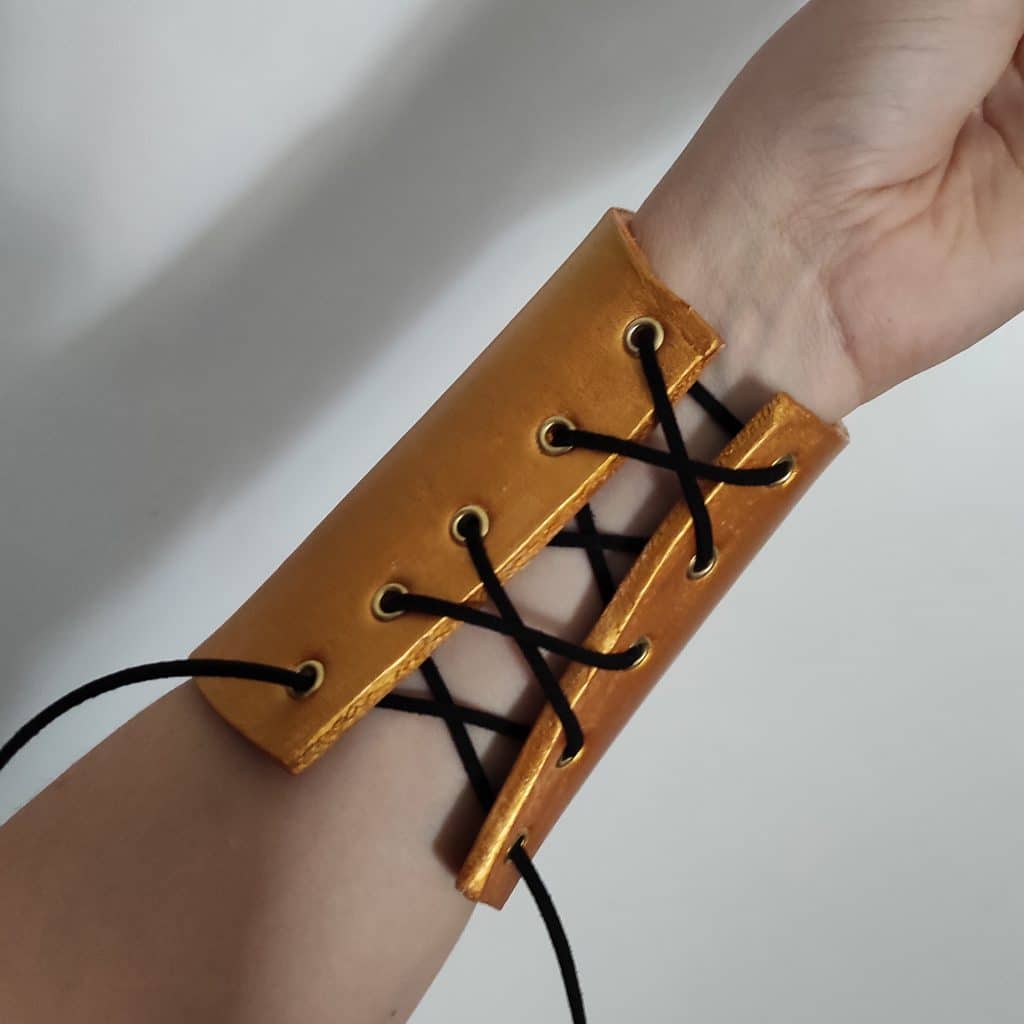
To reinforce the lacing holes and make them more aesthetic, I add golden eyelets. To fix them, I simply use an eyelet pliers which does its job very well!
I then add my lacing and.. Tadaa! ♥
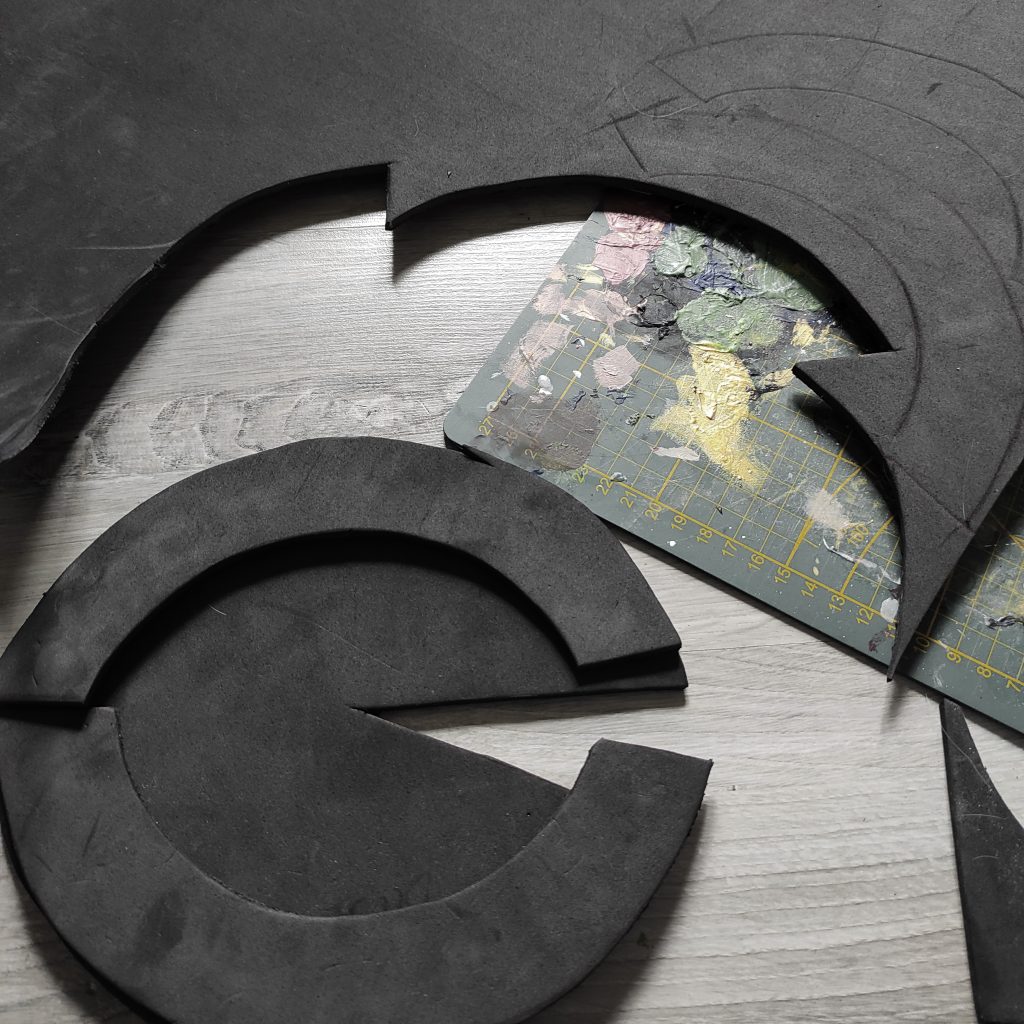
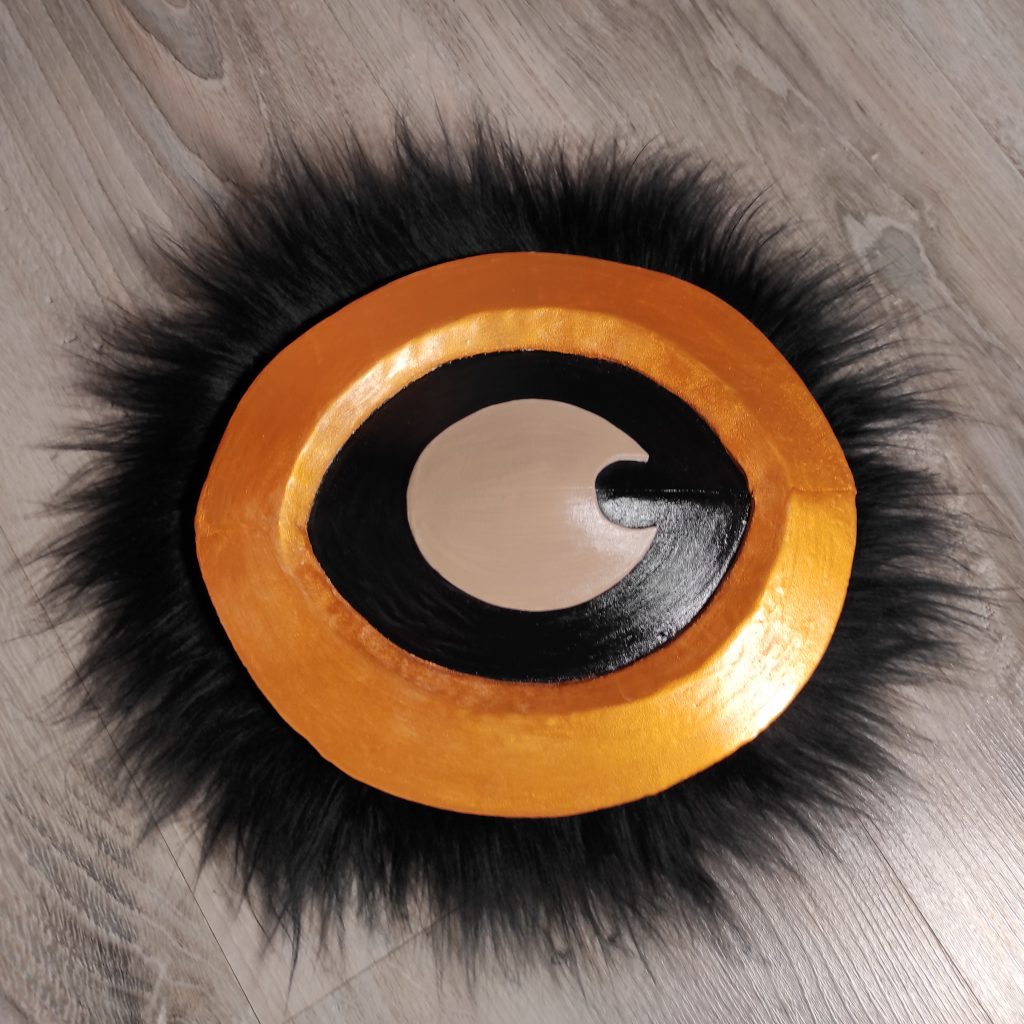
On the shoulder side, I patronize a circle a little bigger than what I need, then cut out a triangle on the inside with the point in the center. This will give a slightly rounded effect once the two outer ends are joined!
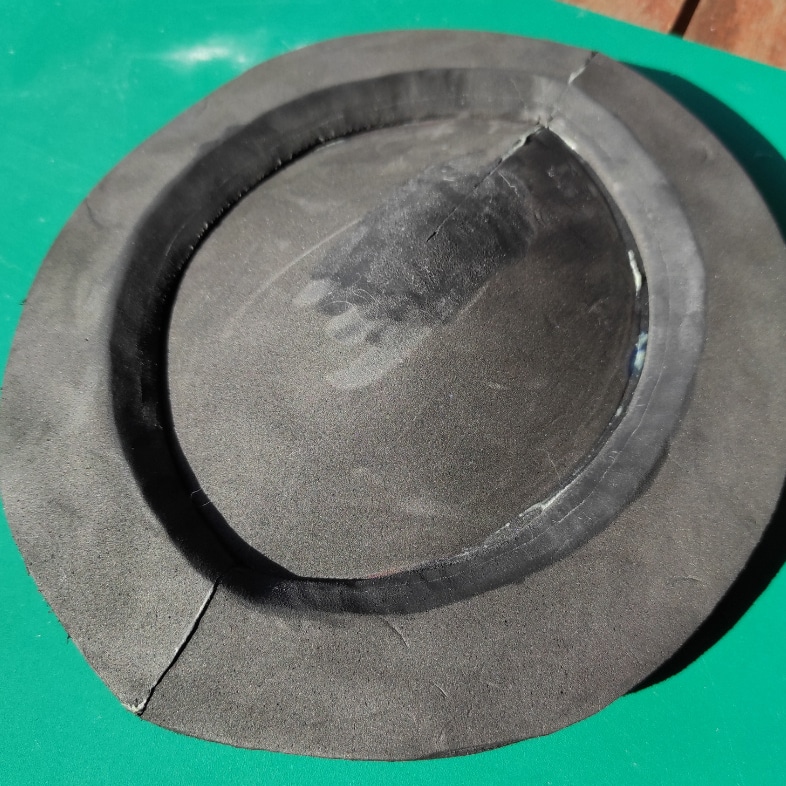
Once everything has been glued and sanded on the sides, I do a little fur test to check the rendering. Everything is OK ! ♥
For painting, same method as before! A nice undercoat, then the paint. I start with the two lightest colors and then cleanly cover the rest with black. A little spray of varnish is necessary before adding the fur!

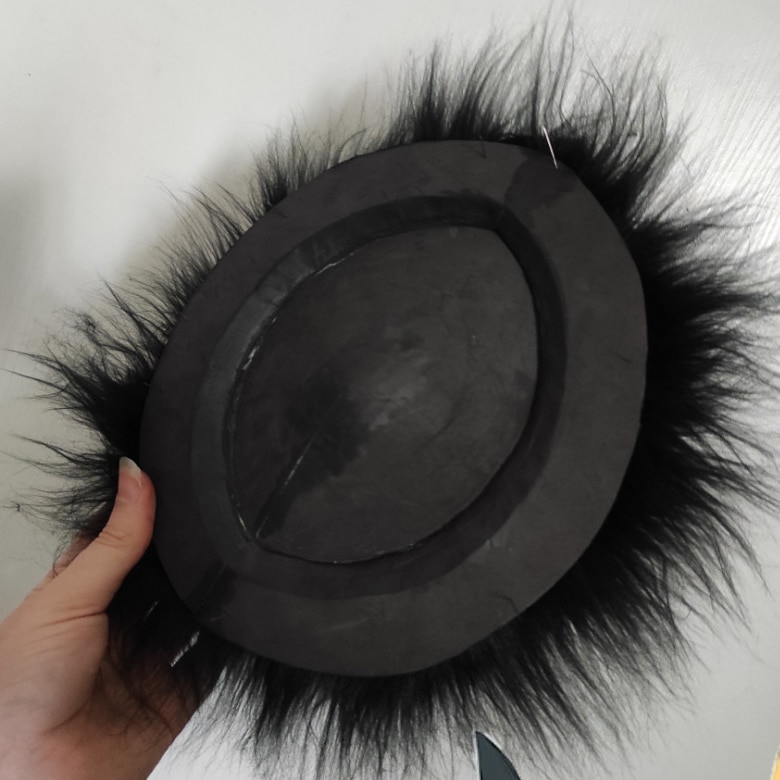
For the fur, I chose to stick strips of black fur that I had left from the previous accessories to waste as little as possible! So I just glue everything on the back of the piece of foam and then I comb everything to check that it is not missing in some places. To fix the clip created previously in Faux leather (see Part 1: the dress), I scrape / sand the ends to make them more abrasive and glue them with the glue directly to the back of my piece. My apologies for this little lack of photos on these two stages! : ‘)
And here is the result of the armor! ♥
6 • The final result
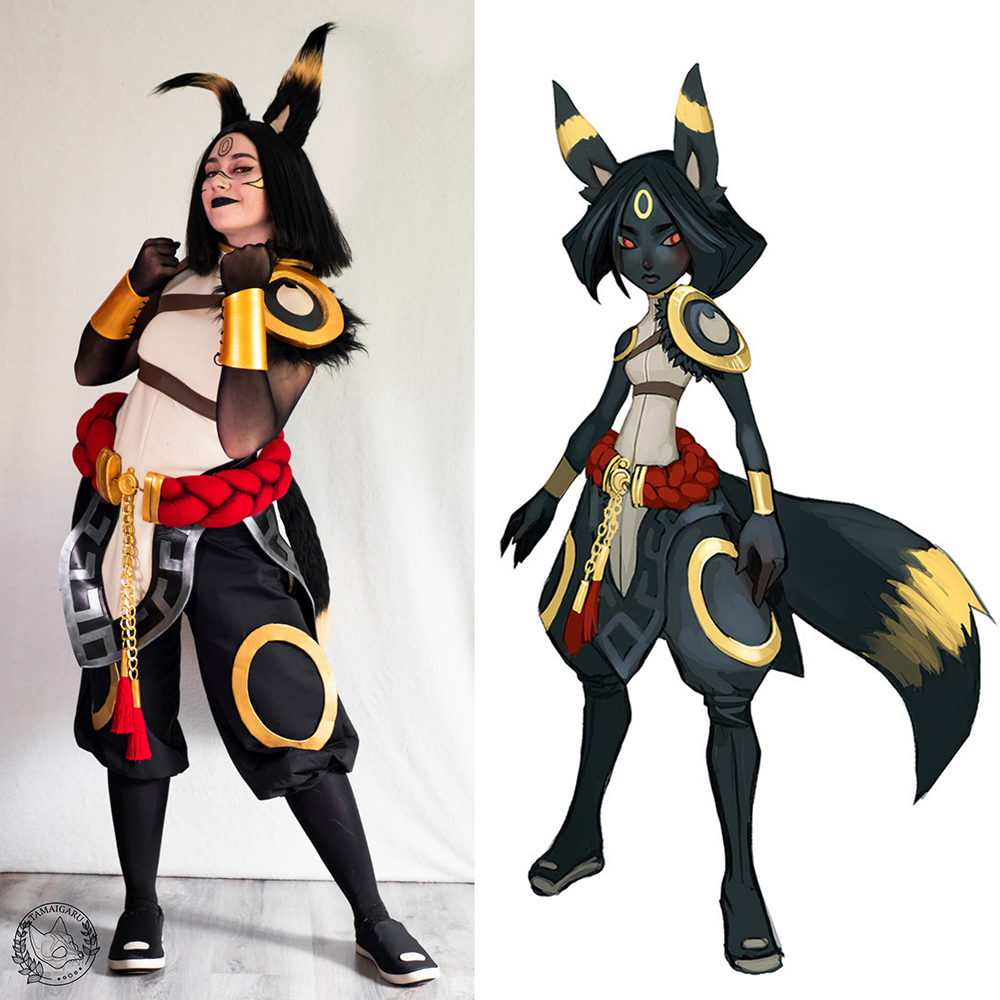
This is where this last part ends, thank you for reading it! ♥
This blog post is the very first time that I put all the design of one of my costumes in writing so feel free to give me a little feedback by telling me what you liked, what was interesting or not and even what it missed if it is the case! ♥
You can also give me suggestions for the next blog posts that you would like to see 😉